Want to learn how to grow weed indoors? In this post we’ll walk you through the basics to get you started growing weed, with lots of tips and tricks to grow dense, high-quality buds. With a little planning, a little effort, and a little patience you’ll be smoking fatties of killer weed.
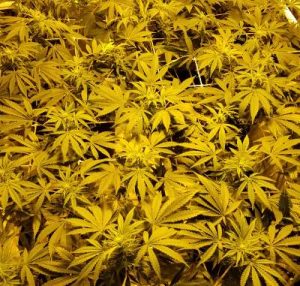 Table of contents
- Weed growing 101: the basics
- How long will it take to grow marijuana?
- How much will it cost to grow marijuana indoors?
- What equipment is needed?
- The stages of marijuana growth
- Germinating seeds and rooting clones
- Vegetation
- Flowering
- Harvesting
Growing weed 101: the basics
A friend of mine was overjoyed with a housewarming gift of a clone of Sundae Driver in a keg cup. We spent the night drinking and discussing how to grow it. This article is written with new growers in mind, to help give a quick overview of how to grow.
How long will it take to grow weed?
If you’re growing indoors it will take roughly 3 months from start (using seeds or clones) to harvest. That assumes a week for the seed or clone to root, 3 weeks of veg time under 18 hours on / 6 hours off lighting, and 8 weeks of flowering with 12/12 lighting. Increasing veg time to 4 or 5 weeks will create bigger plants. Some strains have longer flowering timeframes.
Outdoor growers will see flowering being in mid-summer and with plants harvested in early autumn. This can vary based on strain and the lattitude where you grow.
Plus you’ll need to factor in time after the harvest for curing to ensure top quality buds.
How much does it cost to grow weed indoors?
There are varying levels of investment needed depending on the size of your grow area and the amount of equipment you wish to use. The larger the grow, the more complex the setup can be in terms of lighting, ventilation, and other equipment needs.
Smaller indoor grows can be attained for $500 or less for a small grow tent setup using HPS/MH lighting. A 2×4 grow tent kit or 3×3 grow tent kit is a good place to start if you’re looking to keep costs down. For more yield with the same amount of effort, consider a 4×4 grow tent setup.
If you want an LED grow light you’ll need to spend a bit more. Decent LEDs for small grow areas cost at leastv$500. Cheap LEDs aren’t worth it, the bud quality and yield is much lower. You’ll also need to factor in nutrients and electricity costs.
What equipment is needed to grow weed?
Outdoor grows are cheap and easy. You just need a grow pot, growing medium, and nutrients. Additional equipment includes a pH pen, pH Down, plant stakes, a 5 gallon bucket, and insecticides are also needed for outdoor grows.
Soil or coco coir are good choices for new growers. Fabric pots work well, in 3 or 5 gallon pots for small indoor plants, or much larger pots such as 10 or 20 gallon for larger outdoor plants with huge root systems. Plan on 1 gallon for each week your plants vegetate.
Indoor grow room/tent equipment can vary based upon the size of your grow and the results you’re looking to get. Small tent and grow room setups require at a minimum:
- Grow light (including bulb, reflector hood, and ballast) with hanger cables
- Light timer
- A small fan or two for air circulation
- Containers and growing medium (soil/soiless mix/coco/or a hydro setup)
- Ventilation system with an inline fan, carbon filter, and aluminum ducts.
Air cooled light reflector hoods allow for closer placement to plants which increases light intensity and therefore bud size/quality. Air cooled hoods are useful to keep temperatures down in small spaces.
LED lighting produces less heat than MH/HPS bulbs and is great for growers with limited ceiling height since LEDs don’t require as much room above plants and MH/HPS. They’re more expensive than MH/HPS, but prices have come down a lot in recent years while quality keeps going up.
600w and larger MH/HPS setups benefit from air cooled lighting hoods. To reduce odors from exhausted air, inline fans with carbon filters are a must. Fan controllers allow you to use a larger fan at a slower speed to reduce noise and vibration.
Grows using 1000W lighting must deal with heat, often requiring air conditioning and carbon dioxide systems. Plus you’ll need a thermometer with a hygrometer to monitor environmental conditions in the grow room.
View the complete list of equipment you’ll need to grow weed in a grow tent.
The stages of marijuana growth
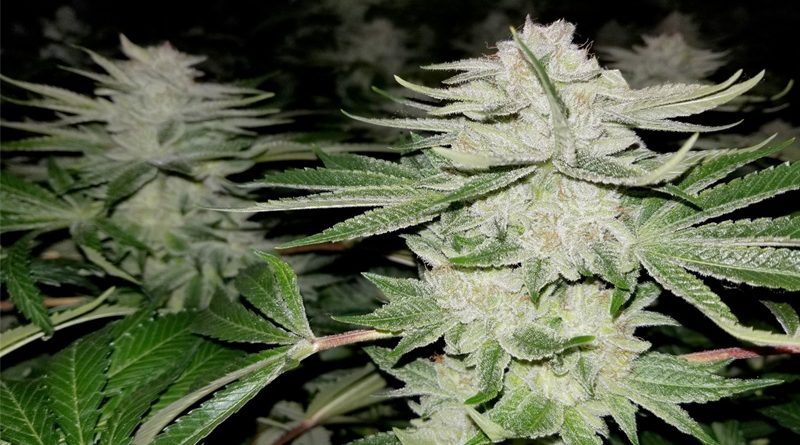
The biggest thing a new grower should be aware of is the light requirements for each stage of growth. Flowering is initiated in outdoor weed plants as nights become longer during the summer. Indoor plants begin flowering when you flip your lights to 12/12. About 2 weeks after your plants get 12 hours of darkness you’ll notice buds form.
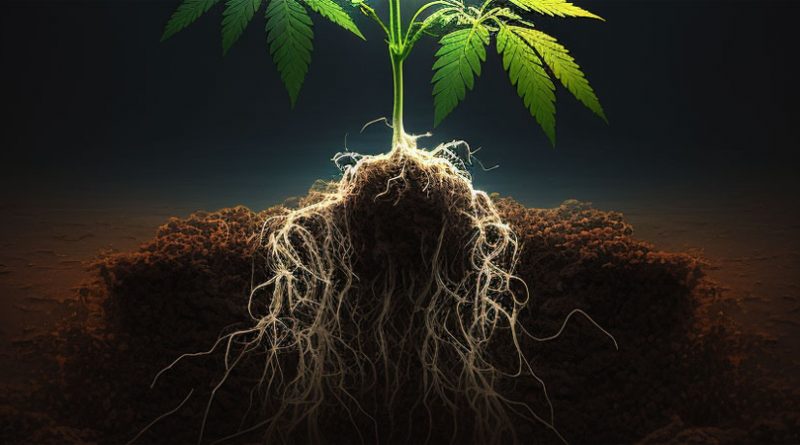
Germinating seeds and rooting clones

First time growers often plant seeds because they don’t have access to clones. If you’re considering growing from seed, it’s worth investing in some decent seed stock rather than picking a few random seeds out of a bag of weed and hoping for the best.
Marijuana plants can only grow up to the potential of their DNA, and it takes the same amount of effort to grow a killer THC-laden strain as it does to grow some random junk seed phenotype that happened to remain after you finished your last bag. Start with great seeds from a reputable seller and you’ll be rewarded with great plants.
Standard seed packs can have both males and females, so plan on germinating at least two times more seeds than you want total plants since the males will need to be removed to prevent the females from growing seeds. Not all rooted seeds are will grow equally vigorous, so having a few extras will let you cull out scraggly growers.
Feminized seeds prevent unwanted males, and are a good choice if you’re just growing a few plants and don’t want to waste time on males you’ll need to kill off later. Seeds can be grown in coco coir, soil or soiless mixes, or rockwool cubes.
If you have access to clones you can ensure a new generation of female plant stock identical to the parent. Keeping a mother plant in the vegetative state will ensure a steady supply of clones for growers looking to keep the next generation in steady supply.
Planning for a perpetual harvest will let you have a well-timed batch of plants in vegetation ready to enter flowering immediately after harvesting the preceding batch. This allows you to harvest a new crop every 8 weeks indoors.
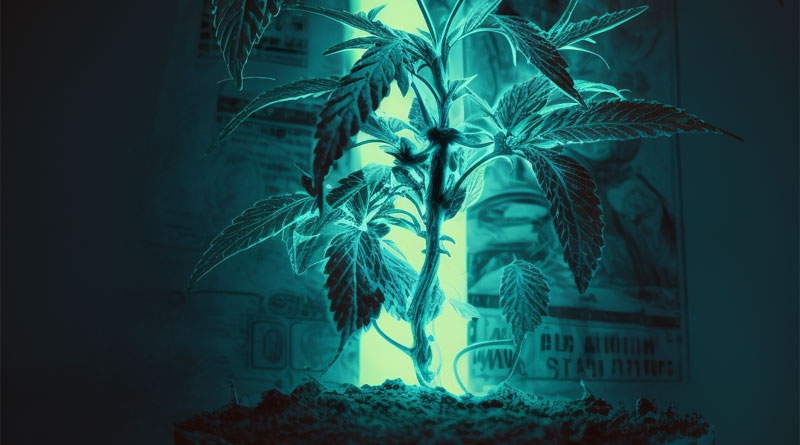
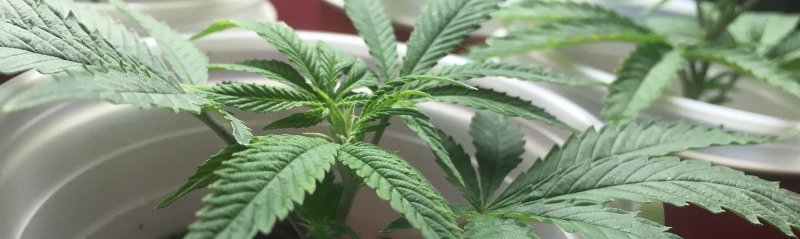
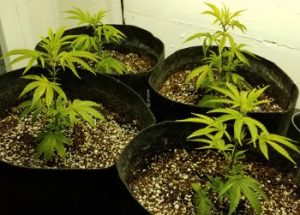
Vegetative stage of weed growth
Once you’ve rooted a seed or clone, your plant enters the vegetative stage. Continue with 18-6 lighting indoors. Usually lasting 2-4 weeks but up to several months depending upon desired size, the vegetative stage allows the root structure to grow and allows for the leaf growth that powers the plant through the rigors of flowering.
Outdoor plants remain in vegetation until flowering begins mid summer, regardless of when they’re planted. If you put outdoor plants outside too early in spring the shorter days may cause the plants to begin flowering and then revert back into veg. You can avoid this by using supplemental lighting, or by keeping your plants inside under grow lights indoors until May.
Plants should be trained during the veg phase to improve growth structure to maximize bud exposure to lighting which improves quality and yield. Topping plants and training branches out will increase surface area exposed to the light, which increases bud sites and yield. This is a key to increasing the amount of buds you harvest.
If growing indoors, plan to stay in the vegetative stage until your plants are roughly half of the desired height and then flip lights to 12 on / 12 off. The plants continue to stretch taller in the first few weeks of the flowering stage.
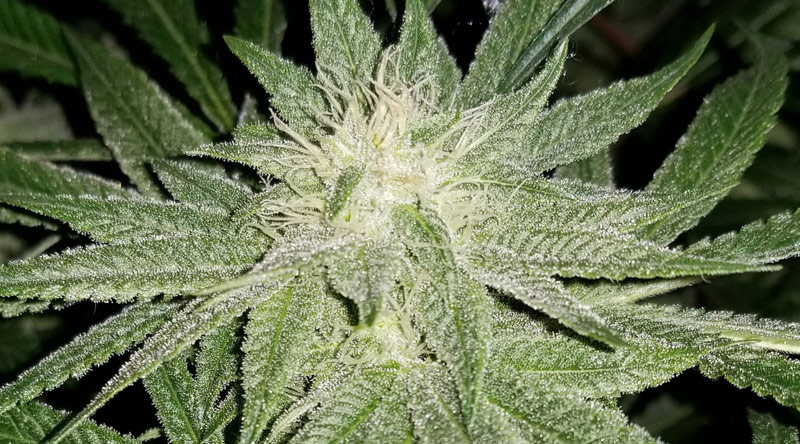
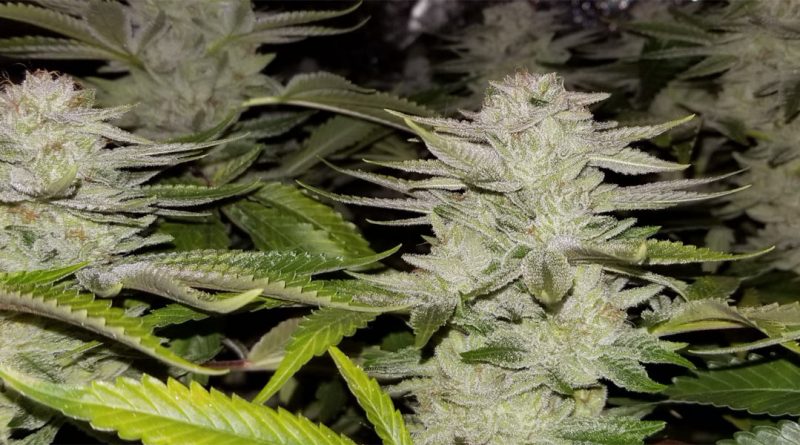
Flowering stage of weed growth
You can trigger the flowering stage in cannabis by reducing the light to 12 hours on and 12 hours off. Flowering can last 8 weeks+ depending on strain, with equatorial Sativa strains typically lasting longer than indica strains, some up to 12-14 weeks.
It is essential that flowering marijuana plants receive 12 hours of uninterrupted darkness to produce healthy, robust flowers with maximum potency. Even a small amount of light interrupting the 12 hour darkness period confuses the plants and can lead to issues including hermaphrodite plants, where females produce seeds due to environmental or other stresses. This causes the plant to focus energy away from producing potent flowers reduces potency and should be avoided.
You’ll need to dial in your nutrient regimen and try to give the plant the best environment possible if you want to grow hight quality buds.
Make sure to flush your weed the last 7-14 days of the flowering cycle to prevent update of additional nutrient mineral salts. This helps increase the quality of your cannabis. Learn more about flushing weed plants.
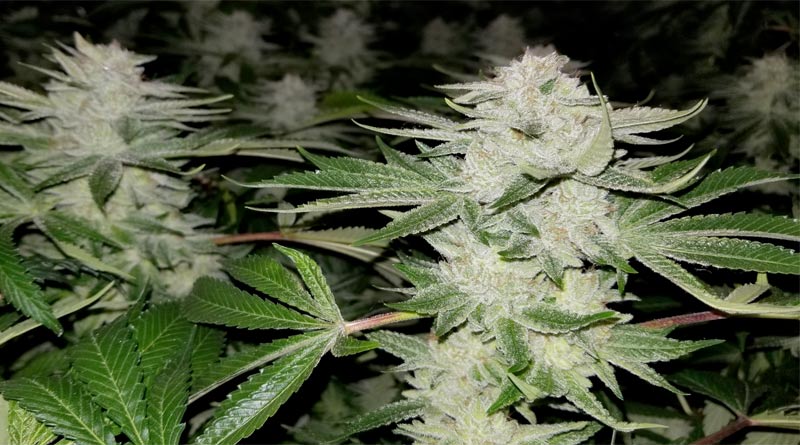
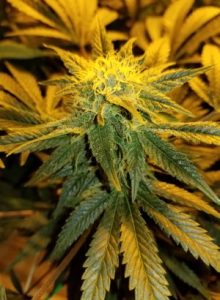
Harvesting weed
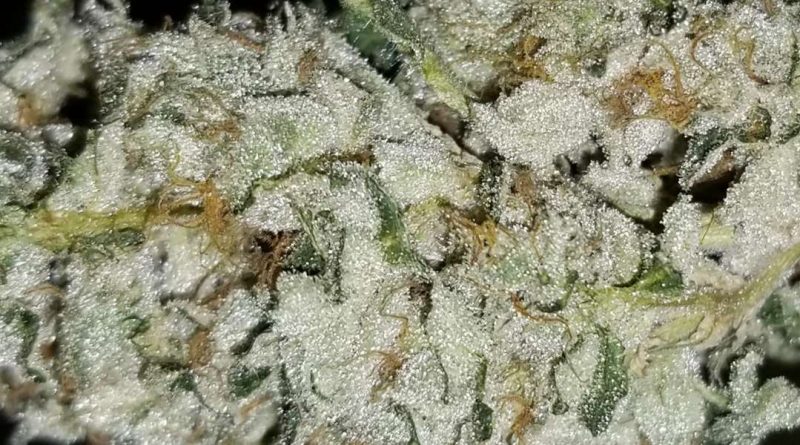
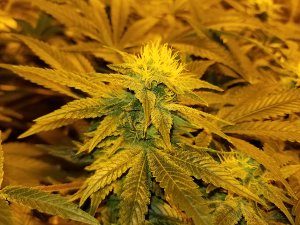
Carefully timed harvesting will maximize potency and yield. It’s important to harvest plants at just the right moment to ensure maximum potency. To soon and plants will not have developed all of their THC. Too long and THC will begin degrading into CBN, which changes the effect of the high. Learn how to determine when to harvest marijuana.
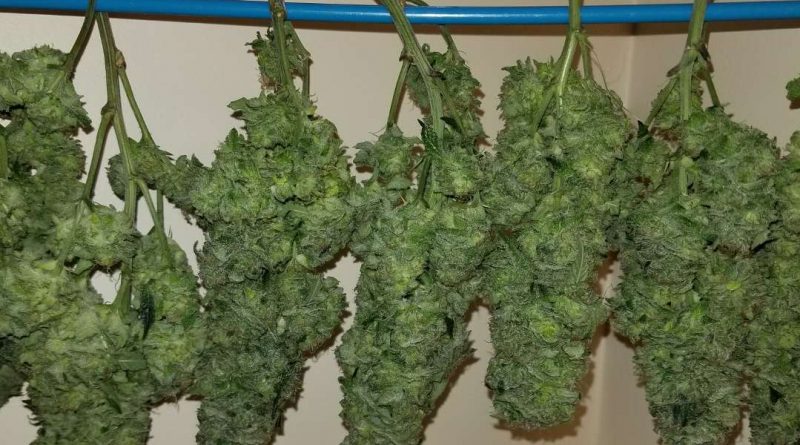
Plan on flushing the plants for the last 1-2 weeks of flowering with plain water prior to cutting them down. After harvesting plants must be trimmed and then properly dried, which usually takes 5-10 days.
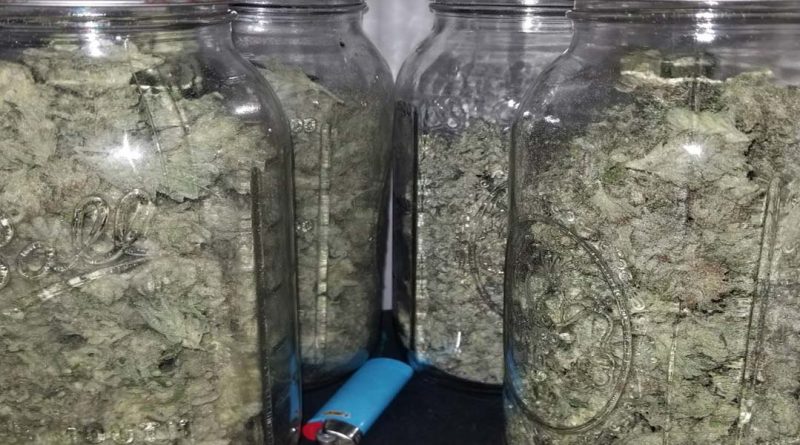
Once dry, buds need to be cured for at least 2 weeks which will help improve the taste, smell, and smoothness of the smoke as the plant compounds begin to break down. Knowing how to cure weed is very important to ensure your buds reach their maximum potential in terms of appearance, taste, smell, and quality.
Ready to get started? We hope this quick guide to growing weed 101 helped give you an overview of growing cannabis. Check out some of the articles below and you’ll learn everything you need to know to master the art of growing high quality marijuana indoors. Let’s get growing!