In this post we’ll discuss everything you’ll need for your 4×4 grow tent setup, including choosing the best light for a 4×4 grow tent, circulation and ventilation setup, and climate control.
You’ll learn what’s included in a 4×4 grow tent kit, features to look for when buying a new tent, and ways to optimize your tent setup to produce the best cannabis plants possible.
We’ll walk you through the basics of growing cannabis in a 4×4 grow tent, including how to choose the best growing medium (soil vs. coco coir vs. hydroponics). We’ll also provide helpful advice to take your 4×4 grow tent to the next level, including setting up a screen of green (SCRoG), automated watering systems, tent monitoring systems, and much more.
With the right equipment and techniques you’ll be able to grow high quality weed your very first try.
Let’s start by walking you through what you’ll need for a typical 4×4 grow tent setup. If you’re a new grower starting from scratch, you can save money by getting a 4×4 grow tent kit.
You can also buy everything separately which can help you mix and match based upon your budget, adding additional equipment as you go.
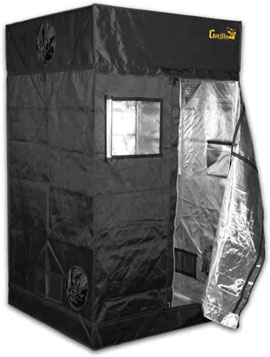
Price is always a big factor when picking 4×4 grow tents, but remember long-term value comes from higher quality. Try to resist the urge to get a cheap 4×4 grow tent if you’re planning to use them for flowering cannabis plants.
Nearly all tents have small pinhole leaks around seams and the zipper flaps sometimes don’t close much. But cheap 4×4 tents tend to have more light leaks, weaker tent poles (which make hanging lights and filters from ceiling a bit sketchy). Plus cheap zippers fail quicker, rendering the tent useless.
Start by picking the best tent you can afford. Try to get as tall a tent as you can fit in your grow space, the extra room comes in handy when plants stretch during flowering. If you’re planning to exhaust air out of a duct on the top of your tent make sure to factor that in when planning your tent height.
If you’re a new grower, consider getting a 4×4 grow tent kit. They have everything you need to set up a 4×4 grow tent and get started growing cannabis.
Features to look for
Duct and cord openings: Make sure the tent you choose has enough duct openings to accommodate your exhaust system, especially if you plan on running air cooled lights.
Ventilation panels with sealable flaps at the bottom are important for air intake, you should have one on each side and preferably a third in the back.
Zipper panels on the sides (and rear if possible) to allow easy access to maintain plants
Quality zippers will hold up after years of daily usage
Sturdy tent poles provide a firm structure and can support heavy lights and carbon filters
A viewing window is helpful, but not essential
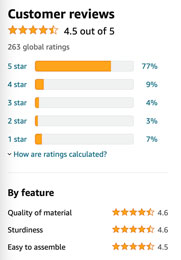
Read 4×4 grow tent reviews carefully. Cheap tents tend to have similar problems.
Read the reviews for 4×4 grow tents closely. Nearly all manufacturers will have at least some negative reviews. But make sure to note the most common issues when evaluating a brand.
Make sure the reviews are specific to the size and model you’re looking to buy. Some listings on Amazon for example will bundle reviews for products with multiple sizes. Construction stability can vary in small grow tents compared to larger sizes, so read reviews specific to the size and model you’re considering.
If you’re just looking for a small vegetation tent or a drying tent, then the low-cost brands can work fine.
A cheap 4×4 grow tent can do the trick for flowering but the risk of a light leak leading to hermied plants is a gamble. So if you’re planning to flower in your new tent, a higher quality brand such as the 4×4 Gorilla grow tent is worth the additional cost.
Test for light leaks
If you do buy a cheap tent, make sure to test it by standing inside it in a brightly lit room to find the light leaks. Look for pinholes around seams and anywhere that is stitched. Even premium tents often have pinhole leaks.
Holes can be taped using black Gorilla Tape, it sticks to the outside of grow tent walls much better than regular duct tape. Close air intake ducts and then tape around the velcro seams as well.
Make sure to check for leaks in flexible ducting too. The cheap brands usually have a ton and this increases with time. Go with heavy duty ducting for best results. If you do find a bunch of leaks in your ducting to be safe you can avoid lighting the room where you keep your tent during the 12 hours of the flowering dark cycle.
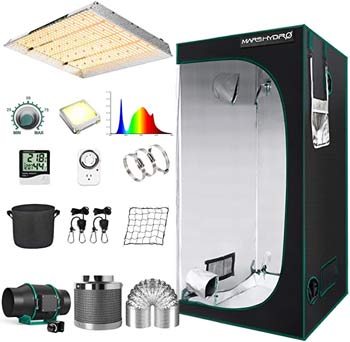
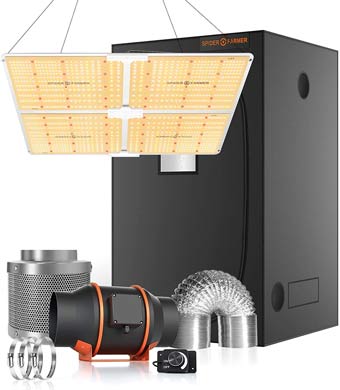
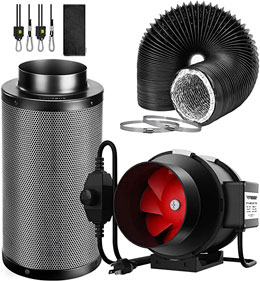
4×4 grow tent kits
Grow tent kits are an easy way for new growers to get started. They contain everything you need to get going, including the light and reflector hood, fans, hanging straps, and ducting.
Spider Farmer and Mars Hydro each make good 4×4 LED grow tent kits to consider. Spider Farmer’s kit costs more but has a better LED light, at 450 watts it’s 50% more powerful than the Mars Hydro kit light.
When choosing the best 4×4 grow tent kit package, pay attention to tent quality. Cheaper tents are fine for vegging plants since they don’t need to be lightproof, but you don’t want to risk light leakage in flowering.
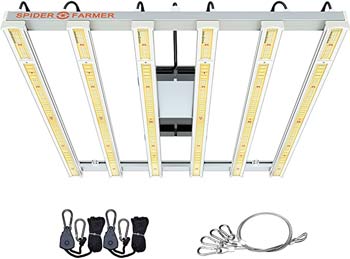
The other big factor in picking the best 4×4 grow tent kit is the quality of the light. You need powerful light to yield quality weed. Watch out for cheap kits with low quality LEDs in particular. The diodes alone used by a quality LED usually cost more than entire cheap LED fixtures. Pay attention to actual watts consumed to determine the power of the light output.
You’ll pay extra for quality and longevity, and like the tent, getting the best light you can afford will ensure many years of happy returns.
There are a few things to think about when selecting the best light for a 4×4 grow tent.
The biggest factor for most new growers is price. Setting up a 4×4 grow tent can be expensive. But it’s important to choose the best kind of grow light for your needs.
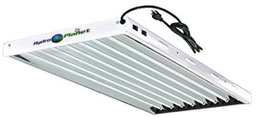
Most 4×4 grow tent setups use either LED lights or a combination of Metal Halide (MH) and High Pressure Sodium (HPS) lights. If you’re using your tent for clones or early vegetation then fluorescent lighting will work.
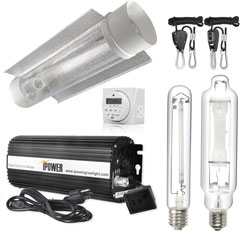
Regardless of the type of grow tent light you choose, you’ll need two ratchet hangers to suspend them from the ceiling cross pole. You’ll also need a light timer to switch from 18/6 to 12/12 to induce flowering.
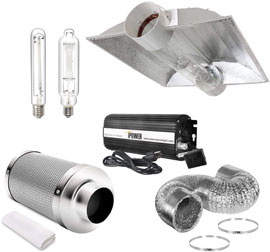
If you’re on a tight budget, getting a 600 watt digital dimmable conversion ballast with an air-cooled fixture is a reliable option. Using MH and HPS bulbs, it’s cheap, produces good quality light – if you choose a high quality bulb. 600 watt HPS and MH light kits contain everything you need to get started.
Drawbacks for MH and HPS lighting is that the bulbs need to be replaced often, the cost of energy is higher compared to LEDs, and they produce a lot of heat which needs to be controlled in small grow tents.
While a 600 watt bulb is a good size to cover the full canopy in a 4×4 tent, the light intensity is definitely lower at the edges. Keep 600 watt bulbs 14-24 inches above the top of your weed plants. Use the best bulbs you can afford to improve the light spectrum.
To maximize yield around the tent perimeter you could also run a 1000 watt bulb, if you have enough tent height to allow for the increased 22-30 inches distance needed from the top of the plants. You’ll also have to deal with excess heat.
Plants can stretch a lot during flowering, so getting a dimmable ballast is great because you can cut light intensity which reduces the distance needed. Light burn results in bleached, stunted bud development in cannabis plants, so raise lights as needed.
Make sure to monitor temperature levels closely and have good circulation aimed at the top of the canopy when using 600 or 1000 watt lighting.
Air-cooled lighting fixtures or cool tubes are necessary when running MH and HPS to reduce temperature directly below the light. 6″ fixtures are adequate for a 4″ grow tent setup, but you could also use 8″ (although it’s overkill).
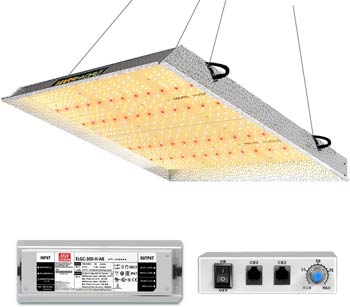
Look for LEDs with high quality diodes, and be sure to check the energy consumption. There is a huge difference between a light advertised as a “1000-watt equivalent” versus a true 1000-watt LED fixture. There’s a lot of smoke and mirrors in the LED grow light industry. Buy the best LED light for your grow tent that you can afford, and don’t be fooled by cheap imitators who offer bold promises for under $200.
When choosing the best LED light for 4×4 grow tent setups, make sure to read the product details closely to understand the required clearance you need above and below the light fixture. I’ve had to return an expensive LED whose product description didn’t mention it needed 18″ of clearance above the fixture, making it unworkable in my 4 x 4 grow tent setup.
A word of warning: if you can’t afford at least a mid-priced LED light, consider MH and HPS. They’re a much cheaper way to go. Save yourself the disappointment.
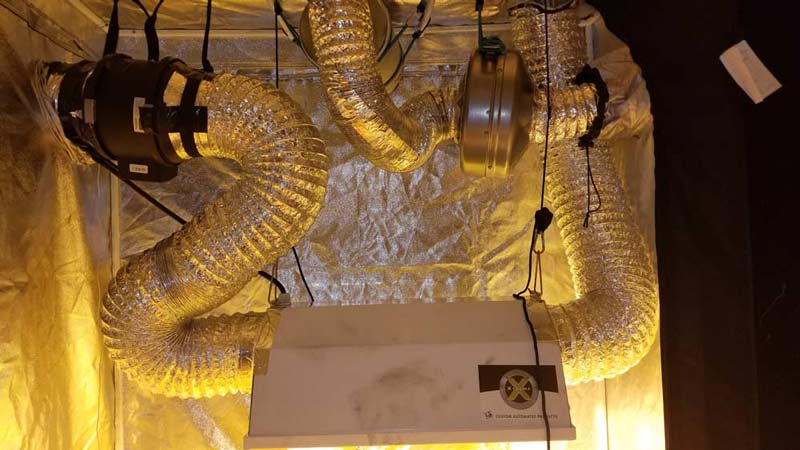
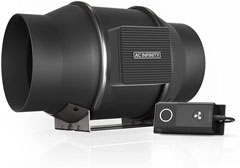
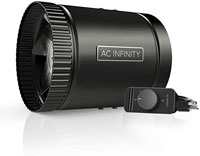
You’ll need to set up a ventilation system in your tent to exhaust moist, stale air. A 4 inch or 6 inch inline fan is adequate for 4×4 grow tent ventilation setup. You can either run the ventilation fan constantly, or you can put it on a humidity and temperature controller to turn it on when needed.
Inline ventilation fans are rated by CFM, or cubic feet per minute. You’ll want to replace the air in your tent every minute. So if you have a 4x4x7 grow tent, you’d need to replace 112 CFM. A fan controller can reduce speeds to the necessary levels. Sharp turns or bends in duct runs reduce fan efficiency, so you’ll need to run your fan a bit above your calculated levels to fully ventilate the air properly.
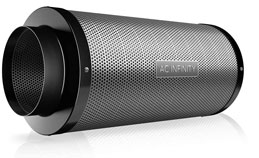
Use a carbon filter suspended at the top of your tent to reduce odors from exhaust. A 4″ or 6″ size carbon filter for 4×4 tent ventilation attached to an inline fan is sufficient.. If you’re using air-cooled lights, match the size of your carbon filter to the size of your fixture opening (usually 6 or 8 inches).
When choosing what size carbon filter for 4×4 grow tents, remember that longer “big boy” filters have more surface area so they filter more air at once the charcoal inside. Spend a little more to get better filtration. But standard length carbon filters work fine in a small tent like a 4’x4′.
Hang your filter with light hanger straps or bungee cords, making sure you allow for room above to raise the lights up as your plants grow.
Air intake
Fresh air should be introduced low in the tent to allow air to cycle through. Open bottom vents during vegetation. In flowering velcro vents should be shut and sealed tight with Gorilla tape to make sure they’re light proof.
Running just an exhaust fan will create a vacuum and the tent sides will suck in. A cheap air intake solution is to use a short run of 6 or 8 inch flexible ducting through the bottom duct holes to make a passive air intake.
A better air intake solution is to use a small 4 inch or 6 inch duct booster fan running through a fan controller to bring in enough air to greatly reduce (but not stop) the tent walls sucking in. A low volume fan works best for air intake. Blast in more than you’re exhausting and air will push stinky air out through the tent seams.
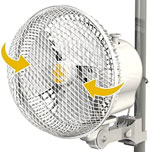
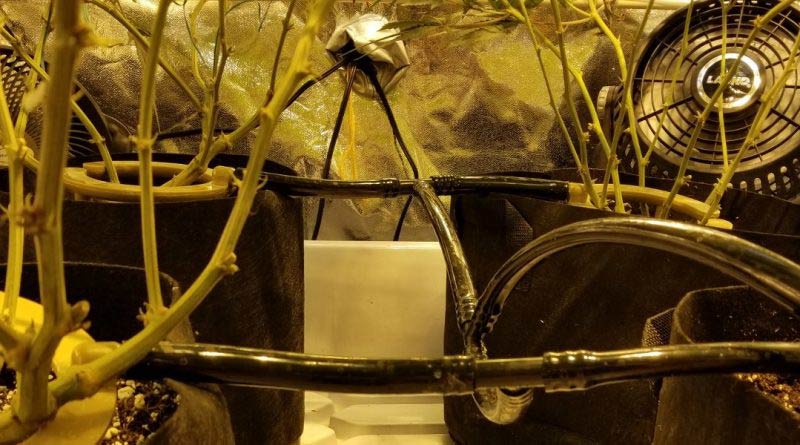
You’ll need to have two small circulation fans in a 4 x 4 grow tent. One is placed above the canopy and the other below. This ensures adequate air movement and prevents pockets of moist air from causing issues. An oscillating Secret Jardin Monkey fan for 4×4 grow tent circulation is ideal to ensure even coverage and prevent damp spots.
Maintaining an optimal grow environment is critical to bringing out the full genetic potential of cannabis plants in a 4×4 grow tent. There’s a few devices you’ll need to get started, and a few more optional products that you can add in to further improve your growing environment.
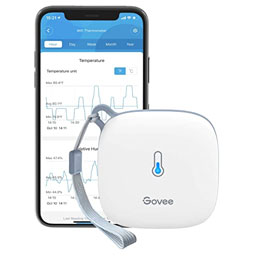
A good probe thermometer and hygrometer such as the Govee Bluetooth hygrometer 2-pack is critical to monitor temperature and humidity conditions in your tent. Look for a model that has a long cord with a probe.
The probe should be placed right at canopy level under your lights to give you an accurate reading of conditions for your plants.
High/low recordings are helpful since temperature often spikes when the lights are on, and humidity can spike while lights are off. Watch closely and make adjustments to your setup if needed.
The Govee wifi-enabled thermometer/hygrometer is helpful to monitor patterns and identify problem areas that need addressing, with automated alerts when there is a problem.
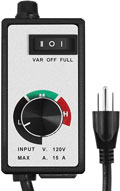
A fan controller is helpful to fine-tune the amount of exhaust in your tent. Running a 4 inch or 6 inch inline fan at full blast is way too much air movement (and noise) for a small 4 x 4 grow tent. Some inline fans have a speed controller built-in, a great option if you are buying a new fan.
In most cases problems with humidity levels can be resolved with better ventilation. Temperature spikes can be addressed with air cooled lights, improved ventilation, and intake fans delivering cooler air. Air conditioning in the room around your grow tent can help ensure the intake is bringing in sufficiently cool air.
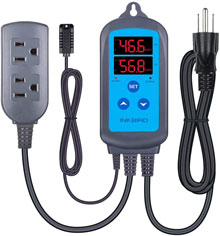
Humidity controller
The Inkbird humidity controller can turn on your fan or humidifier as needed to keep the optimal environment for marijuana plants.
A humidity controller can help you turn on your exhaust fan when certain thresholds are reached. You can also use it to turn on a humidifier if moisture levels become too low for optimal plant growth.
While not a necessity for most new growers who can just leave their exhaust fans on low full-time, it does give an added level of control to boost interior tent moisture levels in dry climates.
A humidity controller can also help you maintain a proper humidity range for drying weed in 4×4 grow tents. This is really helpful in dry climates as it can increase the number of days needed to dry your weed, which helps improve quality.
Humidifier for 4×4 grow tent
It usually isn’t necessary to get a humidifier for 4×4 grow tent setups. Cannabis leaves transpire moisture so large bushy plants naturally increase tent moisture levels. But if your plants are small and lack a lot of leaves, or if you live in a very dry climate you may need to supplement moisture with a humidifier.
Beware of small humidifiers for grow tents that require frequent fillings, they’re a pain.
Consider using a larger humidifier to boost moisture levels in the room outside of your tent, which you introduce using an intake fan. Moderating temperature and humidity in a lung room can be easier than trying to maintain the environment in a small tent due to fluctuations during the light on and off cycle.
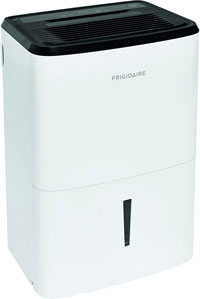
Dehumidifiers
Most small grow tents won’t need a dehumidifier either, since the air volume is relatively small and is constantly getting exhausted. If it gets too moist in there you can crank the exhaust fan.
But if you are growing in a damp area where the air outside the tent is always over 70% you may run into trouble keeping moisture levels down inside the tent. Running a dehumidifier in the area outside of your tent can be a good way to ensure the intake air isn’t too damp. You don’t want to risk mold.
Placing your tent’s intake host against the output fan on the dehumidifier can introduce an immediate burst of dry air if you’re looking to correct tent moisture issues in a hurry.
Grow room monitors are helpful to track growing conditions to fine-tune your tent setup. They monitor temperature, humidity, light, vapor pressure differential (VPD), and more. By tracking conditions closely you can eliminate problems and ensure you’re giving your plants the best optimal environment.
Grow room monitors for 4×4 grow tents typically aren’t needed if you’re growing on a budget, but are a good purchase to consider if you’re looking to ramp up your grow area for maximum quality and yield.
We have been using the Pulse One grow room monitor for years with good luck. It has allowed us to optimize the temperature and humidity levels in the tent and has helped dial in our environment.
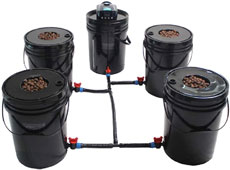
Choosing the best medium for 4×4 grow tents can be a bit overwhelming for new growers. Technically you can use any medium you like, including advanced hydroponics techniques. But for new growers, using soil or coco coir is probably your best bet.
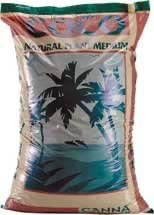
Soil is great because most people are already familiar with it. Buy a premium soil blend made specifically for growing cannabis, such as Fox Farm Ocean Forest soil, and buy a reputable nutrient line. You can grow organic easily in soil, but remember those nutrients can take a little time to break down so the effects aren’t as immediate as with salt-based nutrients.
Coco coir is made of shredded coconut husks. Use a pre-buffered coco mix such as Canna Coco, and add perlite to improve aeration. Growing in coco seems similar to growing in soil, but it’s actually a hydroponic method since the roots get their nutrients directly from your watering solution. Coco combines the simplicity of planting in soil with the explosive growth of hydroponics. It’s also a bit more forgiving than other hydroponics methods.
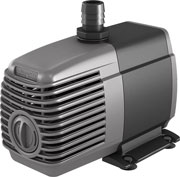
Keep in mind that when growing hydroponically you need to control water temperature to ensure healthy roots, so you may need a water chiller which can make things expensive.
For most new growers the costs and complexity of hydro systems provides additional things to worry about. You’re better off with coco or soil.
Watering
Manual watering is how most new growers water cannabis plants in 4×4 grow tents for soil or coco grows. A 5 gallon bucket is the perfect size to mix nutrient solution for 4-6 plants in 3 or 5 gallon containers. If watering soil or coco coir you’ll want to drain to waste. Elevate plants above large saucers, sucking up the runoff with a Bucket Head 5 gallon bucket vac or small shop vac.
You can build a slightly-angled drain to waste table and put plants in a 4′ x 4′ fiberglass hydro tray to automate runoff drainage into an external drain or sump pump hole.
A 30 gallon bucket will let you mix up nearly a week’s worth of nutrient solution at a time for weed plants in 4×4 grow tents.
Since it can take 11-12 weeds to fully veg and flower even a short 8-week strain, automated watering in 4×4 tents is important if you anticipate needing to go away for a few days during your grow.
How to maximize yield in a 4×4 tent
Plant training techniques
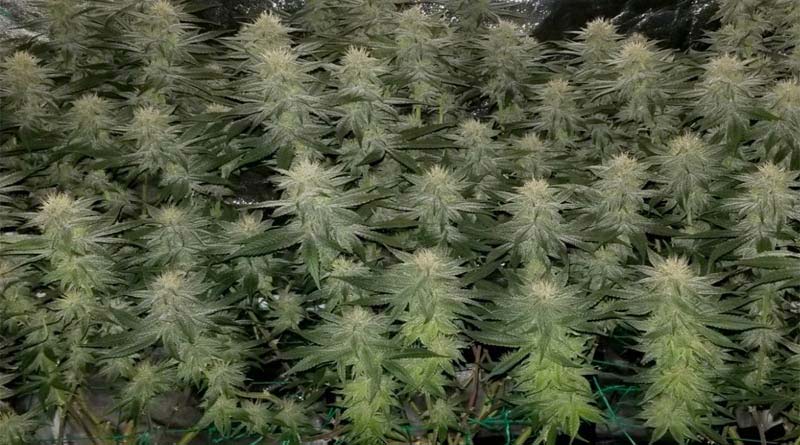
To maximize yield in 4×4 grow tents, you want to ensure a flat, even canopy. The more surface area you have facing the light, the more thick colas you can grow.
Train young plants early by topping them to cut off the top of the plant to encourage branches to form a bushy growth pattern. If left un-topped, plants tend to grow in a pyramidal shape with one large cola. Train the new side branches outwards so they’re all the same height using stakes.
There are other methods to train plants you should familiarize yourself with to improve yield, but at the very least always top your plants and train the branches outwards at the same height to increase bud production sites. When flowering, remove lower growth and bud sites not getting adequate light so that the plant can focus its energy on areas receiving direct light.
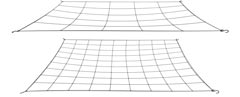
Setting up a screen of green in a 4×4 grow tent will let you maximize yield. An elastic trellis makes it easy.
Setting up a Screen of Green in a 4×4 grow tent
A Screen of Green (ScrOG) setup uses an elastic net with pole hooks or a grid of string to create a perfectly flat canopy. Your goal is to train new growth tips out horizontally and have them grow up through the screen. This ensures your whole plant will turn into thick colas that receive an equal amount of direct light.
You can purchase a SCROG net for 4×4 grow tents. Or you can make a frame using 1/2 inch PVC pipes and 90° connectors to build a square frame, attach a nylon plant trellis, and secure it to your tent poles.
We highly recommend using a SCROG to maximize yield in a 4×4 grow tent, it is definitely worth the effort to set up. Learn more about the scrog method.
4x4 grow tent setup: How to grow weed in a 4 x 4 grow tent
Description
In this post we'll discuss everything you'll need for your 4x4 grow tent setup, including choosing the best light, circulation and ventilation setup, and climate control. You'll learn what's included in a 4x4 grow tent kit, features to look for when buying a new tent, and ways to optimize your tent setup to produce the highest quality cannabis plants possible.


")