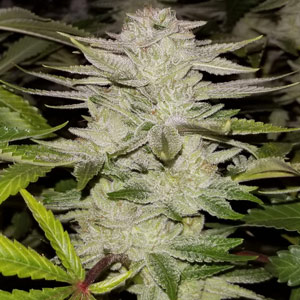
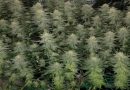
A 48x48x72 grow tent is the perfect size to grow 2-6 small plants. In this post we’ll walk you through how to set up a 48×48 inch grow tent. We’ll also discuss features to look for when buying a grow tent and what kind of equipment you’ll need to create the best possible environment to grow high quality marijuana on your first try.
Grow lights for a 48x48x72 grow tent setup
High Pressure Sodium (HPS) and Metal Halide (MH)
A 48×48 grow tent has a 16 square-foot canopy. 600 watt high-pressure sodium (HPS) and metal halide (MH) bulbs provide adequate light coverage for in 48″x48″ grow tents. HPS and MH fixtures are relatively cheap and are a good option for new growers on a budget. Get a dimmable model, use an air-cooled hood or cool tube, and buy high-quality bulbs for best results.
1000 watt MH and HPS lights provide far greater light intensity at the edges of a 48×48 grow tent. But heat will be an issue with 1000 watt bulbs in small tents, even with air cooled lights. You’ll need to introduce air conditioning in the surrounding room, pulled in through intake fans while running exhaust fans briskly.
In 48x48x72 tents the 6 foot height doesn’t allow you a lot of wiggle room for the increased height requirement (usually 16-30″) between a 1000w bulb and the tops of your plants when you factor in the fixture height, filters, plant stretching, etc. 1000w setups should be reserved for 48x48x90 and 48x48x96 grow tents.
LED grow lights for 48×48 tents
48x48x72 grow tents using LED lights see the benefit of less heat, so if your budget allows for a good quality LED this is a great solution for tents this size.
If you’re planning to use a 6′ tall grow tent for clones or vegetation, you can get by with CFL or Fluorescent tube lighting. But it isn’t recommended to use fluorescent bulbs for flowering, the limited light intensity leads to wispy buds that lack the density and quality seen in more intense lighting sources.
LED lighting is a more expensive alternative than running HPS or MH lights. Quality matters with LEDs. Don’t cheap out on LED lights for 48×48 grow tent setups, lower priced LEDs use cheaper diodes and use less energy. This leads to less dense bud growth. Pay attention to energy usage when purchasing an LED light for a 48″x48″ grow tent. The light from a “1000 watt replacement” LED isn’t the same thing as true LED that consumes 1000 watts.
48×48 grow tent sizes
Other common 48″x48″ grow tent sizes are 48x48x80, 48x48x90, and 48x48x96. In general try to get the tallest grow tent that can fit in your space. The extra height comes in handy.
48x48x80 grow tent
A 48x48x80 grow tent is 6’8″ tall. The additional height compared to a 48x48x72 grow tent is helpful, so if you’ve got the ceiling clearance you should buy the tallest tent that will fit in your grow space. Increased height allows you a safety net if your plants stretch a bit more than expected during early flowering.
48x48x90 grow tent
A 48x48x90 grow tent is 7’6″ tall. If you plan to exhaust through the vent opening on the tent ceiling, keep in mind that you’ll need to allow for just over 6″ of additional clearance above the tent top.
More tent volume helps stabilize temperature and humidity levels. You don’t necessarily want to intentionally grow taller plants, because the light can only penetrate so far. A five-foot tall plant with longer stalks requires more energy movement than with a three foot tall plant, and the buds at the bottom of the five-footer won’t be of significant quality or bud density.
But having a taller tent does allow you the safety net of cannabis strains that stretch a lot during flowering. There’s nothing worse than having your prime colas stretch too close to the light when you don’t have any more room to raise the fixture. Plants too close to high intensity bulbs will suffer from light burn and possible temperature issues.
48x48x96 grow tent models
48x48x96 grow tent setups are tall enough to allow you to use 1000 watt HPS and MH bulbs. 1000 watt bulbs require more plant clearance than a 600 watt light due to the increased light intensity. But the wider light footprint and increased light penetration and stronger light intensity at the edges of the tent lead to very dense bud growth and large yields.
You’ll definitely need to pay attention to heat levels if you’re using 1000 watt bulbs in 48x48x96 grow tents. Using air cooled fixtures will help a bit, and increasing exhaust fan levels and using air intake fans to pull in air-conditioned air can help turn over tent air quicker which can lower temps. Using a dimmable digital ballast can help you control temp temporarily, but you reduce the quality of the light spectrum when dimming bulbs so it’s not an ideal solution long-term.
Features to look for when choosing the best 48×48 grow tent
Price is usually the biggest factor when choosing a grow tent. But quality tents will give you many more runs of weed, making them a better value.
All grow tents brands tend to have tiny light leaks around zipper flaps and stitched seams. Cheap 48×48 grow tents tend to have thinner fabric and sloppier stitching which causes light leaks. They usually have thinner poles which makes them less sturdy, a big factor when hanging lights and filters from ceiling above your precious plants. Zipper quality suffers on cheaper models as well. When the zipper goes, the tent is useless.
Try to get as tall a tent as you can fit. If you’re planning to exhaust air out of a duct on the top of your tent remember to factor that in when planning your tent height. Leave enough room around the sides to access your plants throughout your grow.
Duct and cord openings: You’ll need enough duct openings to accommodate your exhaust system, especially if you plan on running air cooled lights.
Light leaks need to be tested in all grow tents. See section below on you to test and repair light leak issues
Ventilation panels with sealable flaps at the bottom are important for air intake during vegetation. Seal them shut during flowering.
Zipper panels provide access from the sides and rear so you can properly tend to your plants
Zipper construction is important – higher quality zippers will hold up after years of daily usage
Tent poles should be sturdy, with strong connectors to support grow lights and carbon filters
A viewing window is an option on some 48″x48″ tents, but it isn’t critical if you have zipper access to the sides
48×48 grow tent reviews
Read the online reviews for 48×48 grow tents with a grain of salt. Most manufacturers will have a bit of poor reviews. Many seem to have planted fake reviews. So how do you navigate through the nonsense?
Look for common issues when evaluating brands of grow tents. Make sure you’re reading reviews specific to the size and model you’re considering. Some companies bundle reviews for different tent sizes under the same listing. Generally bigger tents are built stronger, so the issues seen in a brand’s 48″ x 96″ tent construction are different from what you’d see in a 48″ x 48″ tent.
If you’re just looking for a small vegetation tent or a drying tent, then light leaks and lots of vent openings aren’t as important compared to a flowering tent. Cheap tents work fine for cloning, growing seeds, or vegetation. A cheap 4×4 grow tent can do the trick for flowering but the risk of a light leak leading to hermied plants is a gamble. So if you’re planning to flower in your new tent, a higher quality brand is worth the additional cost.
Always test for light leaks
Test for light leaks by standing inside your grow tent in a brightly lit room. You’ll notice pinholes around seams, around duct openings, and sometimes through the supposedly light-proof zipper flaps.
Use black gorilla tape to cover up holes. Gorilla tape is also helpful to seal velcro air intake vents during flowering since it sticks so well to tent walls compared to regular duct tape or aluminum tape. Over time even gorilla tape will lose its grip on canvas tent walls, so push it down harder for a semi-temporary solution, and replace when needed.
Flexible ducting can have light leaks too. Test by standing in an all-dark room while your grow lights are on. If you see spots where light is escaping, tape them. Cheap flexible ducting is often made with very thin foil, so heavy duty flexible ducting is preferable to reduce undesired light leakage.
To be safe if you suspect light leaks in your tent, keep the room around it dark during the dark hours of your flowering cycle.
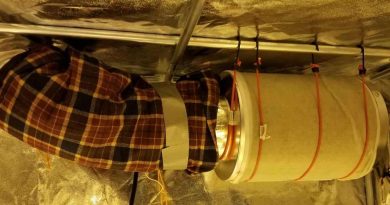
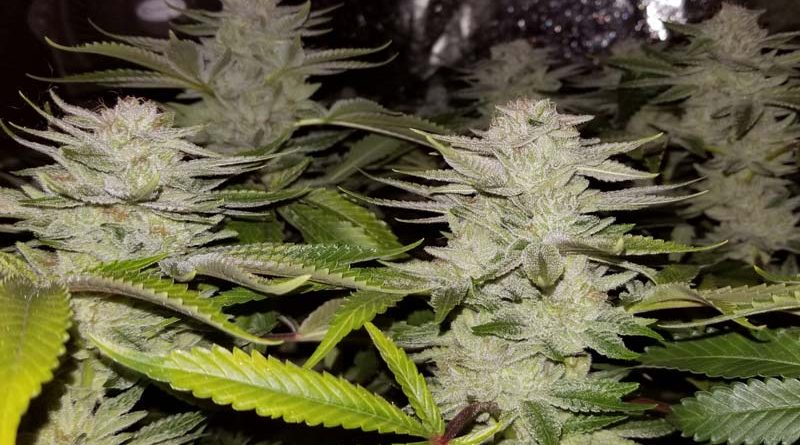
This 48x48x72 grow tent setup uses a 6 inch fan to cool HPS lights, and a 4 inch fan and carbon filter to exhaust air.
48″x48″ grow tent fans
Setting up ventilation fans
Setting up a ventilation system to exhaust moist tent air and introduce clean air is a critical part of creating optimal growing conditions for cannabis. A 4″ or 6″ inline fan provides sufficient air movement for a 48×48 grow tent.
A fan controller can help you lower the fan speed to fine-tune your exhaust rate, which should be a target of once per minute. So if your tent is 48x48x72 inches (or 4x4x6 feet = 96 cubic feet), you’d need to exhaust 96 cubic feet per minute (CFM).
Sharp bends and long exhaust runs decrease efficiency of your exhaust rate, as does adding a carbon filter to reduce odor of exhausted air. So depending on your setup you’d need to target more than just the actual cubic square footage of your tent.
Carbon filters
A decent carbon filter will reduce odors from exhausted air. Suspend from the ceiling on bungees or light hangers, and connect to your exhaust ducting with aluminum tape.
If you’re running air cooled lights, it’s possible to use a single inline fan to both cool the fixture and power your exhaust. Learn how to set up grow tent ventilation
Intake fans
Using an intake fan such as a small duct booster fan is a good idea in 48 inch x 48 inch tents, otherwise your tent walls will suck in as your exhaust fan creates a partial vacuum. This is especially true during flowering, when you need to seal off the air intake openings at the bottom of your tent to make them light proof. Make sure to filter incoming air.
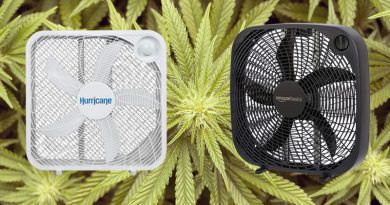
Circulation fans
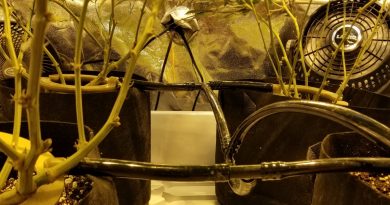
You’ll also need two circulation fans to keep air moving within your tent. One fan should be aimed across the top of the canopy, and the other should be placed below the canopy. This helps avoid moist pockets and the issues associated with too much humidity.
Small clip on fans work great for above canopy circulation in 48×48 tents. Clip fans or small air circulator fans work great below the canopy. Learn how to find the best fans for your tent.
Other things you’ll need
In addition to the lights and fans discussed above, few other things you’ll need to finalize your tent setup:
Aluminum tape
For connecting ductwork use aluminum tape; don’t use duct tape it won’t work as well
Black Gorilla Tape
Use to patch tent light leaks, seal intake windows on tent during flowering, and for a hundred other tasks. Much stickier than regular duct tape.
4″ or 6″ heavy duty flexible ducting, plus duct clamps
Use for exhaust ventilation, intake ventilation, and air cooled lighting. Get heavy duty ducting to reduce light leaks.
Hanger straps (for grow light)
These help you raise and lower your lights. Mount them to the center cross pole atop your tent.
Filter Material
Use to cover air intake ducts or the air intake ports at the bottom of your tent to keep dust and insects out of your tent.
Bungee cords or hanger straps for carbon filter
Thermometer / hygrometer
Get a decent model with a probe that can track highs/lows. Keeping temperature and humidity levels in proper ranges in your 48×48 grow tent is critical if you want to grow killer weed.
Light timer
A timer with two outlets will allow you to connect a fan and an air-cooled light to turn on together.
Extension cord
Make sure to get heavy duty cords rated for well above your expected energy usage.
Power strip with surge protector
Mount at ceiling level, not near floor
If you need something smaller then a 48×48 inch grow tent, consider the 48×36 inch grow tent or a 36×36 inch grow tent. Learn more about finding the best 3×3 grow tent kits.
How to set up a 48x48x72 inch grow tent. Learn what features to look for when buying a tent, and what equipment you'll need to create the best possible environment to grow high quality weed.
 Read the online reviews for 48×48 grow tents with a grain of salt. Most manufacturers will have a bit of poor reviews. Many seem to have planted fake reviews. So how do you navigate through the nonsense?
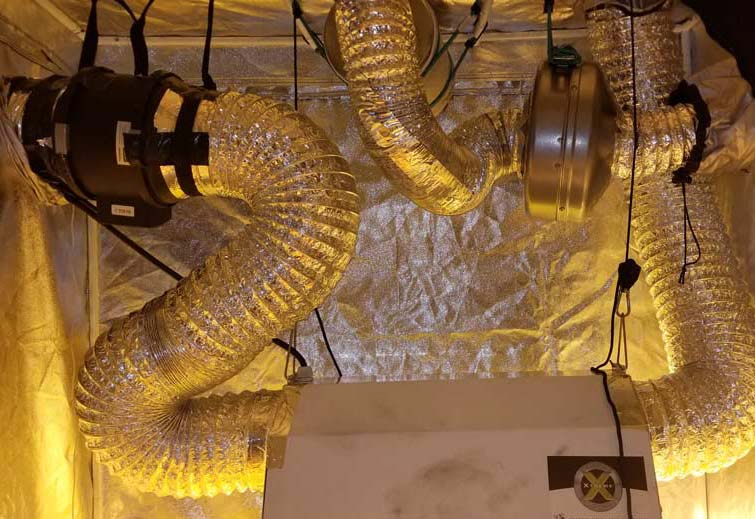


")


 Grow Light Bulbs")