In this post we’ll show you how to lower humidity in a grow tent. We’ve run into problems with humidity when growing weed in tents, and these are the best ways to solve them that we’ve found.
Before you buy a grow tent dehumidifier there’s a few other things you should try first to lower humidity in your grow tent. We’ll walk you through the options that have worked best for us for these two scenarios:
The humidity level of ambient air outside the tent is drier than target rH%
The humidity level outside the tent is higher than your target rH, requiring a dehumidifier
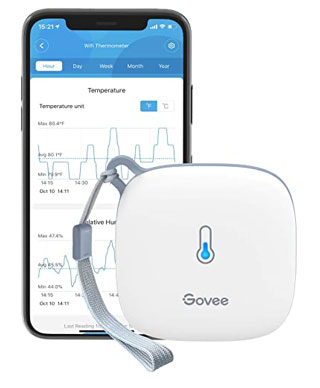
Your target rH in vegetation is 50-70%, and in flowering 40-50%. Late in flowering drop it to 40%. Make sure to monitor highs and lows since humidity levels can fluctuate during light and dark periods. Learn more about the best humidity for weed.
1. Increase exhaust rates
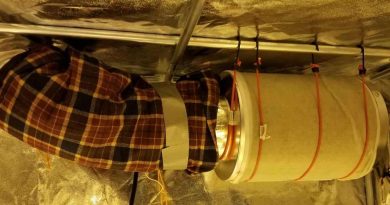
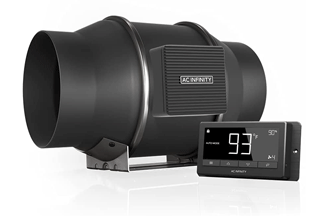
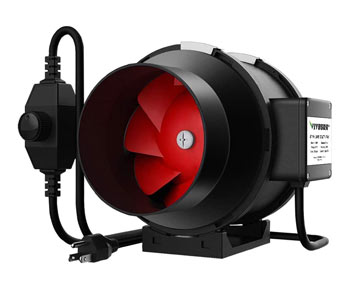
If the humidity level outside your tent is lower than your target humidity level inside your tent, the first thing you need to do is increase your tent’s exhaust fan rate so the air changes over at least once per minute. This is usually done with a 4″, 6″, or 8″ inline fan.
The 6″ AC Infinity S6 inline fan is whisper quiet and comes with a built-in fan controller so you can boost ventilation to remove humidity from your grow tent. For a cheaper option, try their 6″ LITE A6 fan.
If your tent sides suck you need to improve air intake. In vegetation you can open the tent flaps and exhaust air from the top of the tent, which will circulate in new air. In flowering you need to seal those lower flaps, and this greatly reduces intake rates and is usually where growers run into problems.
Add a filtered intake fan to bring fresh air into the lower vent port of your tent. Use a fan controller to fine tune it to maintain a slight negative pressure in the tent (so the tent sides just barely suck in).
Improve efficiency of your tent exhaust by using short, straight duct runs. Angles and length can greatly reduce how much air your fan can exchange.
Increase air circulation inside tent so that a steady breeze is flowing across all parts of your plants. This helps avoid most pockets that could cause problems in a humid tent. Use clip fans or air circulator fans for an inexpensive circulation solution.
The Vivosun 6″ inline fan is the best cheap inline fan, with plenty of power to remove humid air from grow tents.
Improving ventilation and circulation is the first step towards fixing high humidity levels in grow tents. Pulling in dry outside air will quickly reduce interior humidity levels. Learn more about the best inline fan for grow tent use or grow tent ventilation setup.
If you use a 6 inch exhaust fan in your grow tent, a 4 inch inline fan for intake should be sufficient. Growers on a budget can consider a cheaper duct booster fan. Make sure to filter your incoming air to avoid bringing in dust, mold, or other contaminants.
However in many cases that may not be enough. If you’re still running into issues, try the other ways to solve humidity problems in grow tents listed below.
2. Reduce transpiration rates through defoliation
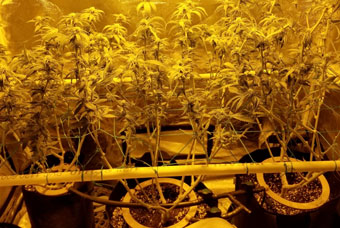
Weed plants constantly release moisture through transpiration. Nearly all of the water you add to the plant makes its way back into the air. The second thing to know about how to lower humidity in a grow tent is to make sure you’re properly defoliating.
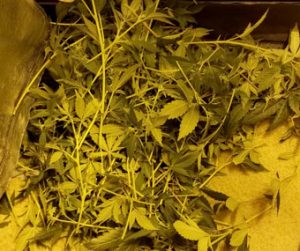
Defoliating your weed plants (especially large lower fan leaves) reduces the amount of moisture that the plants release into the air through transpiration.
Defoliation is the process of removing fan leaves from your plants. This helps improve circulation through the plant, and allows light to penetrate deeper which improves lower bud development. It also reduces the amount of moisture your plant releases into the air.
You don’t just want to do this randomly or you risk stunting growth.
We typically remove all lower growth and large fan leaves just before initiating flowering.
We do a follow up defoliation at the end of week three of flowering.
We’ll also defoliate lightly throughout the flowering process to remove any large leaves that block bud sites.
Some growers prefer to strip all fan leaves at the start of flowering and day 21 (a technique called schwazzing).
We usually are pretty aggressive but leave enough fan leaves to ensure light isn’t passing through the plant unabsorbed. It’s also good to remove thin, scraggly branches and lower branches that don’t receive much light.
By reducing the foliage you improve air circulation through the plant and reduce the risk of damp spots that can lead to mold or other problems. You also allow the plant to focus energy on new growth.
New growers should be careful though, overdoing defoliation or doing too much at the wrong times can result in stunted bud development.
3. Remove runoff promptly
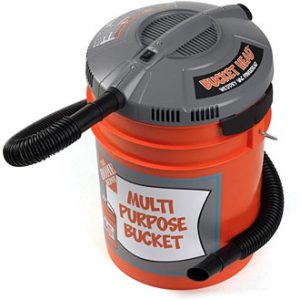
The Bucket Head shop vac attaches to any 5 gallon bucket and is great for removing runoff from weed plants.
An easy way to reduce humidity in grow tents is to make sure you’re not leaving stagnant runoff water in plant saucers. Soil and coco coir growers usually aim for a bit of runoff to ensure the medium is totally saturated. Avoid overwatering and excessive runoff, and try to water right at the start of your light’s on cycle.
Make sure to suck runoff up every time you water using a small shop vac.
The Bucket Head vac is a great choice for this. It’s inexpensive and can hold a lot more water than a small shop vac in the same price range.
A large shop vac serves a double purpose, it can remove runoff and also allows you to add a HEPA filter to keep your grow room clean.
Consider creating a drain table to automatically remove runoff and direct it outside the tent. See how to build a DIY drain table and how to make an automatic watering system.
4. Use a dehumidifier
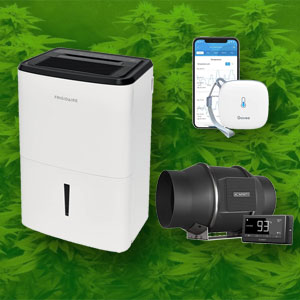
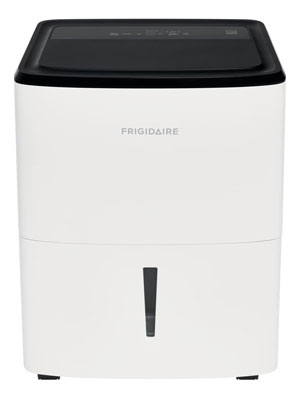
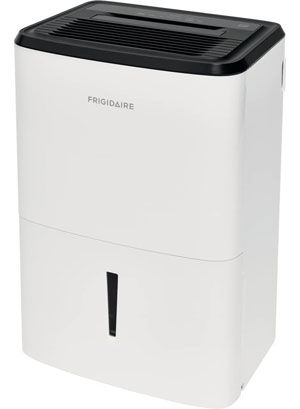
The Frigidaire 35-pint dehumidifier is inexpensive and very highly rated. It’s a great choice to lower humidity in a grow tent.
If the room air outside the tent is moister than your target humidity level then you’ll need to get a dehumidifier.
Unless you’re running a sealed grow room, dehumidifiers should be placed in the room outside of your grow tent to create a properly conditioned “lung room.” This is the most efficient way to lower humidity levels in a grow tent.
To quickly replace humid tent air, point the blower fan on your dehumidifier directly into the tent’s intake fan. By directing the dry air right into your intake fan you can quickly resolve humidity issues.
Placing a small dehumidifier inside a grow tent that’s constantly ventilating isn’t a good idea. Small units can’t keep up with the amount of water released through transpiration, and larger units release heat as they run. Since you’re constantly exchanging tent air every minute, the dehumidifier is fighting a losing battle.
Nearly all of the water you add to your plants is released into the air. So if you’re watering 2.5 gallons of water per day in coco coir, you need to offset those 20 pints to break even. But if you’re growing in a damp climate or humid location such as a basement, you’ll need a much larger unit to reduce the ambient humidity lower than your tent’s target humidity.
It’s best to get a dehumidifier that’s a bit more powerful than you think you need, otherwise you risk having to purchase a bigger unit down the line.
A 30 pint unit is a safe choice for medium to large rooms that are moderately dry
A 50 pint unit is good for large, damp locations like basements
Dehumidifiers used to come rated as 30 pint, 50 point, and 70 pint-per-day. In 2019 rating standards changed when they started testing at lower temperatures, which reduces dehumidification rates. Today those identical units are rated as 20 pint, 30 pint, and 50 pint. This can get confusing when you are comparing units.
If you are facing both high humidity levels and high temperature levels in your grow tent, an air conditioner is your best solution. Air conditioners used to cool the room around your grow tent will also remove humidity.
Air conditioners are rated by BTUs. For every watt of HPS light you’ll want at least 3.5 BTU’s of cooling power.
If you’re running a 4×8 tent with two 1000 watt HPS lights, calculate 2000 x 3.5 = 7000 BTUs to offset the heat from those lights.
Plus you’ll need more power if you’re in a hot climate to offset high ambient room temperatures.
If you’re running a sealed tent and introducing carbon dioxide, you’ll need to locate the AC inside the tent. You’ll need an AC powerful enough to offset all sources of heat, including your grow light bulb, ballast, dehumidifier, and CO2 generator. Check out this BTU calculator from Hawthorne Gardening to help you calculate what size air conditioner you’ll need in a sealed grow tent.
Summary: How to lower humidity in a grow tent
Here’s how to lower humidity in a grow tent to maintain the proper environment for growing weed:
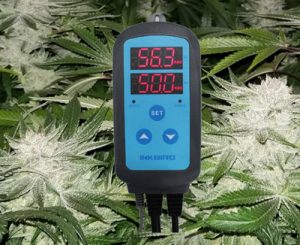
The Inkbird humidity controller can turn on your fan when needed to maintain the perfect humidity level in your grow tent.
Improve ventilation and air intake
Reduce transpiration through defoliation
Don’t leave stagnant water — remove runoff promptly
Use a dehumidifier
Use an air conditioner
To learn more about lowering grow tent humidity levels, check out these resources:


")