Learn how to build a DIY automatic watering system for grow tent or grow room setups. We’ll be making this drip watering system for coco coir, but indoor drip irrigation systems like this can be used for soil grows as well.
We’ll show you how to plan and assemble your coco drip system so that the water flows slowly and evenly to each of the plants. It’s easy to set up and worry-free.
These DIY automatic watering system plans are for small grow tents and rooms with 2-6 plants. But the approach can be scaled for tents or grow rooms of all sizes and plant counts. While it’s intended as an indoor drip irrigation system for cannabis, you could use it for outdoor weed plants as well. You could even do it with other types of plants that aren’t weed, but that’s no fun.
We’ll show you two different approaches to coco coir drip system plans:
Basic automatic watering system
Uses a pump with watering rings and drains to waste in saucers. Perfect for small tents or closet grows that aren’t located near a drain. Jump below to this section ↓
Automated drain table system
Watering system runoff drains to waste in a large plant tray and is sent to an exterior drain (or reservoir with pump and float valve). Jump below to this section ↓
Basic drain to waste DIY automatic watering system
Indoor drip irrigation systems simplify the task of watering and allow you to go away for a week on vacation without worrying about your weed plants.
The Growneer 550 GPH pump is cheap but has 7+ feet of lift, enough to lift water over the edges of tall 55 gallon water reservoirs.
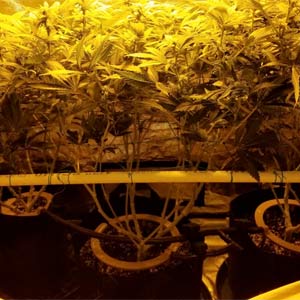
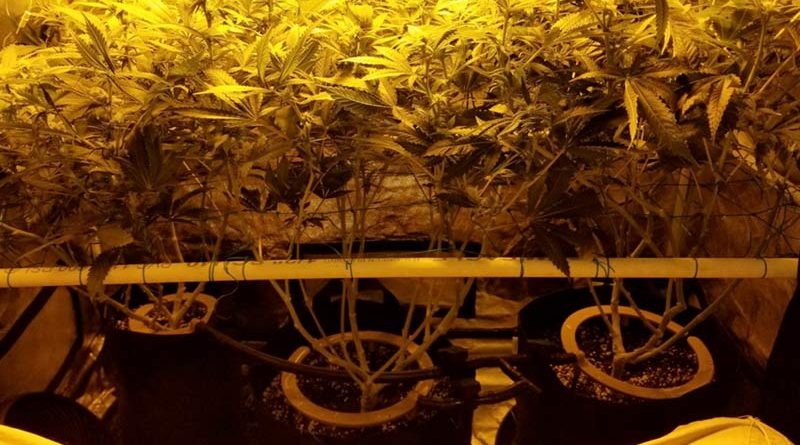
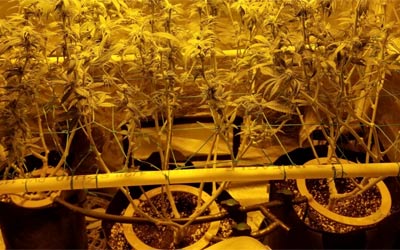
The plans below show you how to build a DIY automatic watering system for grow tent setups with 3 plants in 3 gallon fabric pots and a 5 gallon bucket reservoir. The layout is for a 2×4 foot tent but can easily be adapted for different tent sizes, or to build an automated watering system for grow room setups with more plants.
Runoff will be collected in large plant saucers. You could also use a large Tupperware container underneath for this purpose.
1/2″ 4-way connector (one 4-way connector is needed for 3 plants, or use two T connectors. For 2 plants, use one T connector. For 4 plants, use three T connectors)
How to plan your DIY indoor drip irrigation system
Plan your drip system layout. For a coco coir drip system made for three plants, our pump will connect to the 4-way connector, with 3 lines running out to the plants. Try to go for short, level runs from the connector to the plants. Ideally you want the lengths of tubing coming from the connectors to each plant to be about the same length, and level with each other. This improves water distribution consistency.
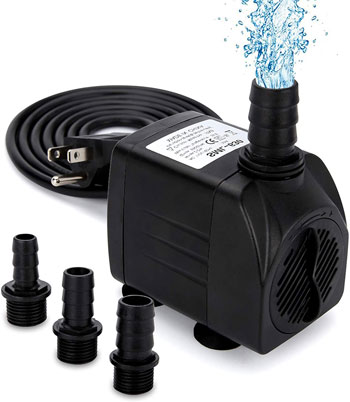
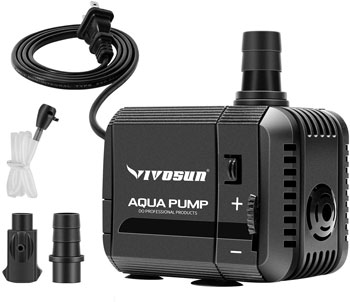
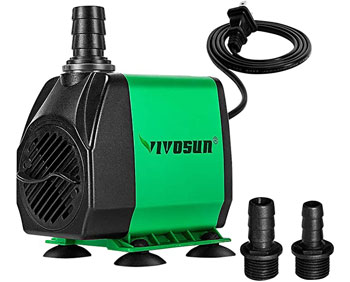
The Vivosun 210 GPH pump is inexpensive and a good choice for a small DIY automatic watering system.
What size pump do you need? This varies based on the size of your automatic watering system. It’s better to have a slightly overpowered pump and then restrict flow using valves. Pumps are rated in Gallons Per Hour (GPH). Divide by 6o to get gallons per minute. If you plan to run your pump for 2 minutes to deliver 2 gallons of water, it would seem like you’d need a pump with 60 GPH. But efficiency is reduced due to bends, connectors, tubing length, and the height water needs to rise over the top of the bucket.
Your best bet for a 5 gallon bucket and a few plants is something in the 160-200 GPH range. The 210 GPH Vivosun pump is a cheap option, we’ve used this for years without issue.
For larger 30 or 55 gallon buckets, you need something more powerful to push the water up over the sides such as the Vivosun 400 GPH or the Groweer 55o GPH pump, so pay attention to the pump’s lift rating to ensure there’s enough power to do this. We’ve used a few different sizes of Vivosun pumps over the years and they’ve worked well.
What size watering ring should you use? The 6″ Bloom Brothers watering ring is perfect for 3 or 5 gallon pots. For larger plants with wider pots, consider the 9″ or 12″ versions. You could also buy a Hydroflow 6″ ring, but they cost twice as much as Bloom Brothers.
How many tubing connectors and what type will I need? If you have two plants, use a single T connector or a Y connector placed equidistant between the 2 plants. For three plants, use a 4-way connector. For four plants, run the pump into the bottom of the T connector, and use two other T connectors on the remaining openings. For six plants, use a four way connector in the center of 3 T connectors. To build a larger automated watering system for grow room setups with more plants ad and longer tubing runs, size up your pump accordingly.
Connectors are cheapest in larger packs, so to save money get a T connector 10 pack or 20 pack and just rig them together vs. buying a 4 way connector 10-pack and only using one. These connectors tend to get brittle and crack after a while if you try to remove tubing and reuse them, so having extras on hand is a good practice.
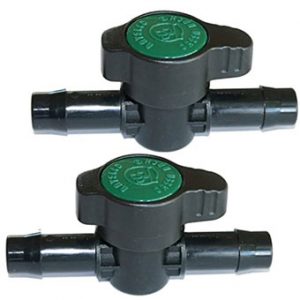
How many ball valves are needed? This depends on plant count. You’ll want to position a ball valve between the pump and the connector, which will serve as the master flow control. You’ll also put an additional ball valve next to each watering ring, which lets you fine tune the coco drip system for each plant to account for different flow rates. Not using these valves results in uneven watering.
Try to get decent ones such as Habitech or One Stop Outdoor. We learned the hard way that the really cheap ones with red tops tend to break pretty quickly and that could result in flooding.
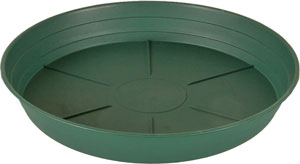
What plant saucers work best? Since we’re watering to 10-20% runoff with our coco drip system, the larger the plant saucer equals the more days you can run your drip system before it fills to the top. In a 2×4 foot grow tent we use heavy-duty green saucers that are 16″ wide, the max size that will fit 3-wide across the tent. If you’re running 2 plants in that 48″ length, opt for even larger plant saucers to hold more runoff. The more runoff you can hold, the more days your automatic watering system can run.
Hydrofarm 16″ saucers are 2.5″ tall, we’ve had some of these that have been used for years. They’re solid and durable. They come in a 10 pack for under $50. The Tite 16″ saucers are a good value and come in a 10-pack, but only 1.9″ high, which won’t hold much runoff.
Other options to collect runoff: You could also use a large basin or Tupperware container below your plants to collect water that drips through. The Bon Tool 2×3 foot utility tub is an affordable but solid choice, see below in this article for plans to use this tub with a DIY PVC plant stand. If your tent or grow room is located near a floor drain in a basement or garage check out the indoor drip irrigation system plans for drainage tables below.
The Gro Pro pot elevator keeps your plants above runoff. Never let your grow pots sit in stagnant runoff water, it’s a recipe for disaster.
What’s the best way to run tubing into grow tent walls? If you’re running your indoor drip irrigation system into a grow tent there are a few ways to run the tube into the tent: through the tent’s lower duct or cord opening (best), through the zipper on the tent door (works ok, but make sure to make opening light proof with a flap of black Gorilla tape), or by cutting a small hold in the side of your tent (not ideal but necessary if you’re looking to drain the runoff out of the bottom of your tent).
What’s the cheapest automated watering system? If you’re looking to build a cheap automatic watering system for one plant, all you really need is a cheap adjustable pump that comes with tubing, a timer, and some gorilla tape to hold the tubing above the center of your plant.
Add connectors to do this for multiple plants. You risk uneven watering, but if you make the surface of your medium concave (curved and lower in the center than the edges) and maintain an even puddle it should improve saturation and keep your plants in good shape in a pinch.
Make sure your plants and water reservoir are in their final positions. Connect the end of tubing to the pump and secure it to the bottom of the reservoir.
Hold tubing to where you want to locate the first ball valve. You want it to be easy to access. Cut tubing and attach ball valve.
Cut a piece of tubing to attach the other end of valve to the first connector, which should be located as centrally among the plants as possible. In our 2×4 tent example with 3 plants this would be in the middle of the tent so the runs to the edges are equidistant.
Measure the remaining 3 lengths of tubing that will go to each plant from the connector. Factor in the width of the ball valve that each line will need when planning the total length. Cut a length and attach a ball valve, then another length and connect to the watering ring.
Position plant rings centered in coco coir so the 1/2″ opening is angled towards the center connector and at the same height. Connect remaining pieces.
Plastic tubing tends to curl a bit, so rotate sections of tube in the drip system as needed to get it as parallel horizontally as possible.
Remember, the order of products for each plant should go: pump in reservoir > master ball valve > central connector > individual ball valve > plant watering ring.
Once your drip irrigation system is set up you’ll need to test it out and make adjustments. Your goal is to have a slow, consistent watering to each ring so that the nutrient solution can be absorbed by your coco or soil medium.
It’s better to apply the same amount of water slowly over a 2 or 3 minute timeframe versus pouring it through quickly in one minute. Water tends to run down the sides of containers if you water too quickly, causing extra runoff and wasting your nutrients.
Open all of the ball valves fully to begin. Turn on the pump with the timer set for 2 minutes. Depending on pump power you’ll likely need to reduce the master ball valve to reduce overall water pressure. From there you can fine tune the individual valves for each watering ring. You want the water to come out equally from all parts of each watering ring. Leave a slightly concave shape at the top of the surface of your coco coir or soil in the pot so the water can form a small puddle that doesn’t quite reach the sides, this will ensure even watering on all sides of the medium.
Plants nearer the central connector will tend to get more water than plants with longer tubing runs. Turn down valve on short runs.
If a watering ring is positioned lower into the plant then more water will flow to it. Turn down valves where this happens, or raise the ring slightly.
Watering rings need to be positioned flat for even water distribution from drip holes. Usually water comes out faster from holes near where water enters the ring. Angle the far ends a little deeper in the coco to bring more water to the ends of the ring.
Since the tubing tends to have a slight curl to it, the angle of this curve will impact flow and you can use this to your advantage. Twist the tubing so it arcs up and that will reduce flow slightly compared to arcing down.
How long should you run your automated drip system?
Once you’ve done your initial test and you’ve gotten each watering ring to deliver an equal amount of water per plant, your next step is to use your next watering to dial in the exact amount you need in 2 minutes.
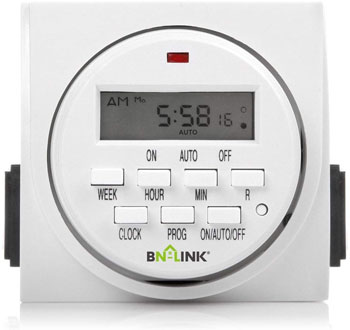
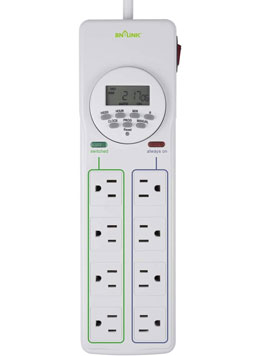
The BN-Link surge protector has 4 outlets on a timer and 4 that are always on, helpful if you need to run multiple pumps to different tents.
Coco growers who water plants daily by hand from a bucket should have a sense of how much water they use before runoff is reached. If you don’t, water plants manually with a 16 oz. keg cup to figure it out. Use a sharpie to mark your water bucket in one gallon increments.
The amount of water you need for your plants varies based on plant size, root ball size, the amount of foliage, container size, temperature and humidity level, and other factors. For our coco drip system we’ll water every day with hydroponic nutrients. If you’re building an indoor drip irrigation system for soil you’d want to water less frequently to allow the roots to dry out a bit between waterings.
At this stage our three plants in the 2×4 tent are in coco coir in 3 gallon fabric pots and consuming about 1½ gallons per day. A 4×4 grow tent with four bigger plants in 5 gallon pots with coco coir might use 2 – 2.5 gallons per day. These amounts can change due to many factors, so measure manual waterings for a few days to determine the volume needed.
Set the timer for 2 minutes and turn on the pump to begin. Adjust the master ball valve so that the total amount of water that comes out slows to where plants are pooling water in the middle near the plant stem, but not filling so it runs off the sides of the coco medium. Adjust individual ball valves for each plant to ensure they’re receiving the same amount.
Monitor water level in the reservoir. At the one-minute mark you want to be halfway to your target volume. Adjust the main ball valve if you’re a bit slow or fast. At the two minute mark you want to reach exactly the target volume level, while making sure there is just minimal runoff. If excess runoff occurs you’ll know to scale down the amount of water used. For your next 2 minute watering observe the one minute mark, making sure the flow rate is on target and that you get to minimal runoff at the end. Now you’re good to go.
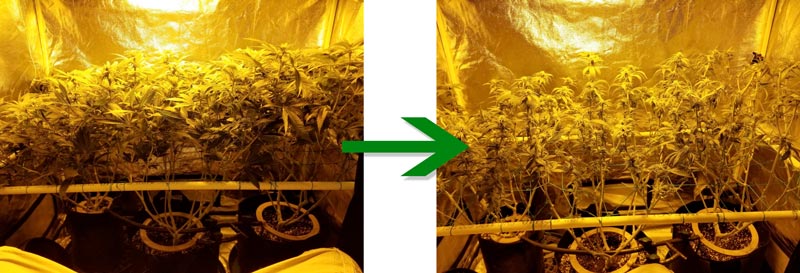
Before and after defoliating weed plants at 21 days into flowering. Defoliated plants lose less water through transpiration.
How many days will this automatic watering system last?
The limitations depend on reservoir size and how much runoff you accrue with each watering. The 3 plants in the 2×4 tent in this example are in 3 gallon pots, taking 1/3 of a 5 gallon bucket of water per day which allows for slight runoff. This would last for 3 days.
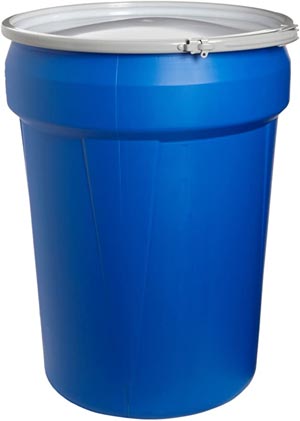
A 30 gallon plastic drum makes a great reservoir for an automated plant watering system.
In veg you could skip a day between waterings without the plants drying out, they don’t have the root size and foliage levels to absorb and transpire a lot of water. Skipping a day allows you to water the second, fourth, and sixth days. This would allow a 5 gallon bucket to last for a full week of vacation. Not ideal to skip daily waterings in coco coir, but it’s a good solution if you are away for a while.
Keep in mind that your pump can’t fully drain the bottom of the bucket, so factor that in so your last watering isn’t lighter than the others. Getting a bigger water reservoir can really extend how long this system can last, a 14 gallon bucket could last two weeks with this setup.
Your nutrient solution is best made in one week batches. At two weeks it usually smells really funky. To avoid stagnant water, you can keep things circulating in a large reservoir using a small pump with no tubing attached, just stick it to the bottom and leave it running so the top of your water level is moving around a bit.
How to extend time between waterings
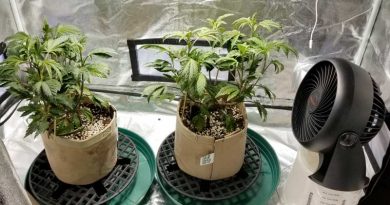
If you are building a coco drip system in a grow tent or grow room and want to extend the time in between waterings, go with a larger container size such as 5 gallon fabric pots.
Less leaves mean less water loss through transpiration. To extend time between waterings in coco coir or soil, lollipop remove lower growth.
Medium sized plants in 5 gallon containers can easily go 1 day between waterings unless they’re very large and bushy. You could potentially extend waterings for younger cannabis plants in vegetation to once every 3 days in 5 gallon pots. Avoid stressing plants by letting them dry out though, especially during flowering.
Defoliate to reduce the amount of water the plant loses through transpiration. Combined with a large reservoir and big plant saucers this can help you really extend the length of time you can be away from your plants before those saucers overflow.
If you really want to extend how long your system can run, you can improve upon the grow tent or grow room watering system by adding a drain table. Indoor drip irrigation systems with drain tables provide an even longer term solution. Below we will talk you through how to build this type of coco coir drip system.
Build a DIY automatic watering system for grow tent or grow room setups with drain table
To fully automate an automatic drip watering system you need to find a way to deal with excess runoff. If you have access to a nearby floor drain or sump hole then it’s easy. If not you can drain to an external reservoir using a pump with a fill valve to drain into a nearby sink or out a window.
The following steps will show you how to build a wooden frame for a 4×4 foot fiberglass drain table. It fits in the grow tent and allows overflow to drain into a nearby sump hole.
This system is paired with a 30 gallon bucket and can provide up to 2 weeks worth of watering for four weed plants in 5 gallon pots in a 4×4 grow tent or similarly sized grow room.
Materials needed to build drain tables for indoor drip irrigation systems
For drain table:
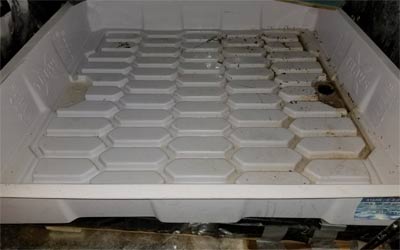
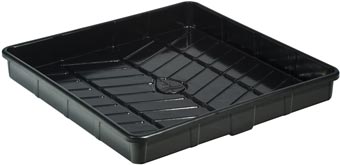
Fiberglass grow tray (we use a 4×4 grow tray, but they also make 2×4, 3×3, 3×6, 4×6,4×8, etc.)
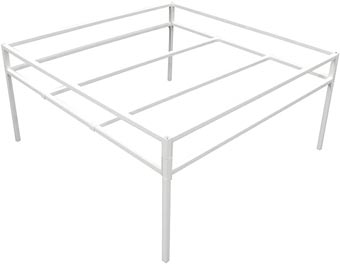
Metal drain table trays are almost $200 and a bit tall for most grow tents. It’s cheaper to build your own.
A wooden frame allows for room under the fiberglass tray for the drain line. Making a DIY frame is much cheaper than buying a metal tray frame (which costs nearly $200).
Adjust sizes as needed for your tent size; this is what you need for a 4×4 drain table:
2″ x 4″ x 8′ boards ( total)
1″ x 4″ x 46″ board (1)
46″ x 46″ sheet of 1/2″ plywood (measure interior of tent)
2 ½” coated deck screws
Just make sure to measure the actual width in between tent poles before you start cutting. The table top only needs to be wide enough to cover the bottom of the plant tray you use, and the bottom of these trays is usually a little smaller than the top.
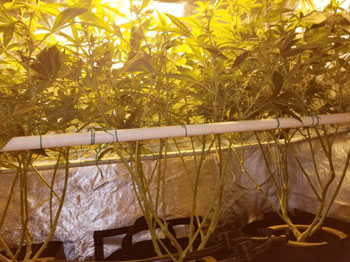
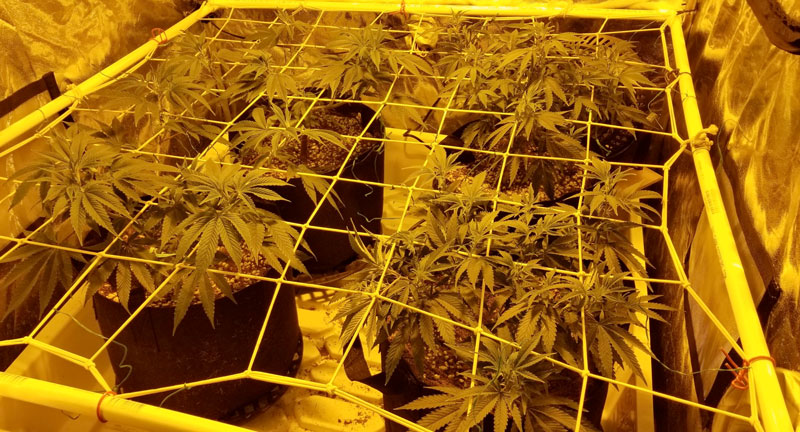
A drain table and ScrOG setup for weed plants in a 4×4 grow tent channel runoff to a nearby sump hole.
How to build a drain table frame for automatic plant watering systems
Measure the width and length inside your grow tent to determine the exact room available inside of the tent poles. This is how big the maximum size the top of your drain table can be. Your table only needs to be big enough to fully support the bottom of the fiberglass drain table you buy, it doesn’t need to go fully to tent edges. Size plywood accordingly.
Measure and cut 2x4s and build the lower table frame. It will be a rectangle with outer dimensions that come close to the edges of the top board on 3 sides. Leave room on the side where the drain will exit through the table, make sure you don’t have a 2×4 blocking that spot. Place that side’s 2×4 inside of the drain opening.
Test fit your layout. Place the four 2x4s on the floor in position, thin sides facing down. Put the plywood top on, then put the fiberglass drain table on top. Double check that hole for the drain opening in your table won’t be blocked by the frame. If so your base frame is good to go, just remove the table and plywood, then screw the frame together with two screws at each end.
Determine the level of pitch needed to drain water. Plumbers angle drain pipes at 1/4″ per foot of length, and this works for DIY automatic drain tables as well. So you’d need a 1″ height difference on the high end of the table. Use a 46″ piece wood that’s 1″ thick and secure to the end of the frame that will be away from the drain hole. Flip frame over so this board sits underneath. This will give you the pitch needed while keeping the table as low as possible within your tent while still allowing room for the drain to come out the bottom of the fiberglass container.
Alternatively for step 4 you could make the coco drip system table taller by adding four legs with 2x4s measured to your desired height. Cut the legs opposite the drain end 1″ longer to keep the table angled properly. This is helpful if you are building an automatic watering system for grow room locations with tall ceilings and want to keep the plants at a more comfortable height to work.
In a grow tent you generally want to keep the drain table as low as possible to allow more room for plant stretching. This is a problem with many of the metal frame plant stands being sold, they waste precious space underneath the table.
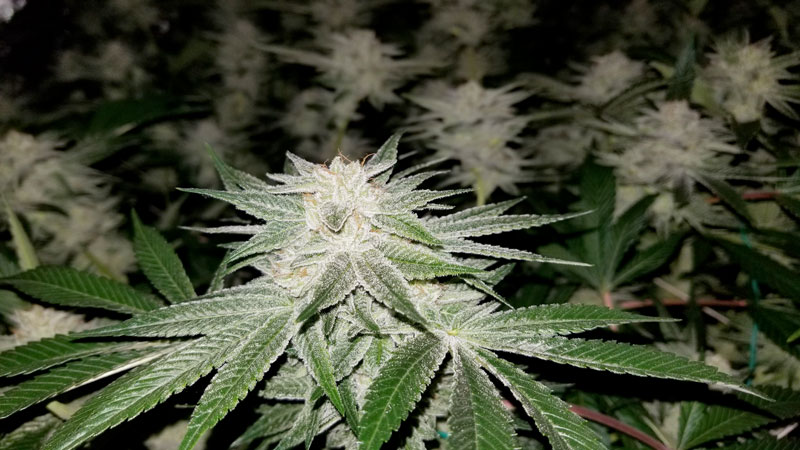
Two months later the weed plants shown above are getting frosty.
How to assemble the drain table
Fiberglass tables for indoor drip irrigation systems usually have an area designated in the design to drill a hole. Use a small circular hole saw at high speed if you need to drill it yourself. Test the hole saw on a thin board first and test fit your drain valve to make sure it’s the right size. There’s no easy fix if the hole you drill is too large or too small.
Once hole is drilled, place fiberglass on wooden frame and mark hole location on plywood. Drill that out with a larger hold saw then you need (gives you literally a little wiggle room).
Attach drain valve to hole. Hand tighten hard but don’t overdo it and damage the fiberglass. Seal edges of drain with silicone to make water tight.
Position 90° elbow underneath the drain table and measure how much tubing you’ll need. You want this tubing just long enough to couple the drain and the elbow, but not too long that it extends below the drain table frame or it won’t fit in the tent.
Attach the final length of drain hose. Ideally the end with the elbow is much higher than the end of the drainage hose so the water can drain freely and not collect inside. You don’t want stagnant water backing up at your drain elbow.
Be mindful of this angle when you cut a small hole in the side of your grow tent where this drain tube will exit. Use black Gorilla tape to tightly seal both sides of the tent where you cut the opening to make them light proof and to prevent unwanted insect visitors from entering. Sealing inside and outside with silicone first is optional but ensures an air tight fit.
Now you’re ready to go! This indoor drip irrigation system draining table makes it very easy to automatically remove runoff from coco coir weed plants without using a shop vac.
Alternative plans: Drain table plant stand using PVC grid
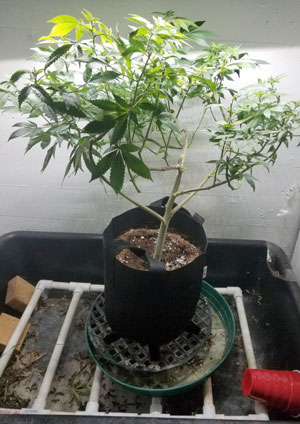
A mother plant on a PVC plant stand in a 2′ x 3′ utility tub to catch runoff in a small closet grow.
These alternative plans are for a DIY drip table for a small grow room or grow tent that uses a 1/2″ PVC frame to suspend the plants above a basin instead of using individual round plastic plant stands under each plant.
It’s very easy to customize to whatever size you need to fit into your drain table, and lets you suspend the plants much higher from the bottom. This is great if you can’t connect your coco drip system drain table to an external drain, since it holds a lot of runoff water and allows you to extend the number of days your automated watering system can run.
It’s fairly simple to build. You should select a deep basin to use that fits within your grow area without touching the walls. In our example we’ll use a 2′ x 3′ x 8″ utility tub that’s meant for mixing small amounts of concrete. It’s solid and tall enough to hold lots of water.
We’ll also show you how to build a wooden frame for it to pull it off the floor and allow you to place a drain in it so the runoff can be routed into a separate Tupperware container outside of the grow space so that the runoff doesn’t stay within the tent or grow room. This is useful if you plan to be away for longer than 3 days, you don’t want to risk mold or other issues from leaving that stagnant water near your weed plants.
How to build a PVC plant stand
Half inch PVC pipe comes in 2 ft, 3 ft, 4 ft, 5 ft, 6 ft, 7 ft, and 8 ft lengths online. For cheaper prices or longer sizes go to a home improvement store.
Measure inner dimensions of bottom of container (which can differ from the top)
Determine materials needed:
Sketch out a quick drawing of your layout to determine how much 1/2 inch pipe you’ll need for the outer edges and all of the planned cross pieces. You want the cross pieces to be close enough together that your plant containers can rest on at least 3 at a time.
Plus you’ll need four 90° elbows for the outer edges (if you plant to prob grid up with bricks) or four 3-way fittings (which allow you to build legs under each corner, which is best to fine-tune the height within basin)
Determine how many cross pipes you’ll need, which depends on how many plants you have and how they’re laid out. You’ll want the pipes to line up so they’re directly under the centers and edges of your pots to avoid having pots that fall through. But the more you add, the more cutting and materials you will need. For each cross piece, you’ll need two T fittings — one at each end. It helps to sketch this out and add up all the fittings and pipe lengths. If you have 5 cross pieces, you’ll need 10 T fittings.
Use a hacksaw to cut pipes to length and assemble. You won’t need PVC glue for this, the fittings will be firm enough to hold it together.
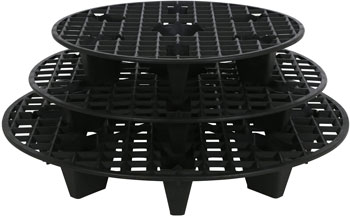
A more expensive alternative that’s a lot easier than building your own PVC plant stand would be to buy a heavy duty fountain basin grate to put on top of the basin. These are very solid and allow water to drip right through, but they’re pricey compared to building your own. A 2′ x 3′ basin grate costs nearly $100.
Benefits of an indoor drip irrigation system
Building a DIY automatic watering system for grow tent setups takes a little work but it will save you tons of effort and time in the long run.
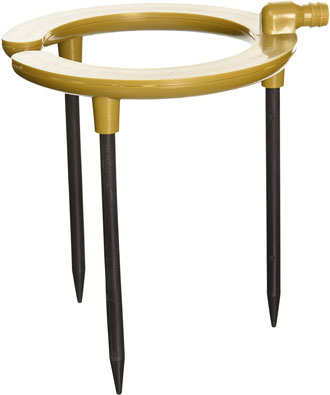
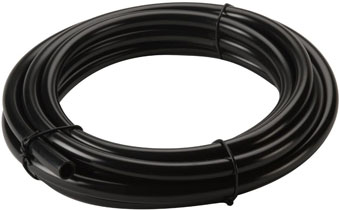
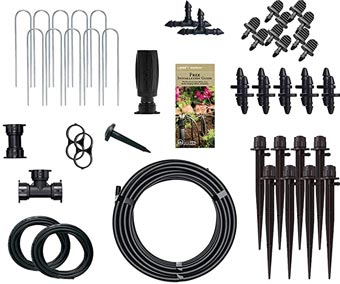
This drip irrigation system from Orbit is a good choice if you need a DIY automatic watering system for outdoor cannabis plants in soil.
You can mix up a week’s supply of nutrient solution in a 30 or 50 gallon bucket and use timers to water automatically each day right as your lights come on. No more forgetting or being too tired for watering.
A DIY automatic drip system is super convenient for flushing plants at the end of flowering. Just fill a large reservoir with water and turn it on, using as many buckets of water as needed. Much easier than flushing 5 gallons at a time manually, sucking up runoff, and repeating.
One word of warning: make sure you still check your plants frequently once you set up your automatic watering system for grow tent use. Daily observation of your weed plants will let you quickly identify and address issues that come up during weed grows such as nutrient burn or deficiencies, insects, under/over-watering, mold issues, etc. This is even more important if you’re using a drip system for outdoor weed plants.
Manual watering each day requires new growers to get down close to their plants. Automatic systems mean less time in your grow tent, so you need to be more aware as you look for issues.
Summary
A DIY automatic watering system for grow tent or grow room setups makes it easy to water weed plants in coco coir or soil. Set it up so the water flows slowly and evenly to each of the plants.
The plans discussed above are meant for grow tents or small grow rooms, but they can easily be scaled to water cannabis plants of all sizes and plant counts. The basic approach uses a small pump, watering rings, and plastic tubing. Runoff is collected below in plant saucers.
To further increase the length of time your grow tent or grow room watering system can last, build a drain table to collect runoff and use a larger reservoir. Try to switch out nutrient solution once a week and don’t let the reservoir water get stagnant.
We hope you found these coco coir drip system instructions helpful. It sure beats watering by hand each day from a 5 gallon bucket. Happy growing!
DIY automatic watering system for grow tent: coco drip system
Description
Learn how to build a DIY automatic watering system for grow tent or grow room setups using coco coir or soil. Learn to plan and assemble your coco drip system so that the water flows slowly and evenly to each of the plants. It's easy to set up and worry-free.


")