Transplanting cannabis seedlings is a crucial step in the growth process of weed plants. It’s the point where the seedlings are transferred from their initial growing containers into larger containers or their final growing space. Proper transplanting can ensure a healthy and vigorous plant, while improper transplanting can lead to stunted growth, root damage, and dieback.
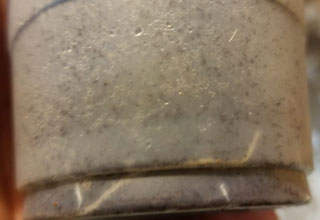
Transplanting can begin a few days after white roots hit the sides of your container, but before they start wrapping around.
In this article, we’ll walk you through the steps of transplanting cannabis plants and provide you with some tips to ensure that your weed plants thrive in their new container.
Step 1: Choose the right time for transplanting
Transplanting seedlings and clones should be done at the right time. If you transplant weed plants too early, the plant will not have developed enough roots to support growth in the larger container, and if you transplant too late, the plant may become root-bound and stunted.
How big should seedlings be before transplanting? Typically, cannabis seedlings are ready to transplant one to two weeks after the plants emerge. You want the roots to have started to fill out to the edges the existing container. But if you wait too long the roots will start wrapping around and becoming root bound.
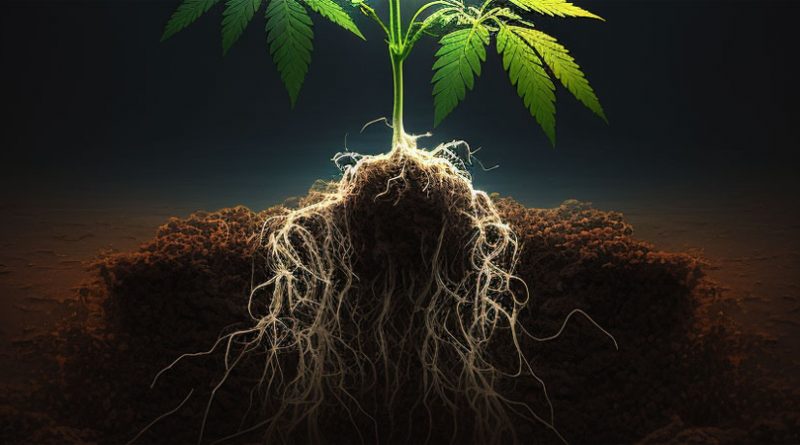
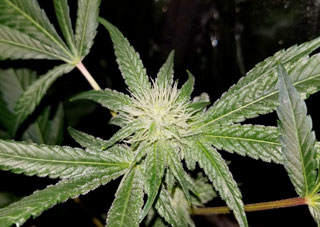
The best time to transplant cannabis seedling is after the new root system has developed, but before it is root bound as shown here.
If you’re growing seedlings in small starter trays or using jiffy plugs or rockwool cubes, be careful as they tend to dry out quickly once the roots establish. They’re handy because you can easily monitor root growth, but you need to transplant right away to avoid having them dry out too much and possibly die.
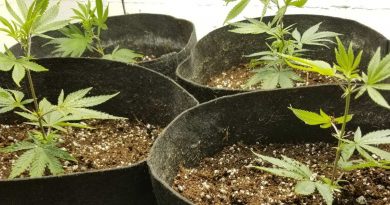
The same logic of monitoring root growth applies for transplanting marijuana plants from a mid-sized container to a large container. You want the root ball to fill out in the existing container before transplanting, so the roots reach the edges. This ensures the plant will adapt well to the new environment and helps avoid shock. Timing for this may vary based on conditions and the health of the plant, so it is best to monitor the roots to determine when to proceed. Transplanting from a series of smaller to larger containers will help develop a more robust root structure vs. transplanting only once from a small to a much larger container.
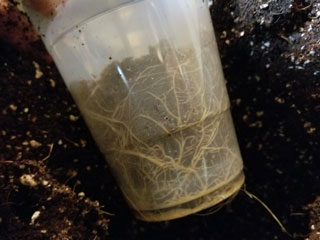
We like to grow seedlings and clones in clear plastic 16 oz. cups placed inside red plastic cups, this keeps the roots in the dark but allows you to easily lift out the clear cup to monitor root progress. When the roots have grown out to the sides and bottom, it’s time to move them to a larger container. If your container won’t allow you to monitor the roots, generally when the leaves of the plant have grown beyond the width of the container they’re in you are all set to transplant.
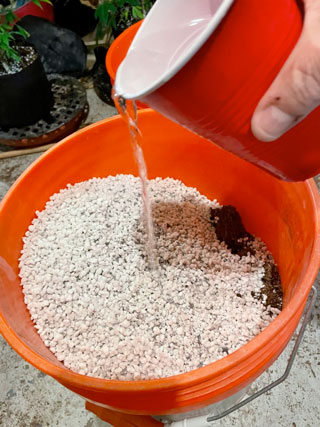
Always use a respirator mask when handling perlite. Lightly watering it before handling will limit dust.
Step 2: Prepare the new growing container
Before transplanting, you will need to prepare the new container. Choose a container that is at least twice the size of the current container, has drainage holes, and is made of a material that will not retain too much moisture, such as plastic or fabric grow bags. If reusing a container, sanitize in a solution of 1/4 cup bleach to a gallon of water.
Fill the new container with a high-quality potting soil meant for cannabis that has a balanced pH and is free of pests and disease. Foxfarm Ocean Forest or Purple Cow Organics IndiCanja are good options to consider. You may also want to add a layer of perlite or vermiculite to improve drainage and aeration.
If you’re transplanting into coco coir instead of soil, make sure that you have about 25-30% perlite which will help the medium dry out a little more between waterings, forcing the root system to grow more quickly. Break up any chunks so the new roots can easily grow throughout the new pot. Perlite dust is dangerous to breathe in, make sure to use a respirator mask and lightly water the perlite before handling to minimize dust.
Step 3: Water the soil in the current container
Water the soil in the current container thoroughly a few hours before transplanting cannabis plants. This will help the soil hold together when you remove the plant from the container. Dry soil or coco tends to crumble, which disturbs the root system and can lead to transplant shock. Your goal is to disturb the existing root ball as little as possible to avoid cannabis transplant shock.
Step 4: Gently remove the plant from its current container
Gently remove the plant from its current container, being careful not to damage the roots. You can do this by squeezing the sides of the container or using a tool such as a spoon or knife to loosen the soil around the edges of the container. Gently support the top of the growing medium with your hand and turn the plant over, continuing to squeeze the sides of the container if needed to loosen it. Never pull the plant by the stem as this can cause roots to break off.
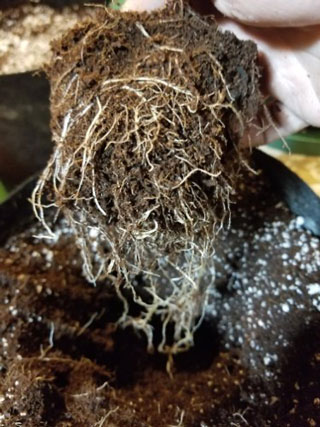
Gently tease the roots out so that they can quickly establish themselves in their new container.
Removing plants from their containers is easy to do if your weed plants are growing in small plastic cups or fabric containers. If the plant is stuck, be gentle. You don’t want to break apart the soil/coco from the root ball. Consider using fabric pots with velcro sides made for easy transplanting to simplify the process.
Once you have removed the plant, inspect the roots for any damage or signs of disease. If you see any damaged roots, carefully remove them with a sterile pair of scissors. Don’t ignore issues, they’ll only get worse. Don’t keep the plants out too long, try to get them into their new home as quickly as possible.
Step 5: Tease the roots
When transplanting cannabis seedlings or clones, it is important that you gently tease the roots so that they are ready to grow outwards into the new container. This is especially true if your plan is root bound with longer roots that wrap around the container.
Use your fingers to gently separate any roots that are stuck together. Your goal is to make sure that the new roots point in all directions outward from the plant. Try not to damage the roots when you do this, the more intact you can keep the RuPaul the better the plant will adapt to the new environment and the quicker it will recover.
Step 6: Place the plant in the new container and backfill
Place the plant in the new container and fill the container with soil. Make sure to leave enough space between the top of the soil and the top of the container to allow for watering.
Gently pack the soil around the base of the plant, being careful not to pack it too tightly. The soil should be loose enough to allow air and water to circulate around the roots, but it needs to be pressed down enough to avoid air pockets.
Spread the roots with your fingers to encourage growth in all directions. If you’re transplanting large cannabis plants, backfill the soil in layers to ensure your roots aren’t hanging straight down in the new container. Try to make a slightly concave surface, which prevents water running down the sides of the new pot when you water.
Backfill weed plants gently to encourage transplanted plants’ roots to grow into the new container.
Step 7: Water the plant
Water the plant thoroughly, making sure that the soil is evenly moist. It’s important not to overwater the plant, as this can lead to root rot. If you’re using soil meant for cannabis that already contains nutrients, water with plant water. Use a light mix of nutrients if watering coco or soil mixes that don’t already contain nutrients.
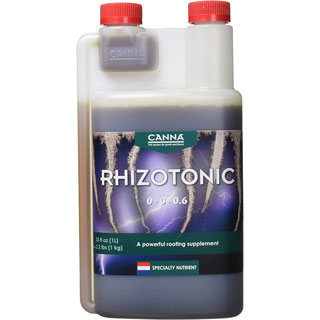
Using a rooting enhancer like Canna Rhizotonic will help your plants develop a strong root system after transplanting.
You can also add a root stimulator or nutrient solution after you transplant weed plants to help them adjust to its new environment. We like to use Canna Rhizotonic for this but there are a number of other alternatives out there. You can also apply a foliar spray with root enhancers so that even more can be absorbed through the plants’ leaves.
If you are growing in coco coir, it is helpful if you pre-water the new medium prior to transplanting. This helps avoid any dry pockets. After transplanting you should water coco again to runoff.
Weed plants’ roots grow faster when they’re reaching for water. Make sure to let the medium dry out almost completely before re-watering. For coco growers, normally you want to water very frequently compared to soil. But if you let the coco dry out for a few times but then resume more frequent watering cycles to take advantage of the robust growth that comes from growing hydroponically. Learn more about transplanting into coco coir.
Step 8: Provide adequate light and temperature
Using an inexpensive LED grow light such as the Spider Farmer SF1000 will help new seedlings establish themselves quickly after being transplanted.
After transplanting marijuana plants, it’s important to provide the plant with adequate light and temperature. Remember that cannabis plants should receive 18 hours of light per day to keep them in the vegetative phase, and the temperature should be between 70-80°F. You’ll want to let the plants establish themselves a bit before flipping the lights to 12-12 to initiate flowering.
For outdoor growers, plan to transplant earlier in the summer so that the roots have established themselves before flowering begins. Remember to harden off young cannabis plants started indoors before locating them under all-day direct sunlight. You can harden transplants off by giving them a few hours of late morning sun for a few days prior to relocating them outside in direct sunlight.
It’s also important to monitor the humidity levels in the growing space. Too much humidity can lead to mold and mildew growth. Too little humidity can cause transplanted cannabis plants to transpire moisture faster than the small root systems can uptake water. Providing the right environment ensures that the plants recover quickly and prevents cannabis transplant shock.
Step 9: Monitor the plant’s progress
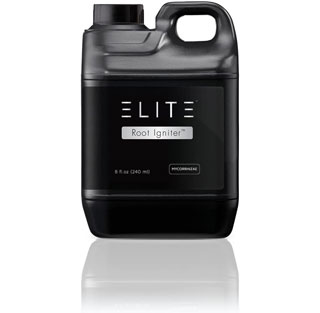
Elite Root Ignitor is a supplement that will help transplanted cannabis plants develop strong root structure in their new container.
Monitor progress in the days after you transplant weed plants. Look for signs of stress, such as wilting or yellowing leaves, and adjust the growing conditions if necessary. Continue to use rooting supplements to encourage robust growth.
It’s also important to continue watering the plant as needed and to gradually introduce it to any fertilizers or nutrients. If you are using a quality cannabis soil such as Farm Fox Ocean Forest that is preloaded with nutrients, you won’t need to add additional fertilizers for a few weeks. Mediums such as coco coir don’t contain nutrition, so you need to use nutrients every time you water.
Summary
Transplanting cannabis seedlings can be a daunting task, but with the right tools and techniques, it can ensure the healthy and robust growth of your cannabis plants. By following these steps and providing the plant with adequate light, temperature, and nutrients, you can help your cannabis plants thrive in their new environment. Remember to monitor the plant’s progress and adjust as necessary, and you’ll soon be on your way to a successful cannabis harvest.
FAQS
Q: Can you transplant cannabis plants during flowering?
A: It’s best to transplant during the vegetative stage. The process causes stress on the plants, and this can negatively impact bud development if done once flowering has begun. Ideally you’ll transplant at least a week before you plan to initiate flowering, however the longer you wait the more the new roots can establish themselves.
Bigger roots equals bigger fruits. If you absolutely have to transplant cannabis during flowering, try to disturb the root ball as little as possible. Transplanting during weeks 4 and beyond isn’t a good idea, those weeks are key to bud development. If your plants are flowering in too small containers and they’re drying out, increase watering frequency or consider an automated watering system.
Q: What happens if you don’t tease the root system before transplanting?
A: If you transplant a root bound marijuana plant without teasing the roots it has a more difficult time establishing itself in its new home. The roots thicken as the plant grows, and it may start to choke itself out.
Q: How many times should you transplant cannabis plants?
Botanicare Rhizo Blast is a rooting enhancer that will promote quick recovery after transplanting.
This depends on how big you want the plant to be before flowering begins. Typically you want to grow seeds or clones in a small container (such as a 16oz plastic cup) so that the roots can dry out between waterings. It’s best to transplant weed plants to larger containers in stages, for example moving into a one gallon container and then a 3 or 5 gallon container. Placing a young seedling or clone directly in a much larger 5 gallon container isn’t ideal as it won’t have the rooting system to reach the edges, so the medium will take longer to dry out between waterings which will slow root development. To grow larger plants you’ll have much quicker results if you do multiple transplants, this allows the root balls to fill out the new container more quickly. Although it’s possible to plant a seed directly in a very large container, it will take the seedling much longer to establish a robust root ball compared to transplanting from a series of smaller containers.
Q: When is the best time to transplant outdoor weed plants?
A: Assuming you start your plants in cups or one gallon containers, usually they’re ready for transplant once you see 4-5 sets of leaves. For seedlings this would be a few weeks after the plant emerged. For clones, a few weeks after rooting. Make sure the plants appear healthy before transplanting. If you’re looking to grow outdoor cannabis plants in very large containers, multiple transplants are recommended. Make sure you don’t place newly transplanted indoor plants in direct sunlight immediately after transplant, plan to harden them off with a few hours of sunlight for a few days first to let them adjust to the stronger light intensity.
Rapid Start is a rooting enhancer from General Hydroponics that will improve success when transplanting.
Q: How long does it take a weed plant to recover from transplant shock?
A: Typically it takes about a week for cannabis plants to recover from transplant shock. If you’re careful not to disturb the roots and you provide a proper growing environment, you likely won’t notice symptoms of shock at all. Rooting supplements will help reduce recovery times. Make sure to properly pH the water you’re using, and don’t go too heavy on your nutrient mix for the initial waterings. Monitor plants closely. Sometimes what appears to be shock might actually be due to nutrient deficiencies, pH lockout, diseases, or pests.
Q: How soon after transplanting should weed plants be pruned?
A: Let the plants establish themselves for at least a few days before moderate to heavy pruning. It’s ok to remove yellow or dead leaves at the time of transplant, but you don’t want to top the plants or heavily defoliate right away or you risk increasing stress and further shocking the plants. But make sure to make pruning and plant training a priority soon after the plants re-establish themselves, as this will promote strong plant development and help increase the amount of bud yield you end up with.
Q: What types of nutrients are best when transplanting cannabis seedlings or clones?
Coarse perlite helps soil or coco dry out faster between waterings, encouraging strong root growth.
A: Plan to use a light mix of whatever nutrient line you’re using. This usually consists of a base nutrient (often an A & B formula) and some kind of rooting enhancer. Foliar spraying with a rooting enhancer provides a direct boost to the plant, follow the directions on the bottle to determine the right strength for foliar applications. If you’re transplanting into coco, make sure to use cal-mag to treat the new container for best results.
Q: What soil amendments are helpful to increase transplant success?
A: We like to use perlite to amend soil or coco. It increases aeration and helps the medium dry out quickly, forcing the roots to grow to find moisture which helps them establish quickly. Make sure to wear a mask as perlite dust is dangerous to breathe in. Watering the perlite helps reduce this dust and is recommended. Try for a 20-25% mix using medium grit perlite.
If you’re growing in large containers or for lots of plants, it’s much cheaper to get the giant bag of perlite vs. multiple smaller bags. Additional amendments that encourage strong rooting in transplanted cannabis seedlings include mycorrhizae fungi supplements such as Mico Supreme.


 Q: Can you transplant cannabis plants during flowering?
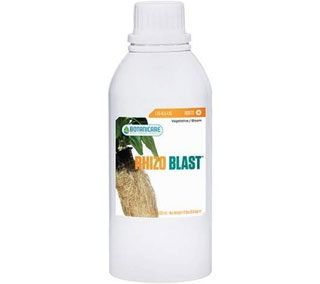


")