Growing cannabis seeds in rockwool: How to start seeds in rockwool cubes
It’s easy to learn how to start seeds in rockwool cubes in a few simple steps. We’ll show you the best way to start seeds in rockwool cubes, how to prepare rockwool, when to start feeding seedlings, the best nutrients for rockwool, lighting for growing marijuana seeds, and when to transplant rockwool seedlings. This advice also works if you’re looking to start seeds in rockwool that aren’t weed seeds, the techniques are the same.
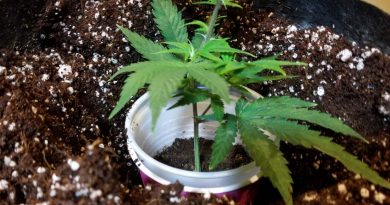
Starting marijuana seeds in rockwool cubes is an easy and effective way to encourage rooting. Rockwool is a reliable growing medium for pot seeds, and it’s suitable for transplanting to all types of growing including soil, hydroponics, and coco coir.
How to start seeds in rockwool cubes
Here are the basic steps for germinating seeds in rockwool:
- Soak rockwool cubes in one pint of water that is pH’d down to 5.5. No extensive soaking is required, but make sure water gets fully absorbed. Include rooting stimulants (such as 2 ml per pint of water of Canna Rhizotonic) to encourage root growth once the seed germinates.
- Remove from water and shake gently to release excess water.
- Add marijuana seed to the hole in the rockwool and push to the bottom gently with a toothpick.
- Place under a gentle grow light in a humidity dome to create a warm, moist environment.
Your seed should begin to germinate in the rockwool within a few days.
How to prepare rockwool cubes for marijuana seeds
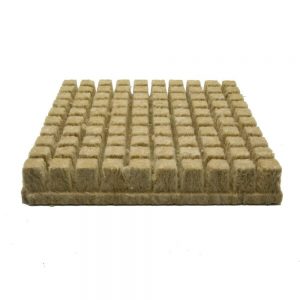
Preparing your rockwool cubes for marijuaja seeds is fairly easy. Most rockwool cubes made for starting seeds will already have tiny holes in them.
If yours doesn’t, bore one out by gently twisting a wooden skewer about 3/4 down (but don’t push it all the way through.
When you add the seed you want it to sit in the bottom of the hole.
Soak cubes in a rooting rooting stimulant
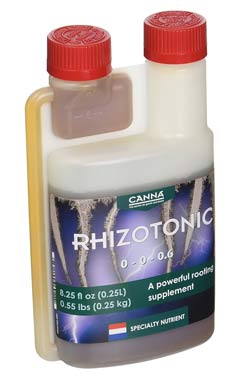
Your next step is to soak the cube in a light solution of rooting stimulant. We like to use Canna Rhizotonic to stimulate rooting. It has worked well for both rooting seeds and clones, and can be used as a foliar spray once leaves appear. You can learn more about how much Rhizotonic to use here.
- A 250ml bottle of Canna Rhizotonic is enough to get you going, but if you intend to use it throughout the vegetative growth stage the 1 liter bottle is a much better value.
- General Hydroponics RapidStart Root enhancer is another option to improve rooting in rockwool and other growing mediums.
- Advanced Nutrients Voodoo Juice is a root booster that provides beneficial bacteria that encourages strong root growth. It contains 5 different microbe strains loaded with rooting hormones. It comes in 250ml, 500 ml, and 1 liter sizes.
Regardless which rooting stimulant you choose, make sure that it is suitable for marijuana plants. Some rooting stimulants aren’t intended for plants that will be consumed.
What is the proper pH when watering rockwool cubes for cannabis seeds?
Since rockwool cubes naturally have a very high pH, you need to offset this by lowering the pH of your watering solution. This is the most critical part of growing pot seeds in rockwool.
The proper pH for watering rockwool cubes when trying to germinate cannabis seeds is 5.5. Try to keep the pH of your nutrient solution as close to that as you can. Use pH down (or substitute lemon or lime juice) to lower the pH once you’ve added your nutrients.
If mixing a small amount of nutrient solution, use a dropper to apply one drop at a time. Mix gently and test with a pH meter. If you go too far, add a drop of pH up until you hit the 5.5 mark.
Soak your cube in the 5.5 pH water for 15 seconds. You don’t need to soak the cubes too long, they will quickly wick up moisture. Remove from the water, gently shake away excess. Now you’re ready to add your seed.
Be mindful of your pH. If your pH is too low (below 5.0) then the cubes will begin to break down – so keep it at 5.5.
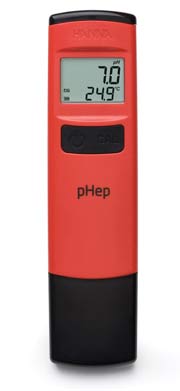
pH testers
You’ll need a pH tester to get your water to the proper pH. Here are the two pH meters we have used over the years:
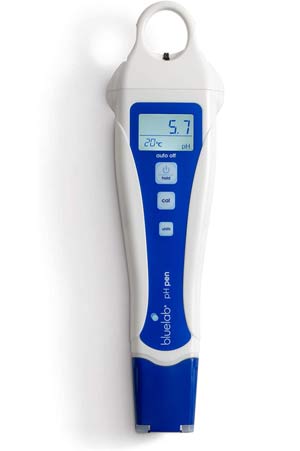
- Bluelab pH pen: Bluelab’s pH pen is a standard tool used by most growers. It is fully submersible and is very accurate. They’re usually in the $70-$100 range on Amazon. This is the only pH pen we’ll use these days.
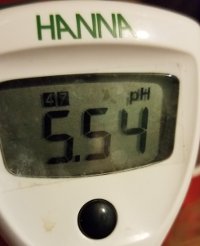
- Hanna pH tester: At $30 on Amazon this is a great entry-level tester for new growers. It’s cheap and it works, we used these for years. You can buy new probes that screw in in case you let this one dry out. We ordered the probes directly from Hanna and the cost including shipping was nearly that of a new meter.
- Hanna also makes a more accurate pH pen, it costs a bit more but it’s still less than Bluelab so it’s worth considering.
As with all pH pens, you need to make sure to keep the bulb wet so it doesn’t dry out, and calibrate it frequently to ensure accurate measurements.
Where should weed seeds be placed in rockwool cubes?
The marijuana seed needs to sit in the bottom of the hole in your rockwool cube. Drop seed in hold and very gently nudge it down with a toothpick or wooden skewer. Be gentle!
What are the best rockwool cubes for cannabis?
There are multiple sizes of rockwool cubes available, but the 1.5″ x 1.5″ cubes or 1″ x 1″ cubes are the most economical for growing marijuana seeds.
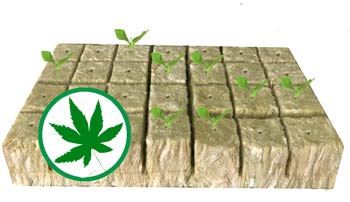
If you check out Amazon you’ll find a bunch of options. Here are a few to consider:
- MI0512 1.5″ rockwool cubes, 28 pack
- Grodan 1″ x 1″ rockwool cubes, 200 pack
- Grodan 2″ x 2″ rockwool cubes, 28 pack
- Grownear 1.5 x 1.5″ plugs, 49 pack
- Hydroponic City 1.5″ x 1.5″ rockwool s
Larger sized cubes such as 4 inches or 6 inches can be used if you intend to use rockwool for your entire growth cycle and don’t want to have to transplant.
How long does a marijuana seed take to root in rockwool?
Marijuana seeds grown in rockwool cubes usually germinate within a few days. If they still haven’t germinated after a week with proper moisture maintained in the cubes then your seed might be a dud.
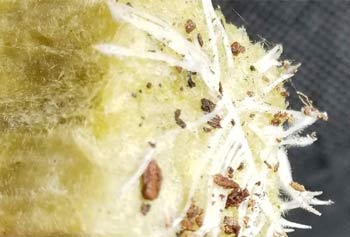
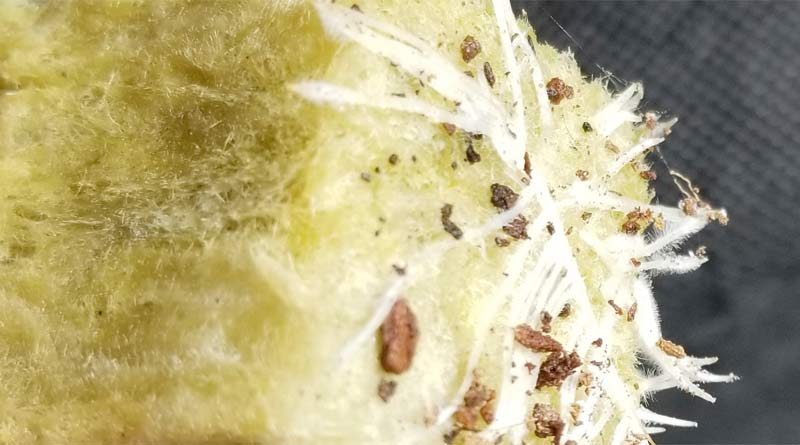
Once your seed germinates you’ll see two small leaves poke up out of the whole. These two leaves, called cotyledon leavers, are quickly followed by additional leaves that have the classic shape associated with cannabis plants. As the seedling grows taller the roots will continue to grow well. Eventually you’ll see white roots start to poke out of the sides.
Some growers use 2 seeds per rockwool cube, letting each sprout for a few days. They’ll then thin out the weaker seed by snipping it’s stem at the base of the cube (don’t pull out, it may damage the other seed’s roots). The benefit is that the grower is left with the strongest, most robust plants.
This method is great if you have a lot of female seeds, but for the average cannabis grower it is a bit wasteful. Particularly since if you’re using regular non-feminized seeds you’ll likely get 50% males, so you’ll want to grow each out individually so you can maximize the resulting female plants.
But if you’re looking to start seeds in rockwool that aren’t as expensive, such as tomatoes, then using two seeds per cube is good practice.
What type of lighting should be used for starting seeds in rockwool?
Seeds like germinating in warm temperatures, so the main function of the light when you start marijuana seeds in rockwool is to provide some warmth. Using a clear plastic humidity dome provides an optimal environment. Or cover cubes in plastic soda bottles with the bottoms cut off if you’re looking for a free DIY solution.
LED grow lights
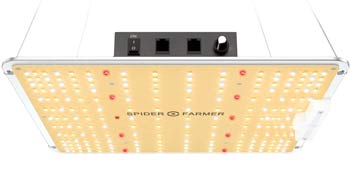
You can also use LEDs to grow seeds. Usually the cheapest LEDs you find on Amazon aren’t great for flowering plants due to low light intensity and lower quality diodes. But these lower cost lights are perfect for delicate seedlings.
A few small LED lights for seed growing to consider:
- Duralux 80-watt 2×1 foot LED is a cheap model for growers on a budget
- SpiderFarmer 2×2 foot LED grow light is a step up for small plants
- Mars Hydro 2×2 grow light is another mid-level option
If you’re planning to use your LED light for your complete cannabis grow you should invest in a higher wattage model with a dimmer for when the plants are small.
CFL lighting
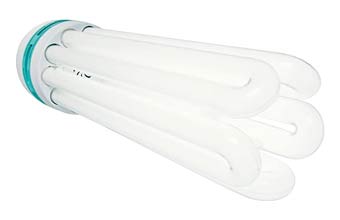
When vegetating young cannabis plants with CFLs we like to use a 125 watt CFL lighting fixture designed for growing seeds and clones. It works best when placed an inch or two above the top of the plants. They’re a cheap way to get started.
125 watt CFLs work great for clones too, and you can also use these for the vegetative stage on smaller plants. Avoid using CFLs for flowering – you need more light intensity. CFL bulbs produce thin, wispy bud growth.
Look for 125w bulbs or higher, and avoid the budget lower-wattage hardware store CFLs not designed for growing plants. They might be marketed as grow bulbs but the usable light for plants is minimal.
You’ll need to replace CFL bulbs once a year, depending on how often you use them. The usable portion of the light decreases over time. If you use a timer to have an 18-hour on, 6 hour off light cycle you’ll reduce electricity usage while extending bulb life 25% compared to running it full blast.
T5 fluorescent lights
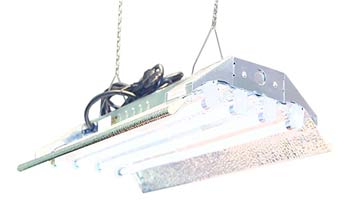
T5 fluorescent tube lights which are great for covering a tray of rockwool clones. Check out the Vivosun 2-foot T5 fluorescent light with 2 bulbs for a good T5 grow light option for germinating cannabis seeds.
Durolux makes a two-foot T5 grow light with 4 bulbs for about the same price as the Vivosun 2 bulb T5. It’s a cheaper brand but 4 bulbs provide better light coverage across a full sheet of rockwool cubes.
Like CFLs, you’ll need to replace fluorescent light bulbs every year. You can also buy LED replacement bulbs that fit into T5 fixtures. This is better if you intend to grow for a while since the LEDs never need replacing.
HID lighting: Metal Halide or High Pressure Sodium
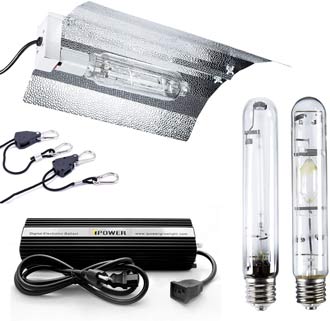
Avoid high-powered HID lighting such as 600-1000W Metal Halide (MH) or High Pressure Sodium (HPS) lights, they are far too intense for young seedlings.
400 watt or less will work, but you’ll need to put the light several feet from the rockwool cubes to lower the light intensity. Watch that the cubes don’t dry out under the warmth of the light. A dimmable ballast is helpful for young plants, and once roots are established you can turn up to 100%.
Metal Halide is the proper spectrum for growing young seedlings and for the vegetation stage. If you’re trying to use a single HID light setup for the entire lifecycle of your grow, look for a dimmable MH/HPS conversion ballast. This will let you grow seeds at a reduced light intensity using MH, turn up intensity for vegging out, and then swapping to the HPS bulb when you flip into flowering. If you’re only buying one bulb, get the HPS.
Sunlight
You can also germinate seeds the old-school way, putting them in a sunny window. Just make sure to avoid extended direct sunlight when the plants sprout to avoid killing them off, as the rockwool cubes can dry out very quickly in sunlight (especially the smaller 1″ x 1″ cubes).
Consider using a hydroponic rockwool system to avoid your rockwool cubes drying out too quickly.
Tips for germinating marijuana seeds in rockwool
Rockwool is very alkaline so you need to go 5.5 with the pH to balance it out. You’ll notice a few leaves emerge, at this point your marijuana seed has successfully popped in the rockwool cube. Monitor the rockwool for dryness and aim to keep it damp, adding additional pH 5.5 water, rooting stimulant, and a very light nutrient mix.
Avoid compressing the rockwool cube after soaking in water in step 1. You want to keep the fibers loose to allow the roots to easily penetrate them.
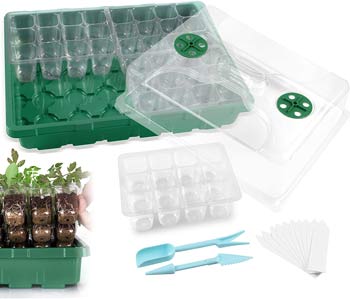
Using a heating mat underneath the tray of cubes can help speed up germination of weed seeds. Use a humidity dome to retain moisture and provide the proper environment for young plants.
Make sure to monitor your rooted weed seeds closely. Look for signs of nutrient deficiencies in the new leaves, which could be due to either too light nutrient mix or potentially nutrient lockout caused by improper pH.
pH issues in rockwool can be addressed by soaking the cube in 1 pint of pH 5.5 water with light nutrients and Rhizotonic. Adding the plant to the permanent medium will allow you to introduce a properly pH balanced environment for the roots to expand outside of the rockwool cube.
Should I use a heat mat with rockwool cubes?
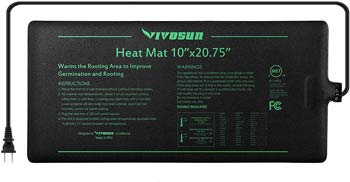
Heat mats speed up germination for cannabis seeds in rockwool. They’re generally inexpensive and are a worthwhile investment regardless of whether you’re growing in rockwool, soil, coco coir, or any other medium.
The Vivosun heat mat is a good value. It is 10″ x 20.75″, perfect for sitting under a standard sized plant flat with a humidity dome. We’ve used this mat dozens of times with good success.
A step up is the Vivosun heat mat and thermostat combo which allows you to fine-tune the temperature settings of your heat map.
If you need to buy the humidity dome and also need a heat mat, check out the Soligt tray with humidity dome and heat mat.
When to transplant rockwool seedlings
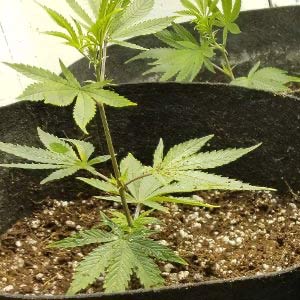 As your new marijuana plant sprouts from the rockwool cube it will begin growing roots. These roots will begin to poke out of the sides of the cube soon after the seedling emerges. Once your rooting system is growing strongly out the bottom and sides you’re ready to transplant rockwool seedlings.
One advantage to growing seeds in rockwool cubes is that they can be easily transplanted across most common growing mediums, such as soil, coco coir, and hydro methods such as Deep Water Culture (DWC).
Starting seeds in rockwool for soil grows allows you to just pop to rooted cube in the soil or soilless medium. If you’re growing in coco you can learn how to transplant seeds in coco coir here, it’s basically the same process.
Unlike some other methods, rockwool cubes let you closely monitor the growing roots, which makes it easy to know when to transplant rockwool seedlings into your final growing medium.
How to use rockwool in hydroponics
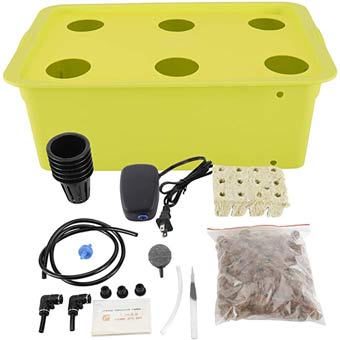
In hydroponic growing the plants’ roots get their nutrition directly from the watering solution. So you can use rockwool in hydroponics to start seeds, and you can move to larger sized rockwool cubes once rooted.
Using rockwool in hydroponics for the entire grow cycle isn’t a method used often by first time growers, as there isn’t as much wiggle room in having the cubes dry out vs. using something more forgiving like coco coir. But since the rockwool dries out easily and can also absorb a lot of water given the size, so you can grow some very strong root systems which in turn can generate large yields of cannabis per plant.
You can also use rockwool to start seeds and then transfer to other hydroponics systems. This includes direct water culture (DWC), coco coir, wick systems, nutrient film technique (NFT), ebb and flow, drip systems, or aeroponics. Once you use rockwool to start seeds and you see healthy roots poking out the sides and bottom you’re ready to transfer into your hydro system.
What is rockwool (definition)?
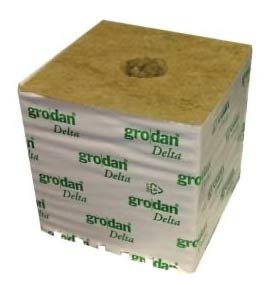
Rockwool is made by melting a mixture of chalk, rock, and sand at very high temperatures. Air is blown through the molten mixture similar to making cotton candy, resulting in a mineral wool with long fibers that are capable of holding a lot of liquid. This makes rockwool a great medium for germinating cannabis seeds and growing hydroponically.
Rockwool is a man-made substance and it doesn’t break down, so it’s not the best for the environment. Avoid breaking up the cubes and breathing in the small fibers, they’ll damage your lungs.
Best nutrients for starting seeds in rockwool
The best nutrients for starting seeds in rockwool are light mixes of standard hydroponic nutrients. Most of the commercially-available hydroponic nutrient companies will work fine; it comes down to personal preference, budget, and other considerations such as whether you want to grow organically.
Go very light, start with a 25% strength mix. Work your way up to 50%. You don’t want to overdo nutrients when germinating in rockwool, the new seedlings’ roots are very delicate.
Several companies make special nutrients specifically for germinating seeds, but most hydroponics nutrients meant for cannabis will work fine when mixed at a light dose. Including a rooting stimulator is ideal to help grow out a strong root system as quickly as possible.
Use a rooting enhancer such as Canna Rhizotonic once roots appear to encourage fast, healthy root growth.
When to start feeding seedlings in rockwool
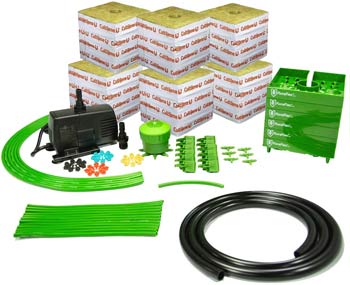
The best time to start feeding seedlings in rockwool is as soon as the roots begin growing. Once you see the first set of cotyledon leaves plant emerge from the cube you should provide a light dose. As the roots poke out the sides of the cube a stronger root system is searching for nutrition so you can increase to a 50% mix of cannabis nutrients.
Since rockwool is a hydroponic growing medium the plants will need to get all of their nutrition directly from your nutrient solution. But the new roots will be fragile so you’ll need to monitor your new seedlings closely to make sure you’re not over or under-doing it.
Watch your leaves for nutrient burn which can be seen when the tips yellow. If the whole plant is a very light green or it starts to yellow then up the nutrient mix accordingly.
How to care for seedlings in rockwool
The most important considerations for caring for seedlings in rockwool is to go easy. Avoid harsh light. Use light nutrient mixes. And don’t let the rockwool cubes fully dry out.
Check moisture levels daily. Lift the cubes to monitor water levels. Seedlings grow best in light moisture since they’ll grow roots to seek out more water. But if the rockwool cubes dry out fully you risk killing the seedlings. The most important tip for beginners is to check them daily. It’s better to have a wet cube than a dry one.
Does rockwool grow mold?
Rockwool mold issues are usually related to an overly humid environment. Fragile seedlings absorb moisture from the air through their leaves, so using humidity domes help maintain proper conditions. But if your humidity dome is completely covered inside with condensation you risk mold. Open vents on top of the dome, and if need be wipe inside down with a dry paper towel.
If you notice white fuzz forming where the seedling stem exits the rockwool cube then take action immediately!
Algae on rockwool cubes
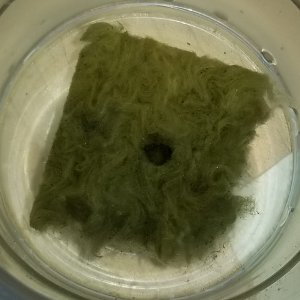
You may also notice dark green forming on your cubes – in that case you have algae. The moisture rockwool holds provides a nice environment for it, but algae on rockwool cubes isn’t a huge deal. You can prevent algae on rockwool by covering the surface to block light from hitting the cube, without light the algae cannot live.
Starting seeds in rockwool for soil
One of the advantages of knowing how to start seeds in rockwool is the ease in which you can transplant to other growing mediums such as soil. If you’re starting seeds in rockwool for a soil grow, follow the steps above to germinate seeds. Once roots poke out the sides you’re ready to transplant. You can just place the whole cube into a small hole in your growing container’s soil. Don’t try to break up the cube after the seed germinates or you risk damaging the fragile root structure.
My weed seeds have rooted in rockwool – what next?
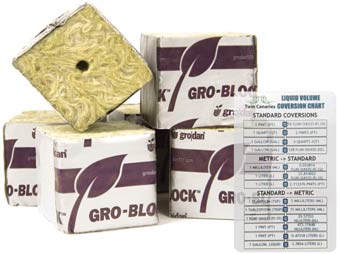
Once your weed seeds have rooted in your rockwool cube you’re ready to plant them or add them to your hydroponic setup. Knowing when to transplant rockwool seedlings is easy to judge – once the roots poke out from the cube you’re ready to go.
Learn how to choose the best growing medium for your weed plants
If you’re new to growing and are looking for an easy medium to grow in, you can use soil or you can consider using coco coir. Coco provides the quick, robust growth of hydroponics while being somewhat forgiving.
Can rockwool be reused?
Rockwool can’t be reused for seedlings since in order to remove the new plant you’d need to break the cube apart. The cubes are very inexpensive, don’t be a cheapskate.
Summary
Growing weed seeds in rockwool cubes is an easy way to start your cannabis plants. The techniques for how to start seeds in rockwool are the same for cannabis seeds as they are for other types of seeds.
Marijuana seeds typically germinate within a few days in rockwool cubes. It’s important to properly pH the nutrient solution to 5.5 to balance out the higher pH of the rockwool, this provides the slightly acidic conditions that marijuana thrives in. Proper lighting is needed, and once roots appear a light mix of nutrient solution will deliver necessary nutrition to the growing seedling. Once roots are established you can then transfer your seedlings.
