This week-by-week guide to the cannabis flowering stages will help you understand the different requirements throughout flowering to maximize your weed plants’ yields and bud quality.
The flowering phase is a pivotal period that sets the stage for the final product’s potency, flavor, and aroma. This guide will help both indoor and outdoor growers to navigate the intricacies of each flowering week, ensuring that every bud reaches its full potential.
We’ll show you pictures of flower development so you can tell when flowering starts outdoors. You’ll learn how to care for your plants each week of flowering, what to avoid, and how to deal with problems that come up along the way.
The images and descriptions of plant appearance will help you identify the first signs of flowering stage. You’ll also learn about metabolic changes, and see crucial tips for promoting optimal health and bud quality.
This guide is written based on plant development for a strain with an 8 week flowering cycle. We’ll also show you images of flowering development for 9-week strains. If you’re nurturing a 10, 11, or 12 week strain or beyond, the key weeks for bud development begin later. So you’ll need to tailor your care to your specific strain’s needs.
This guide will show you how to care for plants through all the cannabis flowering stages, from understanding when flowering starts through harvest.
Preparing for the Transition to Flowering
The transition from the vegetative stage to the flowering stage marks a pivotal moment in your cannabis cultivation journey. As your plants approach flowering, there are several key steps to take to ensure a smooth and successful transition. You want to make sure your plants are as healthy as possible when you transition to flowering, with strong and robust root systems to maximize future bud development.
Light Schedule Transition
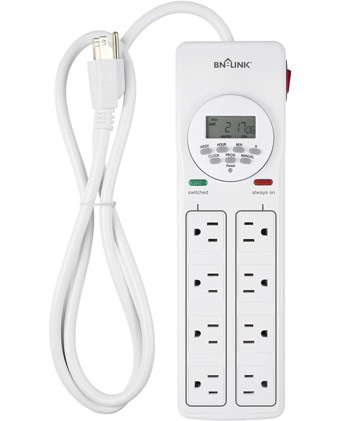
A light timer allows indoor growers to change the light schedule to 12-on, 12-off to initiate flowering in cannabis plants.
For indoor growers, it’s easy to adjust your light timer to initiate the flowering phase. Simply switch from a 12-hour light and 12-hour dark cycle from 18-6 to signal to your plants that it’s time to redirect their energy towards bud development.
This shift mimics the natural light changes that occur during the changing seasons, prompting your cannabis plants to begin their reproductive journey. Indoor growers have it easy since they will always know the exact day flowering has begun.
For outdoor growers knowing the exact moment when flowering begins is a bit more complex. Outdoor flowering is dictated by the sun’s natural cycle and can vary based on your location. The challenge for outdoor growers lies in precisely determining which week of flowering your plants are in, a task complicated by varying weather conditions and sunlight exposure.
Below we have included lots of pictures of cannabis plants at each week of flowering so you can compare them to your own plants to better understand how to identify the cannabis flowering stages.
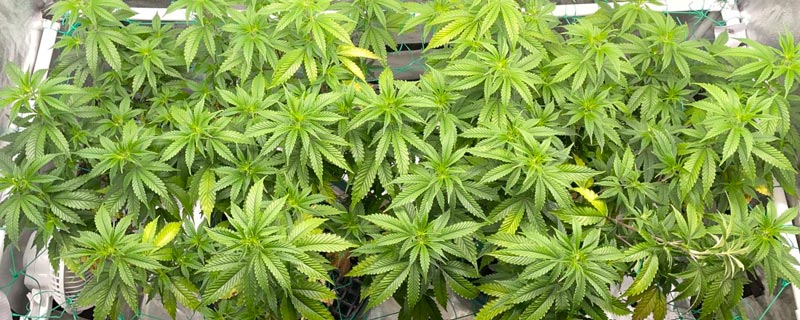
Two Sundae Driver plants in a Screen of Green setup, pre-defoliation, one day before flowering is initiated. The photos below show before and after the defoliation process.
Pre-Flowering Defoliation
Defoliation is the process of removing leaves and scraggly growth from your plants. Three days before you initiate the 12/12 light cycle, indoor growers should perform a modest defoliation of your plants.
Removing some of the larger fan leaves can help increase light penetration to lower bud sites, where light may have been limited during the vegetative phase. Focus on removing leaves and thin growth tips that don’t receive adequate light. Also remove any yellow or brown leaves. This will help increase airflow and allow the plant to focus bud development where it receives the most light. Use sharp plant shears and sanitize blades after every plant to avoid spreading disease.
Side view of the Sundae Driver plants at the end of the vegetative stage, pre-defoliation.
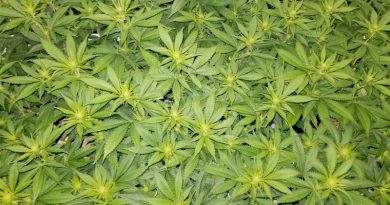
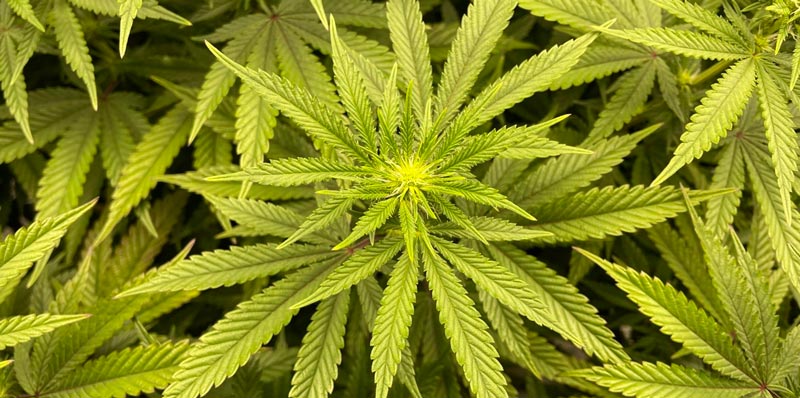
Indoor growers should employ plant training techniques throughout the vegetative phase to build a wide, flat canopy to maximize light exposure. For outdoor growers, topping your plant earlier in the vegetative light cycle will allow it to produce wider, bushier growth with multiple colas. If you didn’t top your plant or employ training techniques, your plants will have a pyramidal shape with one large central cola.
As a best practice when defoliating make sure to thin out your plant gently in the lower interior throughout vegetation, even if you can’t predict the exact date flowering will initiate. This ensures that you don’t need to defoliate too heavily later on once flowering is underway.
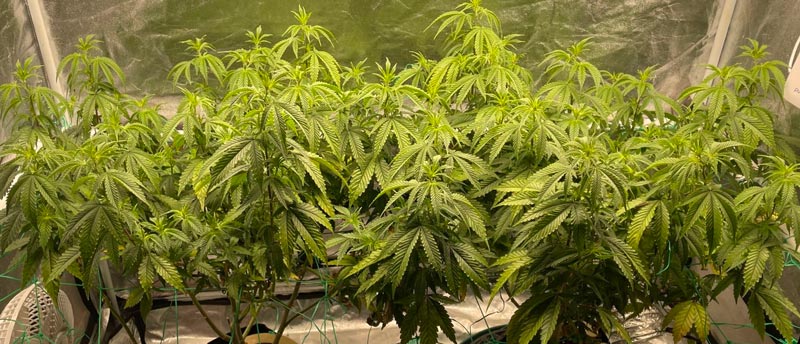
The Sundae Driver plants after defoliation. Lower growth was lollipopped and fan leaves were thinned out throughout the canopy.
Knowing the best time to defoliate during flowering encourages more even canopy development and sets the stage for healthier bud growth later on. However, be cautious not to overdo it; your plants still need leaves for photosynthesis during the flowering phase. Too much stress is never beneficial.
After the initial defoliation 1-3 days before flowering, we like to do a second defoliation at the end of week 3, 21 days after flowering begins. If you defoliate too late beyond week 3 you force the plant to devote energy to something other than bud development, something best to avoid. Some growers employ a heavy defoliation approach (one form of which is known as schwazzing), but this is best left to expert growers.
You still should continue to thin out fan throughout flowering. Focus on leaves blocking light from major bud sites, and to make sure to allow for adequate circulation in the middle of the canopy to avoid humid spots that can lead to PM, mold, or other problems.
Two Sundae Driver plants 3 days into flowering, 4 days after defoliation. Note how the plant has responded with robust growth to fill in the areas that were thinned out..
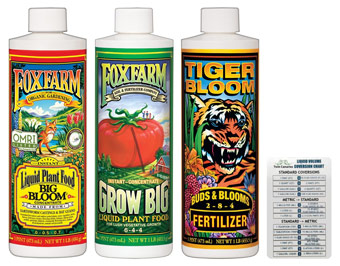
Transitioning from the vegetative to flowering stage brings about changes in nutrient requirements. Cannabis plants demand higher levels of phosphorus and potassium during the flowering phase to support robust bud formation and resin production.
Begin gradually transitioning to a bloom-specific flowering nutrient formula that provides the right balance of essential nutrients for flowering. Begin upping the nutrient levels as soon as signs of flower formation are noticeable, not the day after flipping to 12-12 lighting.
Follow the feed schedule for your nutrients as a starting point, and monitor your plants closely. If plants begin to yellow or show other signs of nutrient deficiencies, increase your mix. If you notice yellow tips on your fan leaves which indicate the start of nutrient burn, back off your mix a bit. Your best bet is to use as little nutrients as possible to ensure healthy growth. Using too much nutrients doesn’t equal better plants. Different weed strains have different nutrient requirements, so you’ll need to learn to dial it in for your strain for best results.
Not sure which flowering nutrient line to use? Learn more about cannabis nutrients. There’s a ton of options out there at varying price points. Try to stick with whatever line you choose for a while so you can learn to make adjustments to the feed chart based on what your plants are telling you.
Pest Prevention and Cleanup
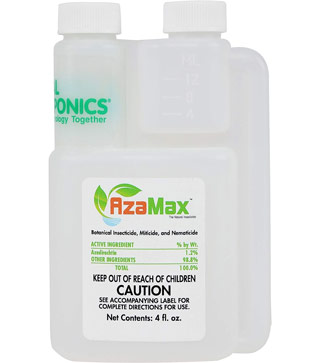
Azamax can be used to control cannabis pests during flowering. It is an insecticide, miticide, and nematicide.
Before your plants enter the flowering phase, it’s essential toensure that your growing environment is free from pests and diseases. Perform a thorough inspection of your plants and their surroundings, addressing any issues before they can potentially escalate during the flowering period. Remove yellow or damaged leaves, and look for signs of infestation. A clean and healthy environment sets the foundation for successful bud development. Indoor growers should sanitize all surfaces of their grow room or grow tent.
If you notice a problem with pests or diseases, indoor growers should delay initiating flowering until things are under control. Much easier to treat during vegetation.
For outdoor growers, consider an integrated pest management (IPM) strategy using multiple control approaches throughout vegetation and flowering to prevent problems before they appear. Proactive powdery mildew prevention is also critical for outdoor growers, particularly later in flowering. Stay vigilant.
Temperature and Humidity Control
The Govee wifi thermometer and humidity meter tracks temperature and humidity on a phone app, a cheap way to keep track of environmental conditions for your plants.
As your plants transition to flowering, maintaining stable environmental conditions becomes even more critical. Fluctuations in temperature and humidity can stress your plants and impact bud development.
Aim for temperatures around 68-78°F (20-26°C) during the day and slightly cooler temperatures at night. Additionally, maintaining humidity levels between 40-50% helps prevent mold and mildew issues as the buds begin to form. This is much easier indoors, where you have total control. Outdoor growers will need to watch weather conditions and employ close observation to catch problems early, when they’re easier to solve.
By taking these proactive steps in the weeks leading up to the flowering phase, you set your cannabis plants up for a successful transition and ensure they have the best possible start to their journey towards bountiful and potent buds. Remember, each decision you make during this critical period contributes to the ultimate quality of your harvest.
Day 3 after the switch to 12-12 lighting and at this point there are no noticeable changes to these Pink Lemonade plants, an 8-9 week strain.
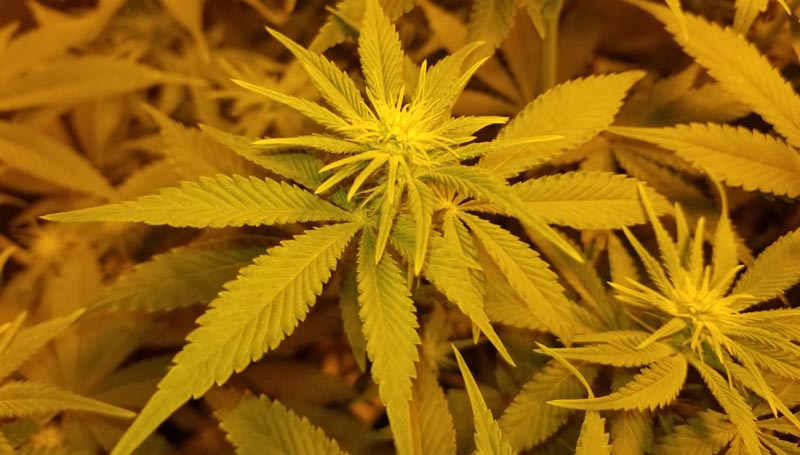
Week One Flowering – The First Signs of Flowering Emerge
Changes to Plant Appearance:
Plants may show initial signs of small white pistils (hairs) emerging from the nodes. Usually this change appears between the end of week one flowering through week two. You may not notice any significant changes by the end of week one, but they’ll be coming soon.
Noticing the changes to pistils at the end of week one of flowering is the easiest way to identify the first signs of flowering stage for cannabis plants. Write down this date so you can align your flowering nutrient feed chart.
Growth of new leaves may slow down, while the focus shifts to flower development.
Plants will continue to stretch for a few more weeks. Indoor growers should make sure to continue raising their lights as the plants grow to maintain the optimal distance from lights.
Metabolic Changes:
Hormonal shift triggers the transition from vegetative to flowering stage.
The plant redirects energy towards bud production and resin development.
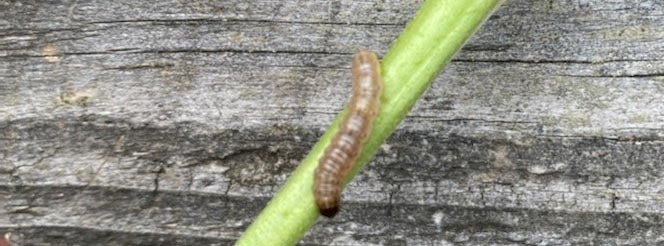
Inspect plants daily before and throughout flowering for signs of infestation, particularly if you’re growing outdoors. Caterpillar infestations should be treated with Bacillus thuringiensis (BT).
Tips for Maximizing Plant Health and Quality:
Quality LED lights such as this 460 watt SpiderFarmer LEDdeliver the strong light intensity that is necessary for dense, quality flower development.
Lighting: Make sure to adjust the daily lighting schedule to 12 hours on followed by 12 hours of uninterrupted darkness to stimulate flowering. Avoid like leaks or interruptions during the dark cycle.
Nutrients: Begin transitioning to a bloom-specific nutrient formula rich in phosphorus and potassium. Slowly ramp up PPMw over weeks 1 and 2, once the first signs of flowering are observed.
Indoor growers do not need to start the heavy application flowering nutrients the moment they adjust to 12-12. Wait until signs of pistil development to indicate the flowering process has begun.
Outdoor growers can monitor pistil development to judge when to increase flowering nutrients and bloom enhancers. The best way to properly line up outdoor cannabis plants with nutrient feed charts is to time it with the first signs of the flowering stage.
Pruning: Trim any lower leaves that receive minimal light to encourage energy distribution to upper buds. Tuck fan leaves to allow better light penetration to growth tips where flowers will form.
Pest Prevention: Inspect plants for early signs of pests like spider mites or aphids, which can harm developing flowers. Be particularly vigilant outdoors, inspecting plants closely EVERY DAY throughout all stages of flowering.
If you notice bugs, attack them hard right away. Alternate multiple insecticides based on the pests’ reproductive schedule. For example, alternate and initial spraying of Green Cleaner with Azamax and then insecticidal soap every 3 days, liberally covering all plant surfaces. For caterpillars on outdoor plants, use BT concentrate. Apply using a small pump sprayer.
If you must spray flowering weed plants, it’s way better to hit plants hard the first two weeks before buds form. You don’t want to be spraying buds after week 2 if possible unless you want to douse your newly formed buds with insecticides. This is why it’s so important to closely observe plants daily and treat problems promptly.
Humidity and Airflow: Maintain proper humidity levels (40-50%) and ensure good air circulation to prevent mold and mildew growth.
Outdoor growers in rainy environments can cover their plants to avoid problems associated with wet leaves and limited airflow. If it’s really wet or humid, increase defoliation and try to thin out thin, twiggy branches with leaves that overlap larger ones.
Indoor growers should control humidity in grow rooms with a dehumidifier. Tent growers should dehumidify the room where they keep the tent, and ensure plenty of ventilation to keep tent levels in the correct range.
Watch Out For:
Pay attention to leaves to look for signs of nutrient deficiencies during the flowering stage.
Stretching: Monitor for excessive stem elongation if growing indoors to avoid plants getting too close to your lights. Adjust low light intensity and reduce distance from light to prevent tall, weak stems.
Nutrient Deficiencies: Keep an eye out for yellowing leaves, a sign of potential nutrient imbalances. Adjust nutrients accordingly.
Bugs: Check daily for insects that could take advantage of the plant’s vulnerable transition phase. Make sure to check all parts of your plants.
Diseases: Be cautious of fungal diseases due to increased humidity in some setups. This is especially critical for outdoor growers in areas with lots of rain or humidity.
Light Leaks: Ensure complete darkness during the 12-hour dark period to prevent light stress. Outdoor growers have less control over this, but should be careful to locate plants away from light sources other than the sun.
By proactively addressing potential issues and nurturing your plants through this critical transition early in the cannabis flowering stage, you’re setting the stage for a successful flowering journey ahead.
First Signs of Flowering Stage
When does flowering start outdoors? This depends on your location and environment. The best way to tell when flowering starts for outdoor cannabis plants is to monitor growth tips. Pay attention to the pictures below to identify the first signs of flowering stage for outdoor weed plants. As pistils emerge, you’ll know flowering has begun.
This is also the time that male plants will begin showing development of pollen sacs. If you’re growing from regular seeds or bag seeds and don’t know whether your plants are male or female, pay attention and kill male plants immediately to prevent unwanted pollination of females which will lead to seedy buds. 50% of regular seeds will likely be male. Don’t ignore this step. If you’re using female clones or feminized seeds you don’t have to worry about this.
Once the first signs of flowering stage development have emerged, you should begin ramping up PPMs on your flowering nutrients. Follow the directions for your nutrient line based, aiming for a light mix feed schedule.
Look closely at plants to see signs of nutrient deficiencies, or burnt tips indicating nutrient burn from too heavy PPMS. Make sure to properly pH your water to ensure proper absorption of nutrients by the cannabis plants.
Day 8 for the Pink Lemonade plants. Look closely for the changes to the growth tips. Outdoor growers who see these changes in their plants will know that flowering is likely early in the second week.
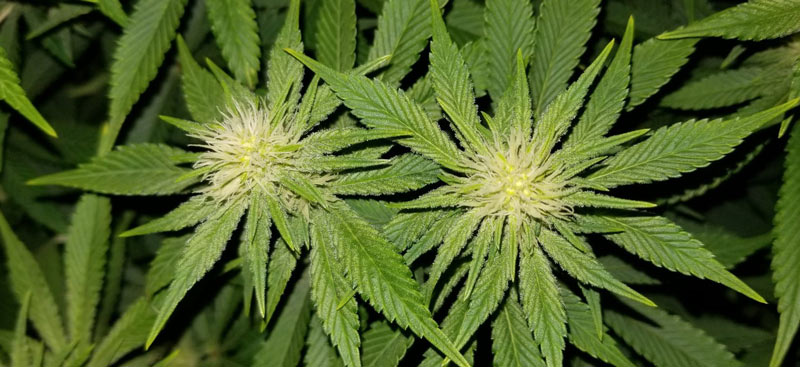
Week Two Flowering – Building the Foundation
Changes to Plant Appearance:
Buds start to form at the nodes and gradually increase in size. This usually happens around the middle to end of week 3 for 8 or 9 week strains. For 10 week stains, this is delayed. For 12 week strains and beyond, can take even longer.
Pistils become more prominent and abundant, looking like little white cotton balls on growth tips.
Leaves may begin to exhibit new growth patterns as energy shifts towards flowering sites.
Plant stretching continues.
Metabolic Changes:
Continued focus on bud development and resin production.
Plant devotes resources to strengthening branch structure to support growing buds.
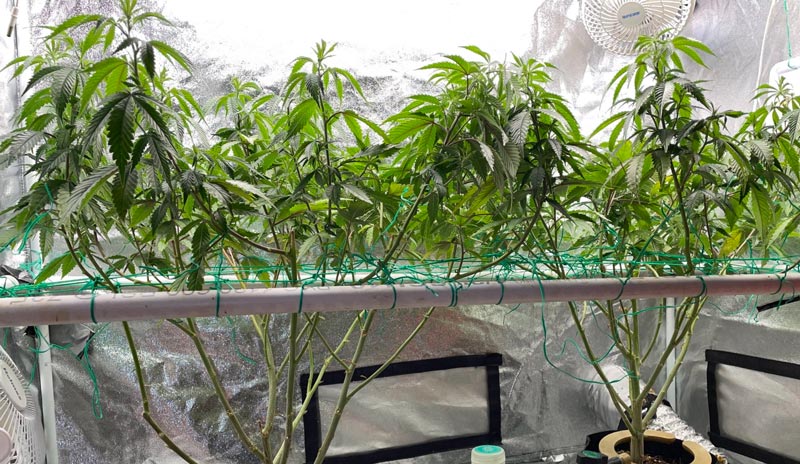
11 days into flowering and these plants are stretching. Indoor growers should make sure they plan for their plants to stretch to allow adequate distance from grow lights.
Tips for Maximizing Plant Health and Quality:
Once the first signs of the flowering stage are observed you should being using bloom enhancers such as Advanced Nutrients Big Bud.
Light Management: Ensure consistent and appropriate light intensity. Monitor for signs of light stress like bleaching or heat damage. Make sure plants don’t stretch into the lights.
Support: Use stakes or trellises to provide support for heavy buds and prevent branches from breaking. If using a screen of green, continue to tuck grow tips outward to maintain a flat, even canopy. Learn more about screen of green setups. Don’t wait until large, sticky buds have developed before setting up trellis netting. It’s much easier to plan out plant support before bud formation has begun.
Nutrient Adjustment: You will continue to ramp up flowering nutrient levels in week two. Regularly monitor PPM of nutrient levels and pH. Adjust as needed to prevent deficiencies or excesses. Begin using bud enhancers or sweetening agents once the first signs of flowering stage are observed, such as Advanced Nutrients Big Bud, Humboldts Secret Sweet & Sticky, or Canna Boost.
Defoliation: Assuming you defoliated a few days before initiating flowering, you won’t need to do much defoliation during week two. However if you have fan leaves blocking bud sites, you’ll need to remove them. Outdoor growers may opt to continually defoliate lightly through the first few weeks of flowering if they aren’t able to more heavily defoliate right before flowering begins.
Training: Utilize low-stress training techniques to guide branch growth and promote even canopy development. You want to allow room around branches and bud sites to allow for good air movement, so spread out the canopy if needed to improve airflow. Eventually you may need to support longer branches with heavy colas later in flowering, so prepare for this now.
Pest Scouting: Continue vigilant pest monitoring to catch any infestations early. Week two is still a good time to treat plants since your buds haven’t really formed yet.
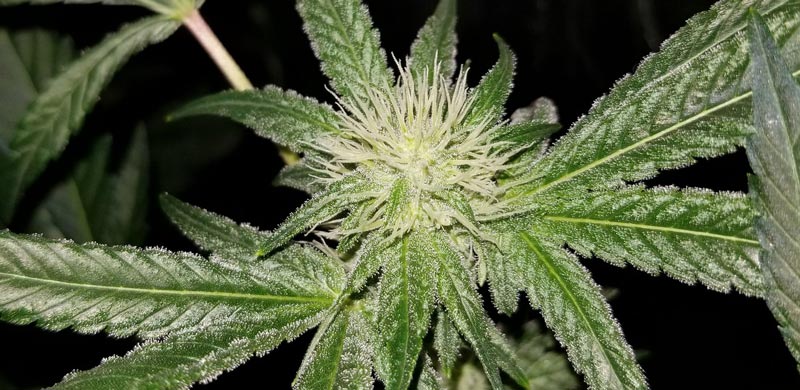
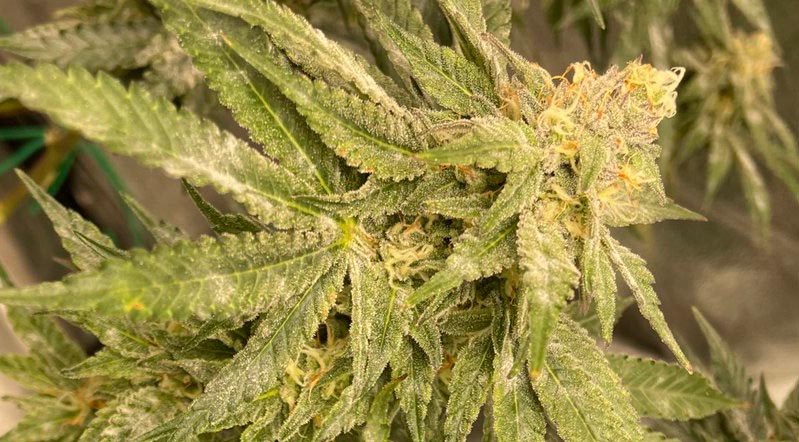
Closeup of emerging pistils on day 13 for this Sundae Driver plant, an 8 week strain.
Watch Out For:
Look closely for signs of spider mites during flowering stage, and if found you must treat them immediately.
Male Plants: If you are growing from regular seeds, you need to look for male plants and immediately remove them to avoid having them pollinate your female plants and create seeds. Look for small pollen sacks or “bananas” growing where the pistils are located on female plants. If you notice them after they have opened, spray the area with water to neutralize the pollen and then remove plants immediately. If you’re using feminized seeds or female clones you won’t have to worry about sexing plants, which is much easier for beginner growers.
Insects: Find them early and treat them early.
Over-Pruning: Be careful when defoliating; removing too many leaves can hinder photosynthesis and stunt growth.
Nutrient Burn: Avoid overfeeding your plants, as excessive nutrients can lead to burnt leaf tips and hinder growth. You’ll continue ramping up nutrients heavily in weeks 3-5, but at this point in week two you’re still not maxing things out.
Branch Breakage: If buds become too heavy later in flowering, weak branches can snap. Provide adequate support to prevent this now.
As your plants continue to transition through the flowering phase, your attention to detail and proactive care will contribute to the development of healthy and robust buds. By the end of week two your plants will show noticeable pistil growth.
The pink lemonade strain on day 14, at the end of flowering week two.
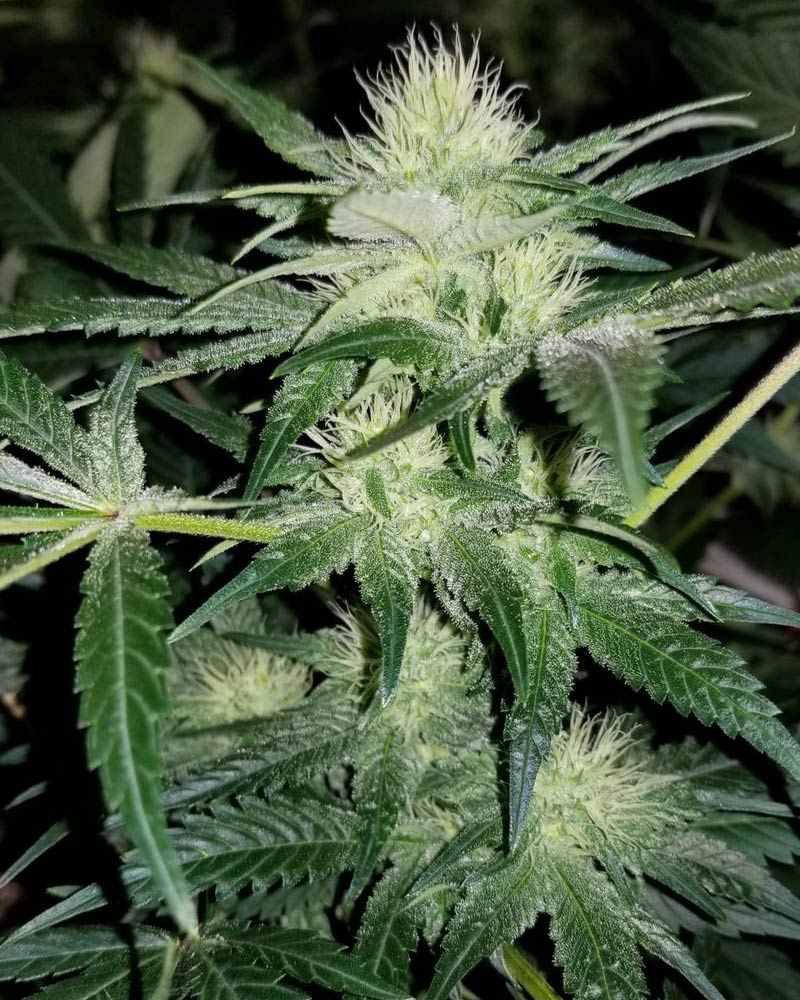
Week Three Flowering – Bud Growth in Full Swing
Changes to Plant Appearance:
Buds continue to grow longer and visibly swell, becoming more densely covered with trichomes.
Plant stretching continues, usually wrapping up by the end of week 4.
The plant’s aroma becomes more pronounced as terpenes develop.
Pink lemonade (an 8-9 week strain) showing flower development at day 17, in the middle of week three.
Metabolic Changes:
The plant is in full flower production mode, focusing on bud growth and resin secretion.
Trichomes continue to develop, containing cannabinoids and terpenes.
Stretching continues for the pink lemonade weed plants on day 20.
Tips for Maximizing Plant Health and Quality:
A PPM Meter will allow you to monitor how you’re ramping up flowering nutrient mixes in accordance with the recommended feed schedule. It’s a must for serious growers.
Light Intensity: Ensure adequate light. As plants stretch, indoor growers should monitor for proper distance between lights and plants to avoid light burn on dense buds.
Nutrient Monitoring: Ramp up flowering nutrients further during week 3 of flowering. Regularly check pH and nutrient levels to prevent imbalances that can impact bud development.
Temperature Regulation: Keep temperatures steady; avoid drastic fluctuations that can stress the plant. Outdoor growers should make sure that excessive heat spells don’t over-stress the plant
Odor Control: Use carbon filters indoors to manage the strong odor that develops as buds mature. Outdoor growers can just pretend that there’s a skunk in the area if curious neighbors mention anything.
Defoliation: Indoor growers who defoliated just before flowering will be ready to defoliate again at the end of week 3, around day 21. Remove large interior fan leaves, leaves blocking key bud sites, overlapping leaves which cause moisture issues, and any wispy bud undergrowth that will not receive enough light to properly develop. While light selective defoliation can continue throughout the flowering phase, you don’t want to defoliate too heavily beyond week 3 or it will negatively impact the plant’s focus on bud development.
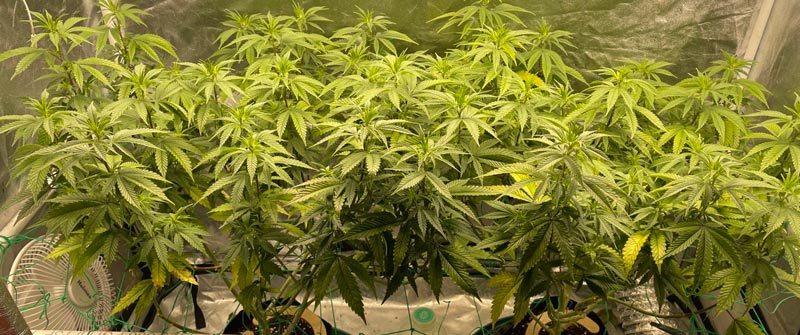
Pink lemonade weed plants at the end of the third week of flowering on day 21, before defoliation. Note the lack of light penetration in the middle and lower areas of the plant.
The same plants immediately after a heavy defoliation, on day 21 after flowering was initiated.
Here are the pink lemonade plants 3 days after defoliation, on day 24 in the middle of week 4 of flowering. Note how quickly they filled in.
Watch Out For:
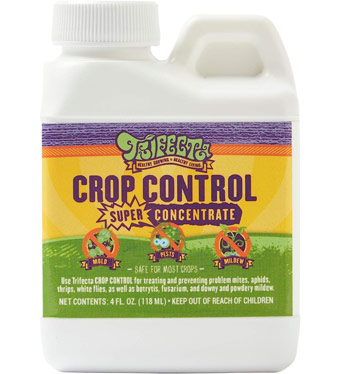
Kill powdery mildew using products such as Trifecta Crop Control or other products meant for flowering cannabis plants.
Mold Risk: With increased bud density, humidity control becomes crucial to prevent mold growth. Ensure air circulation on lower and interior areas of the plant. Indoor growers can increase fans. Outdoor growers can use fans, especially if growing in a greenhouse or hoop house. If you discover signs of powdery mildew, treat it with a product such as Trifecta Crop Control.
Nutrient Burn or Nutrient Lockout: As you ramp up nutrient levels through week 3, observe leaves closely for signs of nutrient burn or nutrient deficiencies. Be aware that some symptoms which appear as deficiencies can actually be caused by nutrient lockout caused by incorrect pH levels, hindering nutrient uptake. Make sure to correctly pH all nutrient mixes for best results.
Trichome Damage: Handle plants carefully during maintenance to avoid damaging delicate trichomes that house cannabinoids and terpenes.
Pest Persistence: Continue regular pest checks and intervene immediately if you spot any unwanted visitors. By week 3 it-s make or break time for pesticides. If you haven’t caught them and stopped them before now, you’ll end up spraying developed buds which is never ideal. Don’t wait until you see buds covered in webs before you try to treat spider mites in flowering. By then it’s too late.
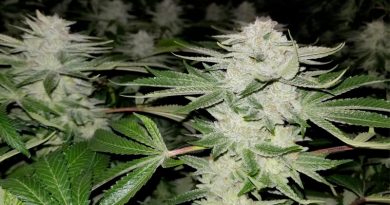
Sundae Driver bud development on day 17, the middle of week three of flowering.
This stage marks a significant shift as your buds bulk up and start to show their true potential. With careful maintenance and attention, you’re on your way to a successful harvest. Focus on minimizing plant stress and making sure they’re getting enough nutrients.
Pistil development on cannabis plants at the start of week four of flowering (day 22) on Blissful Wizard, a 9–10 week strain.
Week Four Flowering – Time to Bulk Up
Changes to Plant Appearance:
Buds continue to expand, often forming dense, colas (clusters) at the top of branches.
Trichomes become more pronounced, glistening with resinous goodness.
Final plant height is achieved
Bud development 24 days into flowering in the middle of week four for this Blissful Wizard weed plant.
Metabolic Changes:
Cannabinoid and terpene production reaches its peak in the trichomes.
The plant directs energy towards resin production, making buds stickier and more potent.
Day 25 of flowering for the Pink Lemonade plants.
Tips for Maximizing Plant Health and Quality:
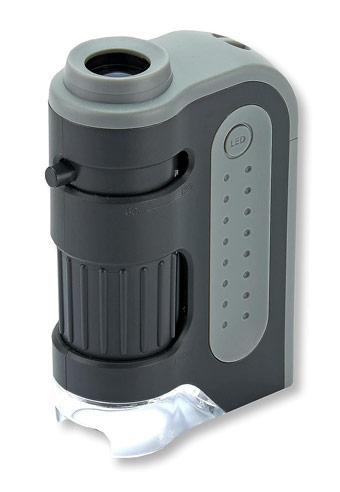
If you don’t already have one, now is the time to order a cheap LED microscope such as this Carson MicroBright 60x – 120x. You’ll need one to monitor trichomes to harvest at peak potency.
Ramp Up Flowering Nutrients: Weeks 4 and 5 are when you’ll max out your nutrient PPM to meet the needs of your hungry weed plants in the middle flowering stages. Monitor leaves daily to observe for signs of over- or under-nutrition.
Light Spectrum: Consider adjusting your lighting spectrum for enhanced resin production. More red and far-red light can stimulate trichome development, similar to the changes to sunlight as the angle of the sun lowers in the
Environmental Stability: Maintain stable environmental conditions to prevent stress-related issues during this crucial phase. For outdoor growers in areas where fall weather may impact plants, consider covering plants to limit moisture on buds.
Plant Support: Strong winds can be brutal on long branches with heavy buds, so make sure you have adequately supported your plants for the duration of the grow since buds will continue to bulk up during weeks 4 and 5.
Trichome Observation: Use a magnifying glass or digital microscope to closely monitor trichome development. Harvest timing depends on trichome color. It’s much too early now in week 4. But it’s helpful to start to see what clear trichomes look like at this stage. Plus it’s exciting to watch the new stalks develop mushroom heads as flowering progresses.
Sundae Driver, and eight week strain, shown at day 24 in the middle of week four.
Watch Out For:
Bud Rot: Regularly inspect buds for signs of bud rot (gray mold), especially in dense colas. If noticed, remove immediately before additional plants are contaminated.
Pests such as Spider Mites, Thrips, or Aphids: Continue to monitor for insects daily. It is much harder to treat bugs in week 4 of the flowering cycle and beyond without spraying buds. To make it easier to identify pests on your plants, consider placing yellow insect sticky traps below your plants.
By this point, your plants are in the midst of an aromatic trichome transformation. Keep a close watch, as the impending harvest window approaches and the buds reach their prime potency and aroma.
The start of week five of flowering for the Pink Lemonade plants (day 29).
Week Five Flowering – Bud Development Is Cranking
Changes to Plant Appearance:
Buds continue to swell and become more dense, resinous, and aromatic.
Trichomes mature further.
Plant stretching has ended, and the plant’s energy is devoted to maturing buds.
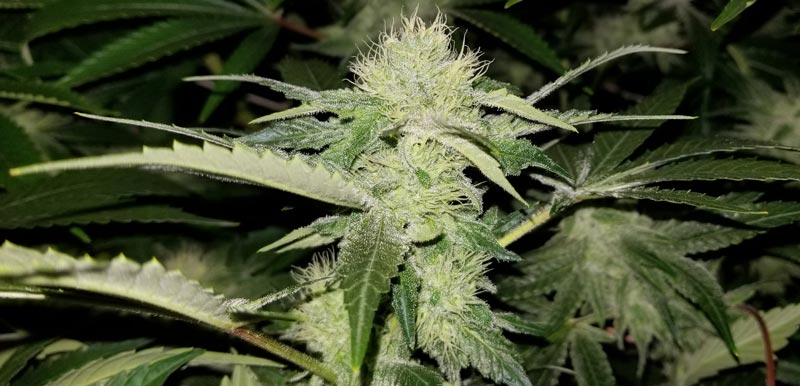
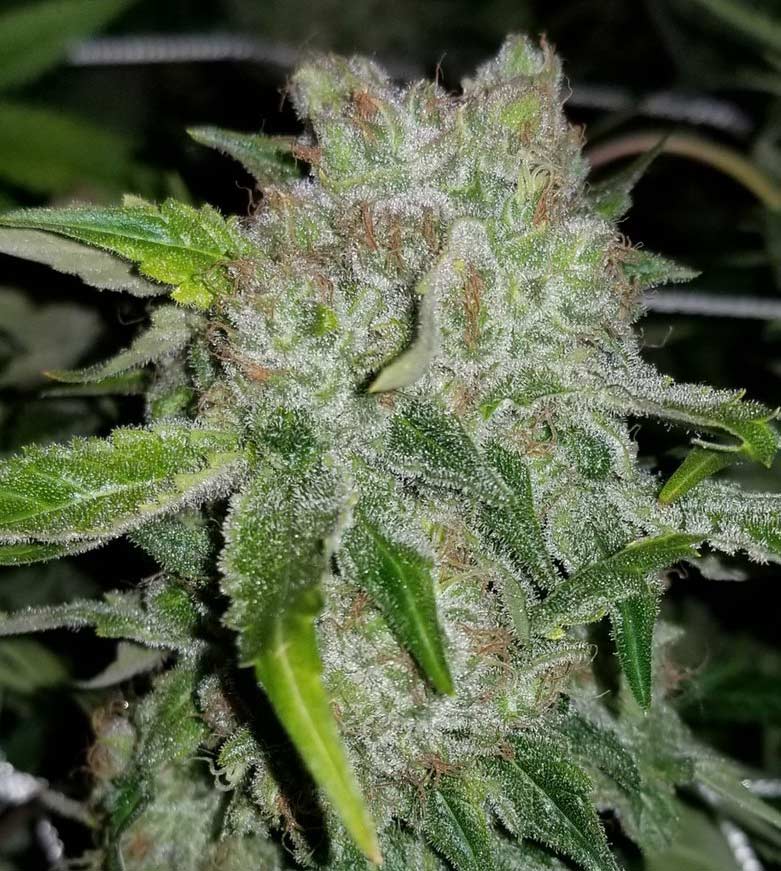
AK-47 (an 8-8.5 week strain) 31 days into flowering, in the middle of week five.
Metabolic Changes:
The plant shifts focus to ripening the buds and accumulating cannabinoids, terpenes, and flavonoids.
Trichomes reach peak resin production, contributing to the potency and aroma of the buds.
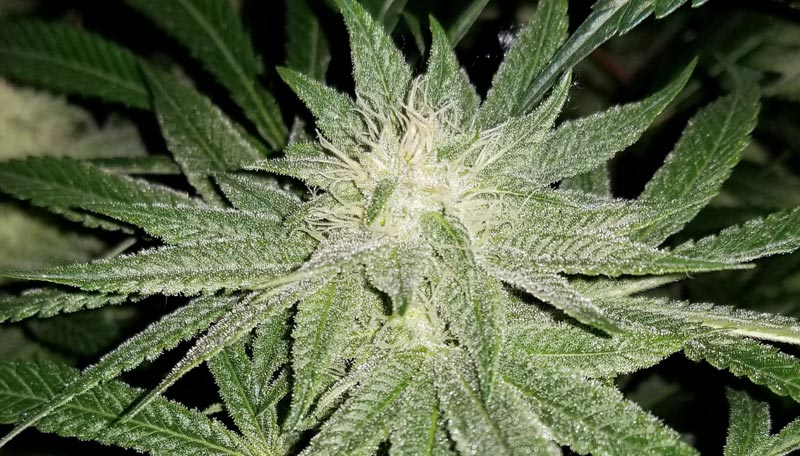
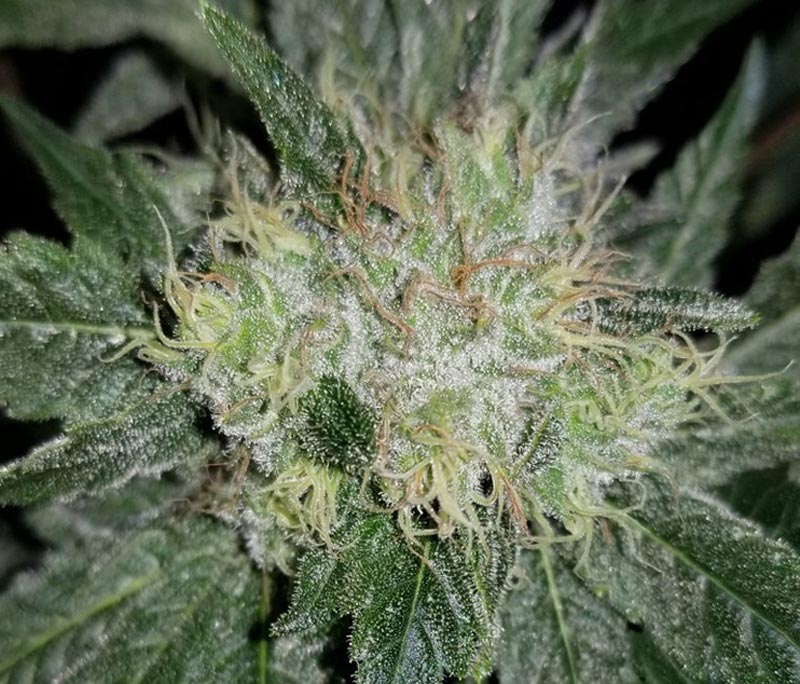
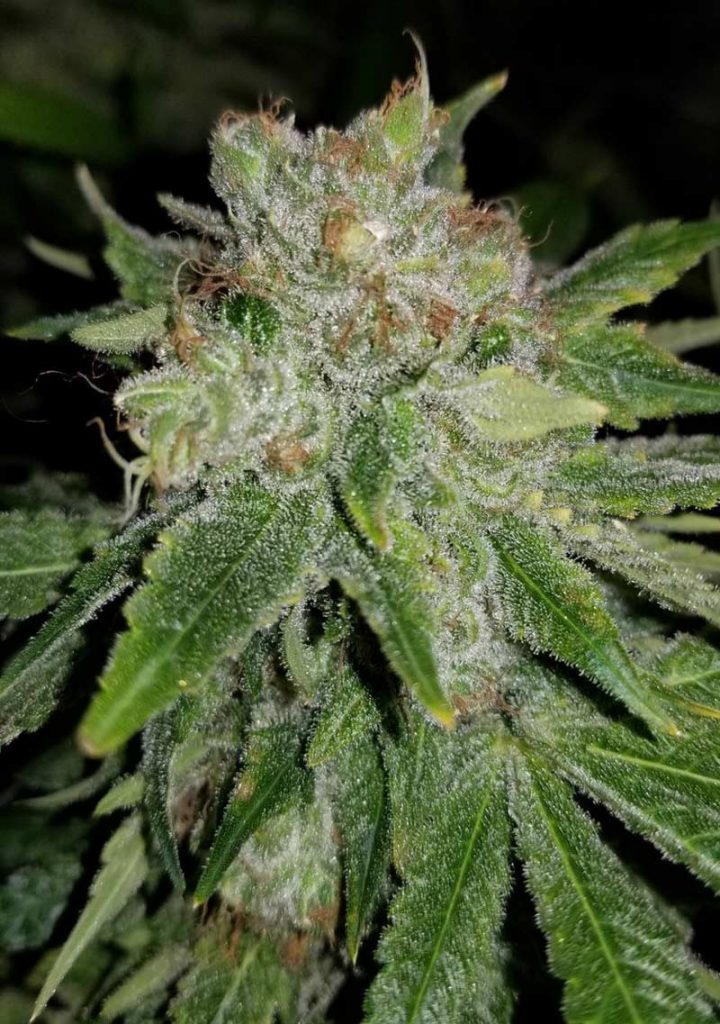
Closeup of a Gorilla Glue plant looking frosty during week 5 of flowering, at day 33.
Tips for Maximizing Plant Health and Quality:
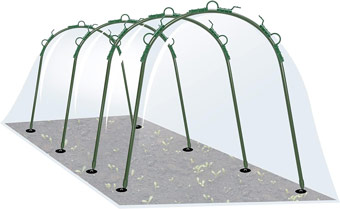
A cheap hoop house such as this Vivosun 5 foot greenhouse is a good investment to cover plants in later stages of flowering.
Provide Proper Nutrition: By week 5 on an 8 week strain you are cranking up flowering nutrients to their peak. This is the last big week for bud growth. Make or break time. Note that for longer-flowering strains, this phase of growth occurs in later weeks so don’t peak your nutrients too early.
Temperature and Humidity: Maintain a slightly lower humidity level (around 40%) to minimize the risk of mold during the later stages of flowering.
Indoor growers should use strong fans for constant air circulation in their grow room or grow tent. They should also ensure that there is enough ventilation to constantly remove moist air to maintain humidity levels.
Outdoor growers need to be vigilant and try to improve conditions as best they can. Increase airflow using fans if needed. Extreme shifts in nighttime temperatures put you at risk for powdery mildew. Stay vigilant! A cheap hoop house is a worthwhile investment in areas with lots of rainfall which can quickly lead to moisture issues.
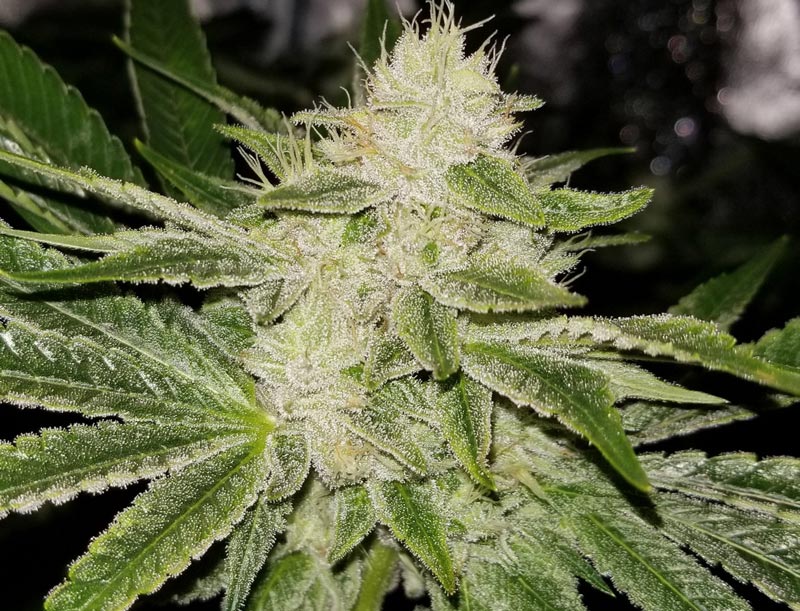
Gorilla Glue on day 34, the last day of week five.
Watch Out For:
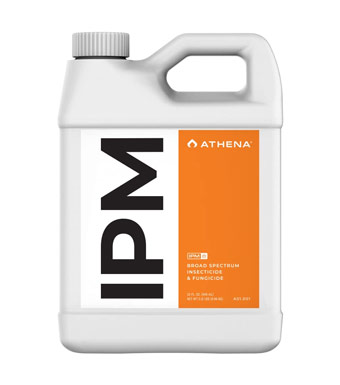
Athena IPM can treat powdery mildew and kill spider mites during flowering.
Environmental Changes: Avoid drastic changes in temperature or humidity, as they can stress the plant and affect final bud quality. Strong temperature drops with humidity spikes after grow lights go off can lead to PM issues for indoor growers.
Powdery Mildew (PM): Powdery Mildew is an enemy of outdoor growers, particularly in moist areas with hot days and cool nights. Conditions are more favorable in areas with cooler autumn nights. Check plants daily. Treat immediately, isolating affected plants. Don’t let plants touch each other to avoid spreading it, and increase airflow. Protecting plants at night can minimize condensation in cooler climates. Don’t risk your whole grow this late in the game – prevent PM by all means necessary and deal with it ASAP if discovered. Products such as Trifecta Crop Control, Growers Ally, Athena IPM, or Mammoth CannControl can kill powdery mildew during flowering.
Bud Support: Make sure you have adequately supported your buds. Don’t let a windy day catch you by surprise. Stakes or nylon trellis netting are helpful for outdoor marijuana plants. Indoor growers can use inexpensive plant yo-yos to support large branches..
Excessive Handling: Minimize touching the buds to prevent trichome damage and loss of potency.
POWDERY MILDEW! SHIT!!! If PM hits your plants during flowering and you catch it early, treat them immediately and improve the environmental conditions to reduce the ability for PM to spread. Learn how to kill powdery mildew on cannabis plants during flowering.
As your plants reach the pinnacle of their flowering journey in week 5, keep your eyes on trichome development and prepare for the rewarding harvest that’s just around the corner.
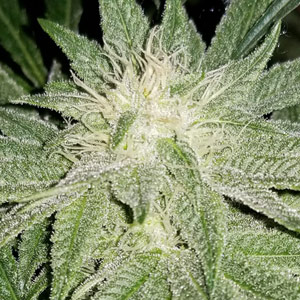
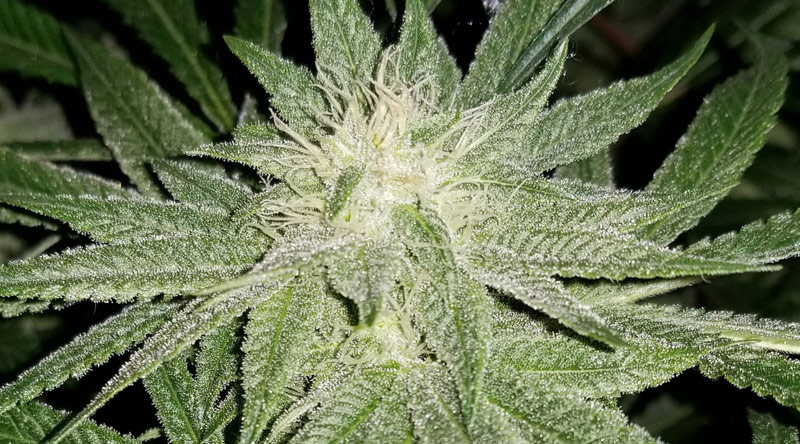
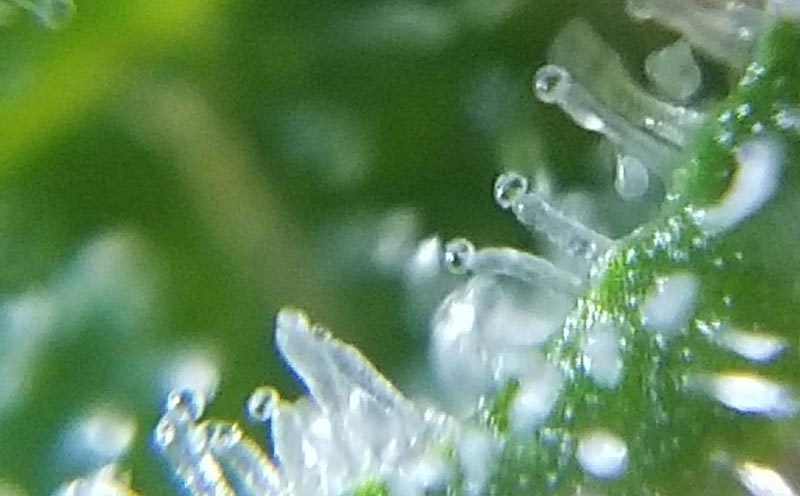
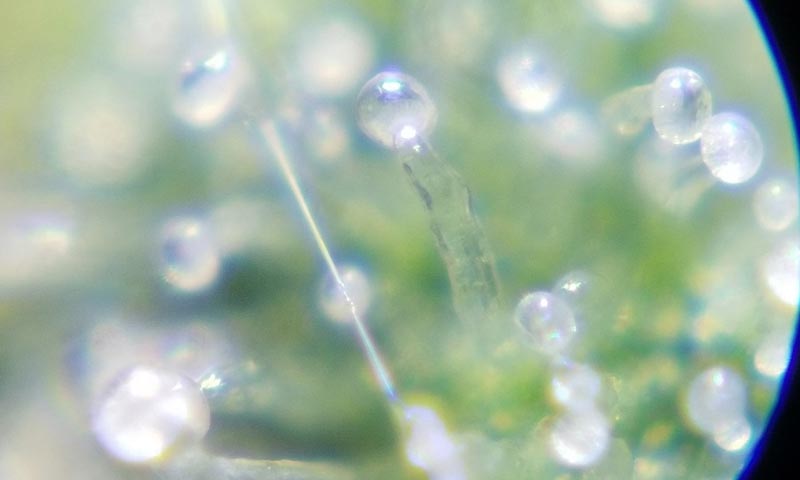
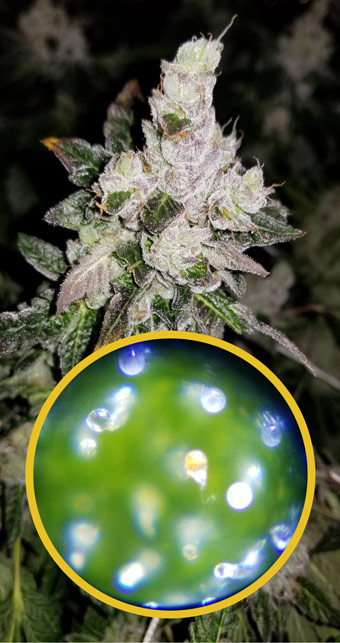
Closeup of cannabis trichomes on the last day of week 5 of flowering. The trichome heads are all clear, indicating it is far too early to harvest. Use a pocket microscope to be sure you’re harvesting at peak potency.
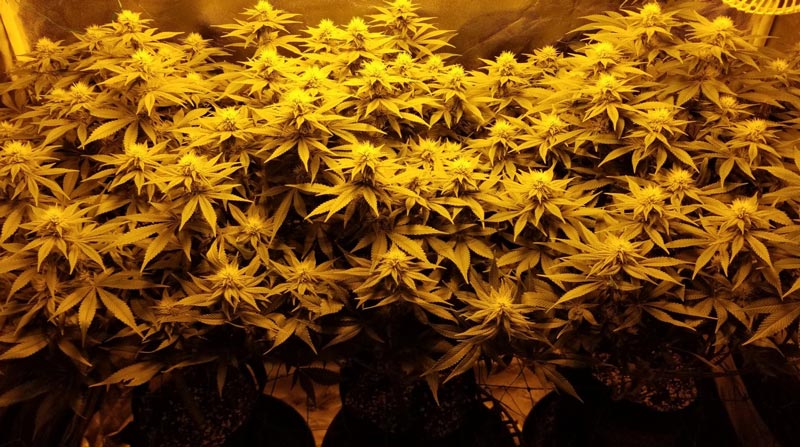
Week Six Flowering – Bud Mass and Ripening
Changes to Plant Appearance:
Buds are at their peak size and resin production, with a rich aroma.
Trichomes continue to mature, starting clear and becoming cloudy (max potency) before coming amber.
Just because you see a few amber trichomes doesn’t mean you’re ready to harvest though.
As your buds enter week 6 of flowering they’ll continue to grow mass. Make sure to look at plants daily for signs of problems such as insects or bud rot.
Metabolic Changes:
The plant’s energy is dedicated to finalizing the cannabinoid and terpene profiles.
Continued resin production contributes to the stickiness and potency of the buds.
An AK-47 plant during week six of flowering, on day 40.
Tips for Maximizing Plant Health and Quality:
Trichome Observation: Keep a close eye on trichome color; it’s a key indicator of the optimal harvest window. Your goal is mostly cloudy (max THC) with some amber. If you cut while too many are clear you sacrifice potency. A 60x – 120x magnification pocket microscope is perfect for monitoring trichomes.
Cut Back Nutrients: By week 6 for an 8 week strain, the plant no longer needs an aggressive flowering nutrient mix. Scale this back. For strains with longer flowering cycles this doesn’t yet apply.
At 40 days into flowering some pistils may start to turn yellow or orange, a sign the plant is progressing closer to harvest time.
Watch Out For:
Bud Rot: Always inspect buds daily in the later cannabis flowering stages, making sure to monitor the major colas as well as buds on the interior of the plant. Remove the affected branch or entire plant if you discover bud rot or you risk the whole grow getting ruined. Cover plant with a trash bag and wrap tightly at the base of brach to contain spores before cutting. It’s a bummer to kill a large bud you’ve watched grow over the past month and a half, but if you notice bud rot you need to do it immediately.
Timing: Monitor trichomes closely; a mix of cloudy and amber trichomes signifies the ideal time for harvesting. It’s likely too early to harvest in week 6, but the time is near and environmental conditions can impact timeframes. Outdoor growers who are unsure how to tell what week of flowering their weed plant is need to pay particular attention.
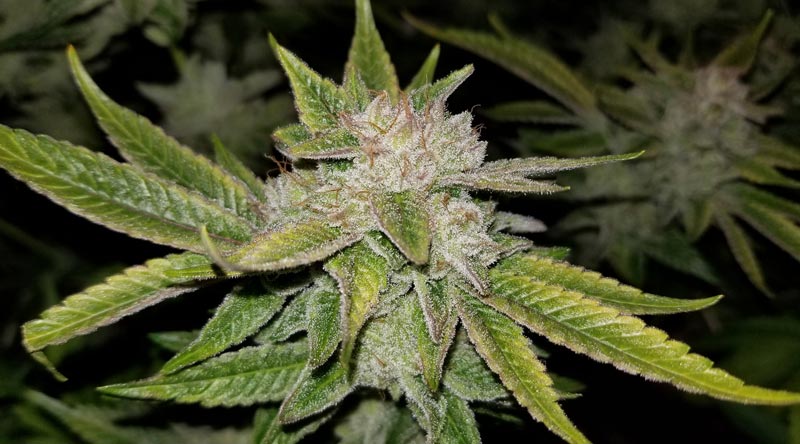
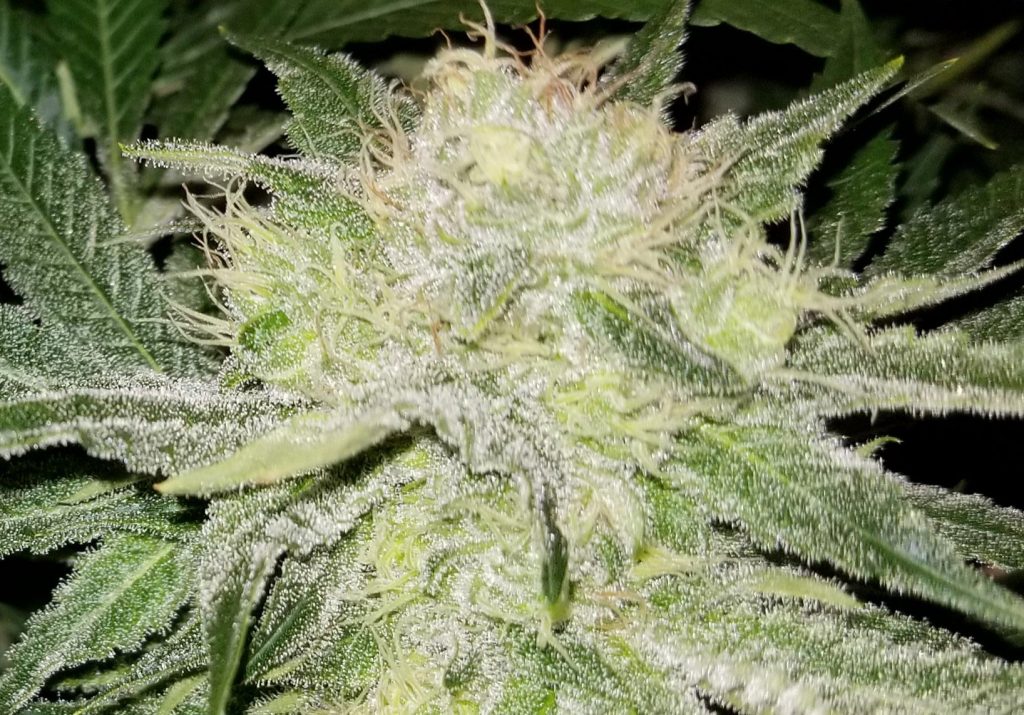
Closeup of a cannabis flower on the last day of week 5 of flowering. Some pistils have darkened.
As you navigate the final weeks of flowering, the anticipation of a successful harvest builds. With trichome maturity and aroma as your guides, you’re well on your way to enjoying the fruits of your labor. Don’t jump the gun and chop early, you’ll sacrifice quality, potency, density, and yield. Patience, patience. There’s a fiesta in the making as we speak.
An AK-47 weed plant at week 7 of flowering on day 44.
Week Seven Flowering – Preparing for the Harvest
Changes to Plant Appearance:
Buds are fully developed, dense, and covered in resin.
Pistils on the buds may recede or change color, turning darker orange or brown and curling in. This is a sign harvest is approaching, but not a surefire tactic.
It’s best to determine harvest time based on trichome color vs. pistil activity.
Blissful Wizard on day 44, showing tight, frosty bud development.
Metabolic Changes:
The plant completes its cannabinoid and terpene production.
Resin production remains active, enhancing potency and flavor.
Tips for Maximizing Plant Health and Quality:
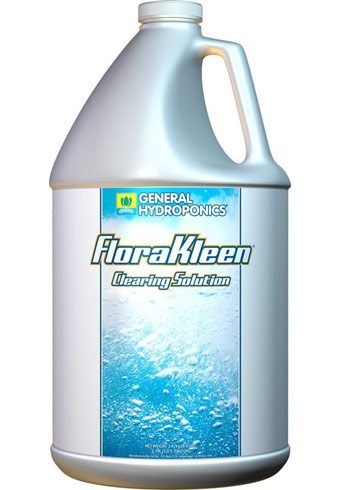
FloraKleen is a flushing agent that dissolves nutrient salts. It is used to flush your plants during the final week of flowering.
Final Trichome Check: Continue monitoring trichome color. Once most are cloudy and a substantial portion turns amber, it’s time to harvest.
Dark Period: Consider implementing a prolonged dark period (24-48 hours) before harvest to enhance resin accumulation and avoid light degradation of THC.
Begin Flushing on Plants in Soil: Plan on flushing for 7-10 days with plain pH’d water for soil grows. You want to leach nutrients out through the runoff, so slowly flush with 2-3 times the amount of water as your container size.
For cannabis plants growing in hydroponic mediums the effect of flushing is realized more immediately by the plant, so it can begin a few days after plants in soil.
For coco coir we prefer a 10-day flush, and start it in the middle of the 7th week for an 8 week strain. For 9 week strains we start flushing in the middle of the 8th week.
Harvest Tools: Gather essential tools like trimming shears and gloves, and clean surfaces for trimming. A trim tray can help you capture falling trichomes during trimming, especially if you do a dry trim after the plants are fully dried. It will pay for itself the first time you use it.
Drying Setup: Set up your drying environment, making sure to clean and sanitize it. Make sure that you have proper humidity levels for drying, around 50%. Now is the time to set up a drying tent to ensure an optimal, slow dry. If necessary use a dehumidifier to prevent your drying area from becoming too moist, which invites mold and other issues.
AK47 plant on day 46, halfway through week 7 of flowering.
Watch Out For:
Trichome Degradation: Be cautious of excessive handling, as trichomes can be easily damaged at this stage.
Last-Minute Pest Checks: Inspect plants for any lingering pests or diseases before harvest.
Harvest Timing: Ensure you don’t wait too long to harvest your weed plants. Overripe buds can lose potency and flavor.
Weather Conditions: If you’re an outdoor grower and the weather forecast is a concern, it may be better to harvest a few days early rather than risk exposing plants to strong winds or overly wet conditions
Powdery Mildew: Cool temperature swings on fall nights are favorable to powdery mildew growth, so the risk grows as the growth cycle progresses. Cover plants from rain and watch for condensation at night when moist air comes in contact with your plants. Remove affected areas immediately and take other preventative measures. learn more about how to kill powdery mildew during flowering.
With the finish line in sight, your attention to detail in the late stages of cannabis flowering is crucial. As trichomes mature and the aroma intensifies, you’re getting ready to embark on the final steps of the journey – the harvest, drying, and curing.
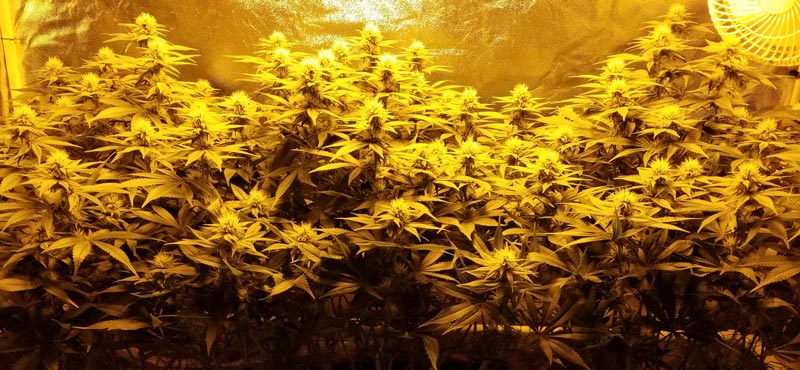
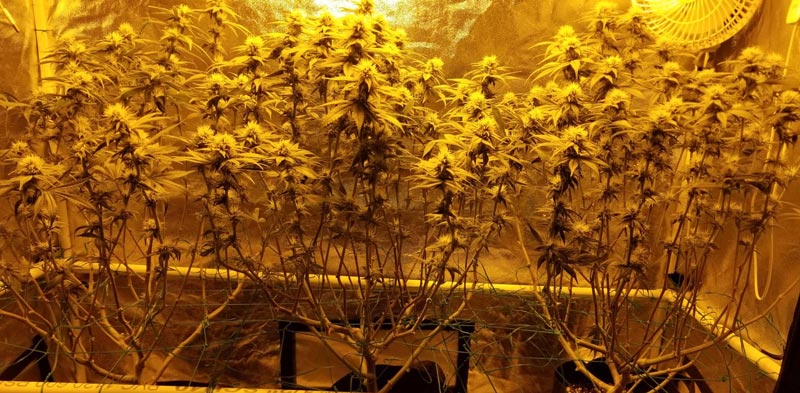
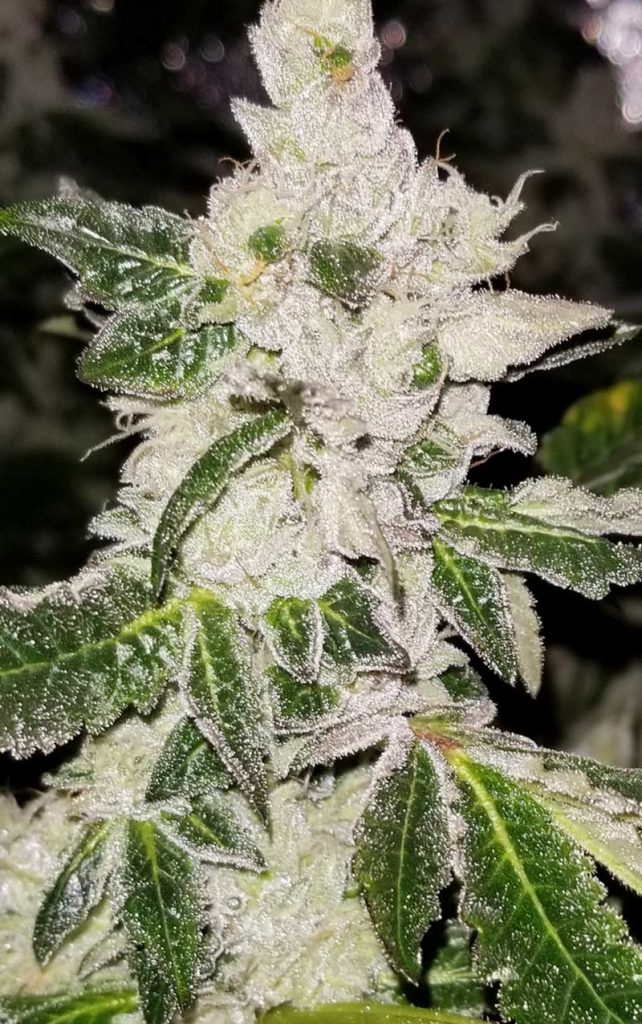
Gorilla Glue plants at week 8 of flowering, at day 52. They have been flushed and are closing in on their harvest window.
Week Eight Flowering – Harvest Window Approaches
At some point around the end of week 8, your 8 week strain will be ready to enter the harvest window. Environmental conditions and a guesstimation on the exact date flowering began may impact timing for outdoor grows, so you need to be prepared in case the plants enter the harvest window earlier or later than expected.
Closeup of a weed plant that is 52 days into flowering. Nearing harvest time, but not quite ready.
Changes to Plant Appearance:
Sugar and fan leaves will start to show signs of yellowing following a flush
Pistils will curl in and darken
Trichomes will continue to turn from clear to cloudy to amber, signaling an approaching harvest window.
53 days into flowering (halfway through week 8, and 3 days after flush initiated) and the pistils have turned orange and curled in on the colas of these weed plants.
Metabolic Changes:
Terpenoid and Cannabinoid Accumulation: During the final week of flowering, cannabis plants experience a surge in the production and accumulation of terpenoids and cannabinoids, such as THC and CBD. This is especially true for resinous trichomes, which become visibly more pronounced on the buds and leaves, leading to increased potency and aroma.
Ripening Process: The last week of flowering marks the peak of the ripening process in cannabis plants. The plant shifts its focus from nutrient uptake and growth to the final maturation of the flowers. The plant directs its energy towards the development of trichomes (and seed production if you mess up – or intentionally – let a male plant pollinate your female plants).
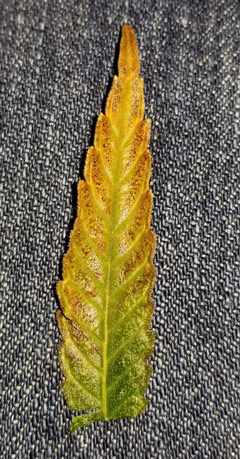
Diminished Chlorophyll Content: As the plant approaches harvest, chlorophyll production begins to decline. This is responsible for the observed color changes in the leaves, which often transition from bright green to shades of yellow, orange, purple, or even red. The diminishing chlorophyll content contributes to improved flavor and smoother smoke when consumed.
Senescence and Nutrient Redistribution: During this stage of flowering, some lower leaves may start to wither and die. This is a natural process known as senescence, where the plant reallocates nutrients stored in these dying leaves to the developing flowers. The redistribution of nutrients enhances the overall quality of the buds and helps increase their cannabinoid and terpenoid content.
53 days into flower and this plant is nearly ready to be chopped down.
Tips for Maximizing Plant Health and Quality:
Monitor Trichomes: Trichome development determines the best harvest time for maximum potency. Don’t cheap out, get an inexpensive pocket microscope for best results. Observe multiple areas on each plant daily.
Timing for Different Phenotypes: Plants of the same strain growth from seed may contain different phenotypes, or variants of the plants’ genetics which result in differing characteristics from seeds taken from the same parent plant. So pay close attention to each plant. If you’re growing different strains, make sure to monitor trichomes closely to harvest each plant at peak potency. Clones taken from the same parent should finish up at the same time since they share identical genetic makeup.
Flushing: 7-10 days before harvest you should have done an initial flush with 2-3x the water of the plants’ container size. Additional waterings should be with plain water, plus products such as bud sweetener or flushing agents. In mechanical hydroponic systems, just switch to plain, properly pH’d water 5-7 days before harvest.
Don’t water for 1-2 days before harvest: Stop watering for 2 days before chopping your plants. Some growers keep their plants in total darkness during this time, indicating to the plant that death is upon it, and to use its final remaining energy on the buds.
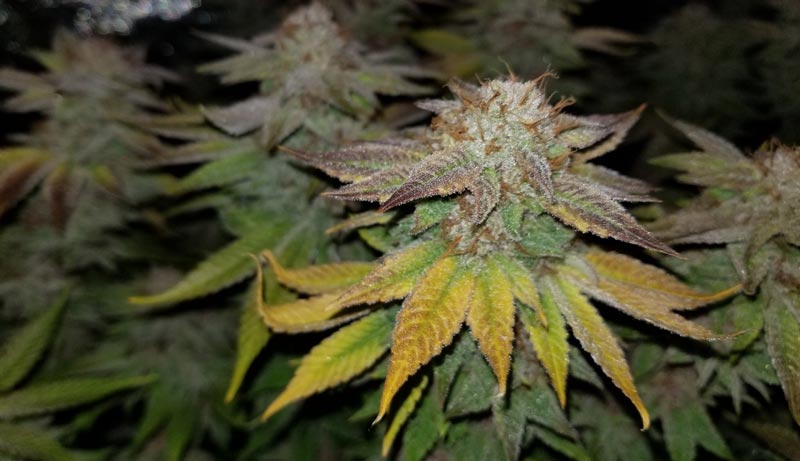
54 days into flower and some sugar leaves are starting to yellow. This AK-47 plant will be ready to harvest in 4-5 days.
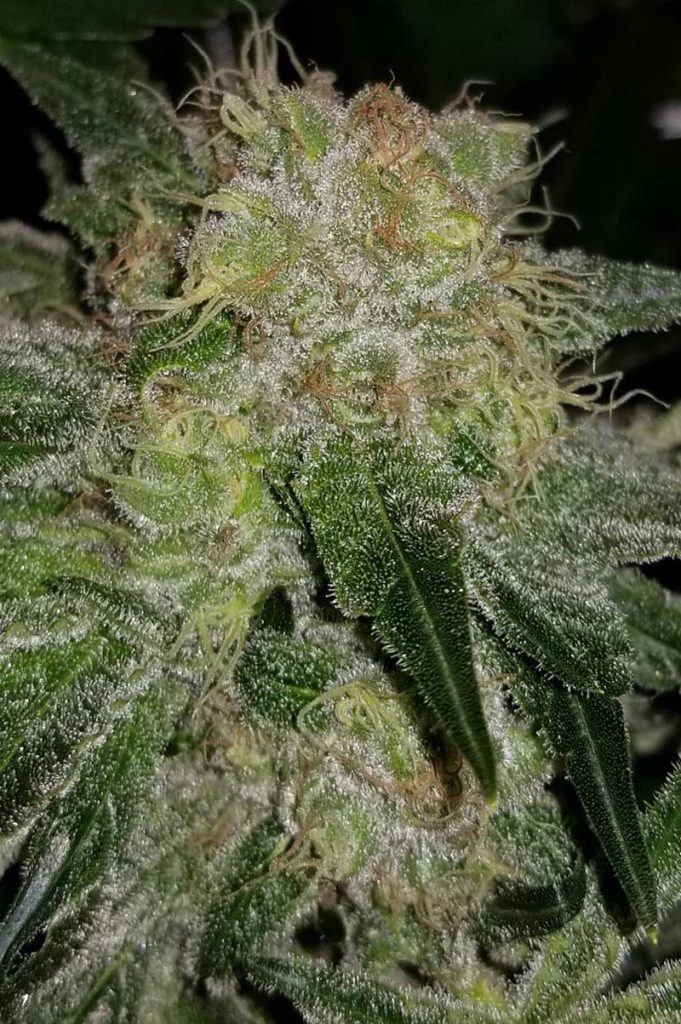
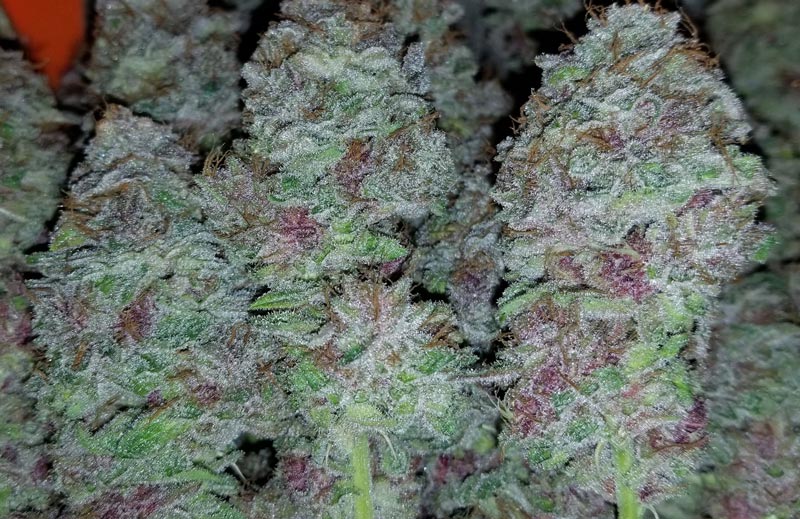
Closeup of Gorilla Glue trichomes in week 8 of flowering, on day 55. Not enough cloudiness with some amber heads, this needs another few days.
56 days into flowering, this plant has reached the end of week 8. This plant was harvested 4 days later.
58 days into flowering, and these plants are 1-2 days from being harvested at peak potency.
Week 9 Flowering: Harvest time for an 8 week strain
If you grow an 8 week cannabis strain, the harvest window typically approaches at the end of week 8 through week 9. You should let your trichome status determine the exact time to cut at peak potency.
Pre-Harvest checklist:
At this point you should have flushed your plants 7-10 days before you harvest.
Continue watering with pH’d water with bud sweeteners and flushing agents (but no nutrients, CalMag, etc.)
Stop watering plants two days before you plan to harvest.
Continue to watch daily for signs of powdery mildew or bud rot.
Some growers will put plants into only 10 hours of lights with 14 hours off the final week. Others will put plants in total darkness the last two days before harvest.
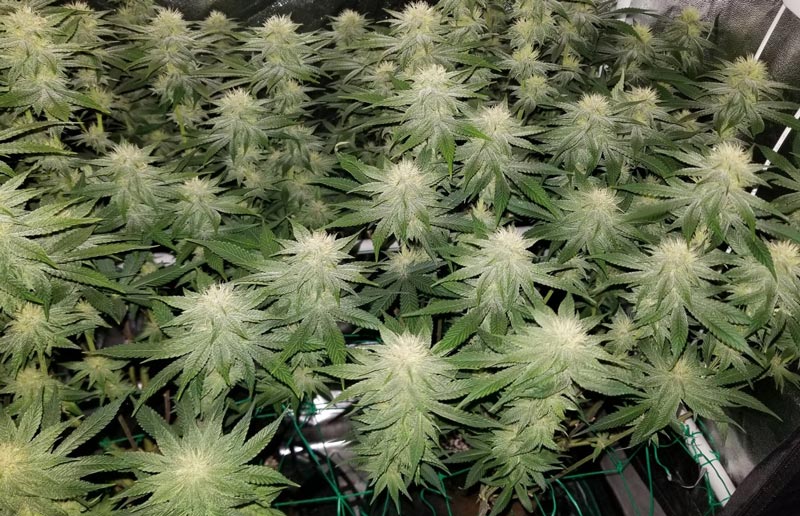
The Pink Lemonade plant on the day of harvest, at day 61 in week 9 of flowering.
Harvesting: Next Steps
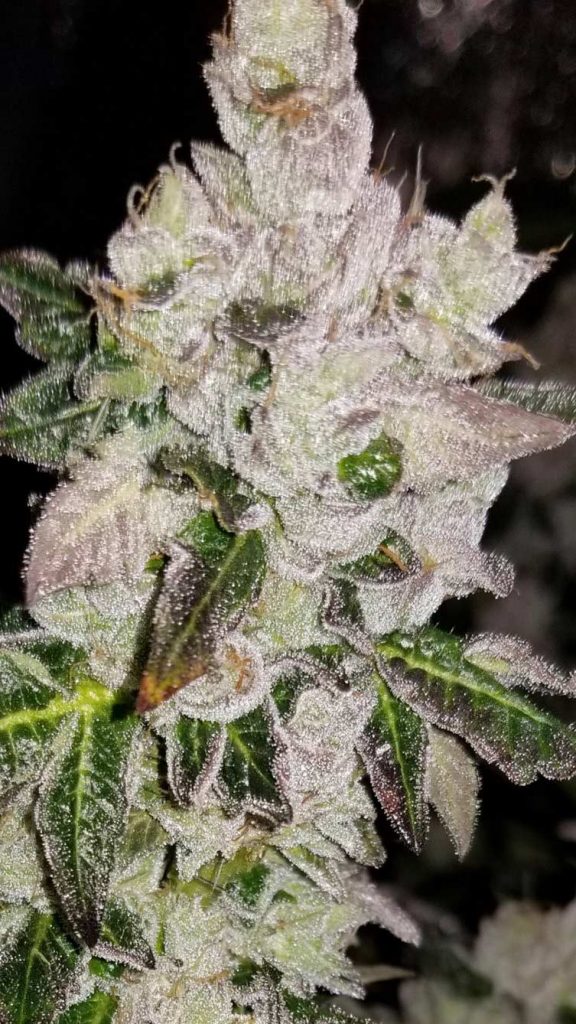
Closeup showing mostly cloudy trichome heads with some clear and amber. Taken at day 57, the first day of week 9 of lflowering on an 8 week strain.
Make sure to save sugar leaves to dry sift or make cannabutter. Don’t waste them!
Drying: Hang trimmed buds upside down in a dark, well-ventilated area with controlled humidity (around 50%).
Make sure ambient humidity in room is lower than 50% (for example if you’re drying in a damp basement that’s 75% the plants won’t dry well.
Avoid overly dry conditions under 40% humidity, which can cause plants to dry too quickly. Your goal is at least 5-7 days, or longer.
Use a drying rack if drying small branches or buds cut off of branches.
Consider making a drying tent with a humidity controller and fan which can provide you with total control to extend the drying process as long as possible.
Curing: Transfer dried buds into glass jars, filling them about 2/3 full. Open jars daily to release moisture for 1-2 weeks, then every few days for the next few weeks.
Pink lemonade after harvest and a wet trim performed at 61 days, in the middle of week 9 of flowering.
Adjustments for Longer Strains (9-14+ weeks flowering)
While the basic timing for growing a 9-10 week strain is similar to the 8 week strain, just slightly delayed, it can be hard for growers to tell how to make adjustments to nutrients for 11, 12, 13, or 14 week strains.
Careful observation of bud development is the key to understanding the timing on cannabis flowering stages for longer strains. Take notes of when you ramp up nutrients throughout the stages of flowering. Try to learn from your mistakes, making adjustments on the next grow.
Dialing in a specific strain is easier for indoor growers, who can run more grows per year and better control environmental conditions in the grow room or grow tent. In many areas outdoor growers running longer strains risk inclement weather during late flower, which adds risk. Especially if you’re growing in areas with cold, damp autumn weather.
Novice outdoor growers would be wise to run shorter length flowering Indica and hybrid strains. Look for genetics with strong disease resistance, especially to powdery mildew. It would suck to spend a season growing only to run into issues the last few weeks before harvest.
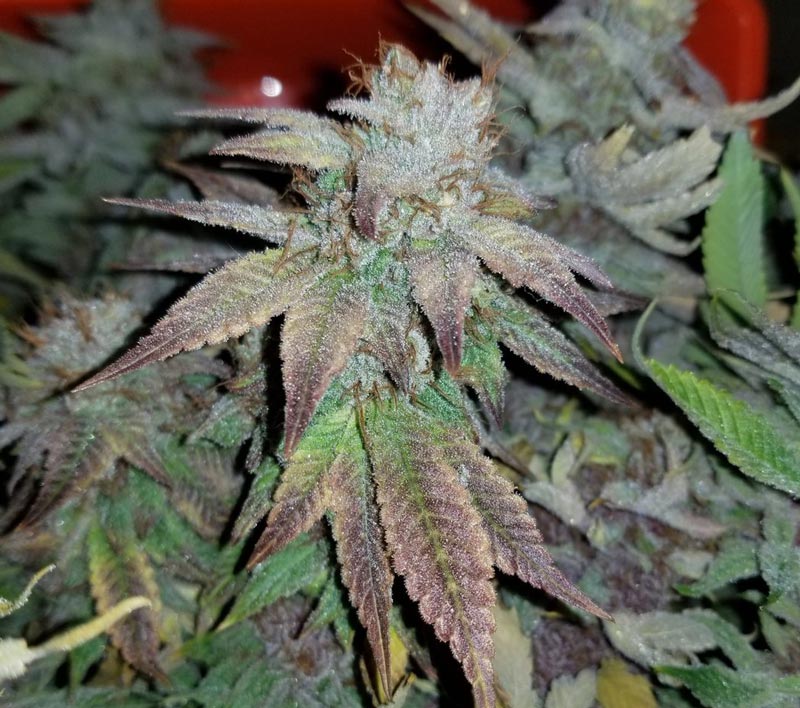
The Blissful Wizard strain has a 9 week flowering time. It’s looking very frosty at 54 days, nearing the end of week 8. It still needs more than a week to finish ripening and to be harvested at peak potency.
Extended Patience: Longer flowering periods require growers to exercise greater patience. The gradual maturation of cannabinoids and terpenes demands careful monitoring and readiness to wait until the ideal moment for harvest. Observe closely.
Nutrient Management: Nutrient requirements may vary throughout extended flowering. Adjust nutrient levels and ratios to cater to the plant’s changing needs as it progresses through the stages.
Environmental Stability: Maintaining consistent environmental conditions becomes even more crucial. Fluctuations in temperature, humidity, or light can impact the plant’s resilience and final quality. Adding another month to flowering time increases your risk for diseases, bugs, and other disasters. Avoid longer flowering strains for outdoor grows in climates with shorter growing seasons.
Harvest Timing: The extended flowering time requires precise timing for harvest. Monitor trichome color closely to capture the peak potency, flavor, and effects unique to each strain. Some longer strains have an earlier exhibition of cloudy and amber trichomes a few weeks before the actual harvest window, when buds could still use a bit more time to mature. Know your strain and read up on flowering timeframes for best results.
The Blissful Wizard bud after drying and curing, covered in a dense layer of trichomes.
Final Thoughts on Understanding Cannabis Flowering Stages
It isn’t hard to grow great weed. But it does take knowledge and observation. Cultivating cannabis strains with longer flowering periods necessitates an even more heightened level of dedication and vigilance.
Understanding the requirements throughout the marijuana flowering stages is essential to grow large, potent weed with dense bud development and great aroma and taste. By fine-tuning your nutrient schedule, environmental control, and growing techniques, you can bring out the best in your cannabis plants from the first signs of flowering stage through harvest.
Each grow run is a new learning opportunity. Don’t get frustrated when problems emerge, which they often will. Pay close attention to your weed plants and learn to identify and mitigate problems early and you’ll continue to see improvements in bud potency, density, flavor, and taste. Happy growing!
Week-by-week guide: Flowering stages of cannabis plants
Description
This week-by-week guide to the flowering stages of cannabis cultivation will help you understand the different requirements throughout flowering maximize your weed plants' yields and bud quality.


")